Figures
In Curio, anything placed on an idea space is a figure. It can represent a basic flowcharting shape such as a square or octagon. Or more complex items such as text, images, web links, movies, music, or any type of document. A figure can also represent a collection of contained figures. For example, a mind map or a list outline.
With any type of figure, not only can you specify its look through fonts and colors, you can also specify meta information such as tags, and start/due dates.
Text Figures
Text figures are the quickest way to begin working in Curio.
Create a Text Figure
- With the Select tool, double-click anywhere in the idea space to create an automatically sized text figure, or double-click-drag the mouse to define a specific width for the new figure.
- Or, with the Text tool, single click anywhere in the idea space to create an automatically sized text figure, or click-drag the mouse to define a specific width for the new figure.
Style a Text Figure
- Using the controls on the inspector bar or inspector shelf to style your figure.
- You can also set options such as enabling a minimum height or freeform sizing.
Stop Editing a Text Figure
- Press Escape or click on the Select tool when you’re done editing the text figure.
Access the macOS Ruler
- While editing text figures you can use the standard macOS ruler for additional options. Toggle the ruler visibility using the View > Show Ruler menu item. The ruler includes tab stops and controls for text styles, alignment, spacing, and simple text lists.
Syncing with External Files
Curio Pro supports two methods for syncing text figures with external files which may be useful:
Sync Figure Text to Organizer Title
- Use the Info inspector to give a figure an identifier of
{%IdeaSpaceTitle}and the figure’s content and the idea space’s title in the Organizer will automatically stay in sync regardless of which one you change.
Related Text Figure Features
- Markdown can be enabled for text figures as an alternative to Curio’s standard rich text editing.
- Text Figure Attachments associate files and images with a text figure.
- Text Styles let you save and reuse paragraph and character formatting.
Inserting Figures
Click the Insert toolbar button or press i to open the Insert popover, where you can add almost every type of figure to the current idea space:
- Basic Shapes: Insert text figures, lines, and geometric shapes. See Basic Shapes.
- Styled Shapes & Stencils: Choose from Curio’s bundled items and your own saved figure styles and figure stencils.
- Collection & Composition Figures: Insert lists, mind maps, tables, index cards, albums, pinboards, matrices, and tabloids. See Collection Figures.
- Audio & Video Recordings: Record directly into the project using your Mac’s microphone or camera. See Audio and Video Recordings.
- YouTube Videos & Web Views: Embed a YouTube video, insert a web view, or open Google Docs in a web view.
- Instant Documents: Create a new document from a bundled or personal Instant Document template.
- Equations: Create an equation using LaTeX, AsciiMath, or MathML. See Equation Editor.
- Date & Time: Insert the current date and/or time as static text. See Date and Time.
- Variables: Insert dynamic project, idea space, figure, and date information. See Variables.
- Files & Convertible Imports: Insert a file normally or convert supported files into native Curio figures. See Creating Asset Figures.
Using the Insert Gallery
Double-click any item in the shape, style, and collection galleries to instantly insert it on the idea space. Alternatively, drag the item out of the gallery to place it at a specific location on the idea space or within a composition figure.
Stencils are the exception: double-clicking a stencil opens it so you can pick out an individual figure from inside. To insert the whole stencil, select it and click Insert, or drag it out.
Insert Main Menu
The main Insert menu offers many of the same choices as the Insert popover along with their keyboard shortcuts. Unlike choices that open a style or stencil gallery in the popover, Insert menu commands create the figure immediately using its default styling. The menu also includes submenus for dates, times, and variables.
Terminology
A figure is the most basic entity within Curio such as a text figure, an image figure, a document asset figure, and a line figure.
A collection figure is a special type of figure that contains, manages, and positions figures within it. Examples include Curio’s list, mind map, table, index card, pinboard, and album collection figures.
Composition figures are special types of collections that can contain and lay out any type of figure including collection figures, and even other compositions! For example, a tabloid composition can organize the layout of several text figures, a few images, some lists, a couple of tables, plus a matrix composition which itself contains a grid of text and mind map figures.
A figure style defines the look of the figure including properties such as color, border, font, and shading. You can apply a style to a new or existing figure.
On the other hand, a figure stencil is an exact copy of the original figure so includes richer data such as figure size, placeholder or boilerplate text, and any contained figures. You can create a new figure based on a stencil (it’s just a copy of the stencil) but you can’t apply a stencil to an existing figure.
A simple figure stencil is a stencil that is a single figure. Even if that figure itself is a collection figure such as a mind map or list it and therefore contains figures within it, the collection figure itself is just a single figure, thus it is a simple figure stencil.
A complex figure stencil is a stencil made up of multiple figures. A perfect example is a landscaping stencil where flowers, shrubs, and trees are represented by individual figures, images, or grouped figures.
If you change or update the original style or stencil Curio does not change any instances either in the current project or in projects stored on your hard disk. The change will only be reflected in new instances that you create or apply in the future. However, Curio Professional users can use master styles and master stencils which allow this functionality.
Tools Palette
The Tools palette in the toolbar contains five buttons for selecting content and drawing directly on an idea space:
-
Select: Click figures to select and modify them. Double-click the idea space to create a text figure or double-click an existing text figure to edit it. Click and hold the tool to choose Select, Select Only Figures, or Select Only Scribbles. Press Escape to return to the standard Select tool. See Selecting Figures.
-
Text (
T): Click to create or edit text figures; drag when creating one to give it a specific width. -
Line (
L): Drag to draw lines. Click and hold to choose nondirectional, directional, or bidirectional lines; repeatedly pressLto cycle through them. Hold Option before releasing the mouse to add midpoints to a multipoint line. See Line Figures and Idea Graphs. -
Shape (
F): Click and hold to choose a geometric shape, then drag to draw it. Double-click a shape to add text. Use the Shape inspector to change its geometry and appearance. -
Scribble: Draw freehand using Curio’s brush and pen tools. See Scribbles.
Session styles: After choosing the Text or Line tool, any inspector changes you make before creating a figure are remembered with that tool and applied to the figures you create with it during the current Curio session. Use figure styles for reusable styles.
Selecting Figures
With the Select tool active, click a figure to select it. A glow appears around the selected figure, along with resizing handles where appropriate. Click the idea space background to clear the selection.
To select more than one figure:
- Hold Command while clicking figures to add them to the current selection.
- Hold Shift while clicking to do the same. Within an ordered collection such as a list, Shift-clicking can instead select the range of figures between the previously selected figure and the newly selected figure.
Drag Selecting Figures
Drag out a region with the Select tool to select the figures and scribbles within that region.
Click and hold the Select tool to choose what a dragged region can select:
- Select: Select both figures and scribbles.
- Select Only Figures: Select figures but not scribbles.
- Select Only Scribbles: Select scribbles but not figures.
Selection Colors
The selection glow color provides more information about a figure:
- Blue: A normal figure.
- Gray: A locked figure.
- Purple: An original figure which has synced figure instances elsewhere in the project.
- Pink: A synced figure instance of an original figure.
- Green: A figure which has a local identifier.
- Orange: A leading figure.
- Yellow: A following figure or a bundle figure.
Figure Helpers
When a single figure is selected, Curio can show contextual floating controls near that figure. These controls are called figure helpers.
Use View > Allow Figure Helpers to enable or disable individual helper modules.
Working with Figures
Select One or More Figures
- Using the Select tool, click on a figure. Select additional figures by holding ⌘ or use the Shift key to select a range of figures in a collection. Or use the Edit > Select All menu item to select all figures on the idea space or within the active collection figure.
Adjust a Figure Location
- Simply drag the figure using the mouse to the new location on the idea space.
- Or use the arrow keys to move figures around. Hold Shift to move in greater increments. If an idea space grid is active then the figures will move based on the grid spacing.
- Or use the Geometry inspector to set a specific value.
Adjust a Figure Size
- Drag on the handles that appear around the border of a selected figure.
- Or use the Geometric inspector to set a specific height or width.
- If a scaled image figure then you can press the N key or click the Natural Size in the Geometry inspector to reset the image to its unscaled size.
- If an image figure then by default resizing is proportional. This can be toggled in the Geometry inspector or by holding down the Shift key while resizing.
Rotation
- Hold ⌘ while dragging a resize handle to rotate the figure.
- Or, to quickly rotate a figure in 45° increments, simply press the R key (hold down the Shift key to rotate the figure in a clockwise direction).
- To quickly set the rotation angle of a figure to 0°, press the Z key.
- You can exert more control over the exact rotation angle and rotate multiple figures at once by using the controls of the Geometry Inspector.
Image Flipping
- Select an image figure.
- In the Geometry inspector, in the Arrange panel, click the “Flip Horizontal” or “Flip Vertical” button.
Moving a Figure in Front to Back Ordering
- Select the figure.
- Choose Arrange > Send Backward or Arrange > Bring Forward to move a figure one position closer to the front or back of the stack. Choose Arrange > Send to Back or Arrange > Bring to Front to move a figure to the very bottom or top of the stack. Toolbar buttons are also available for this via Customize Toolbar.
Locking and Unlocking Figures
- Select the figures you wish to lock.
- Choose Arrange > Lock from the main menu. This will lock both the content and position by default.
- Alternatively, you could choose a subitem — Content or Position — to lock just one of those attributes.
- When a figure with any lock attribute is selected it will have a thin, gray glow. If only the text content is locked, it will show selection handles as well, since the figure can still be moved and resized.
- To unlock a figure choose Arrange > Unlock to remove all lock restrictions.
Using Snap Guides
- Choose Arrange > Show Snap Guides from the main menu. You can toggle the appearance of edge and center snap guides independently by choosing Arrange > Edge Snap and Arrange > Center Snap from the main menu.
Align Figures
- Select the figures you wish to align.
- Choose one of the alignment options from the Arrange > Align submenu, or use the buttons in the Geometry inspector.
- If only a single figure is selected then it will be aligned within the idea space itself.
Distribute Figures
- Select the figures you wish to distribute.
- Choose one of the distribution options from the Arrange > Distribute submenu, or use the buttons in the Geometry inspector.
Focusing on Figures
Use Focus to emphasize selected figures or a specific branch in a list or mind map while dimming unrelated content on the idea space.
- Select one or more figures and choose View > Focus or press ⌃F.
- All other figures on the idea space will become transparent. If the selected figures are parent figures in a hierarchical collection such as a list or mind map then any existing or new child nodes inherit focus as well.
- To end Focus, choose View > Focus or press ⌃F again. If you switch to another idea space or reopen the project, Curio restores the idea space’s Focus state when you return.
To declutter the window further, press ` (backtick) to hide or show both the Organizer and Shelf, or use the standard macOS full-screen mode from the View menu or by pressing ⌃⌘F.
Basic Shapes
Choosing Basic Shape in the Insert popover opens a gallery of the unstyled building blocks used throughout Curio. Each one is created with your current default styling for that kind of figure, so it’s a quick way to add a plain figure that you’ll style afterwards.
The gallery contains three groups:
- Text. A plain text figure, or a bordered text figure with a rectangular frame around it.
- Lines. Simple, directional, bidirectional, and multipoint line figures.
- Shapes. Rectangles, rounded rectangles, circles, ovals, capsules, semicircles, underlines, polygons, brackets, trapezoids, triangles, diamonds, clouds, speech bubbles, arrows, crosses, signposts, parallelograms, cylinders, documents, and notes.
All shapes are technically text figures with the specified shape border, so you can type into any of them, and you can change one shape into another at any time using the shape button in the figure inspector.
You can also use the Tools Palette to insert text, lines, and shapes.
Tip
If you want a figure that already carries colors, fonts, and other formatting, use Styled Shape or Stencil instead, which draws from your figure styles and figure stencils.
Asset Figures
Creating Asset Figures
Drag a file from the Finder, Desktop, or another app into an idea space to create an asset figure:
- Copy and Embed: The default. Curio copies the file into the project’s internal asset library so it travels with the project.
- Move and Embed: Hold Command while dragging to move the original file into the project.
- Store an Alias: Hold Option while dragging to keep the file in its original location and store a reference to it in the project. You can convert the alias to an embedded file later using the Info inspector.
Important
Some file-syncing systems don’t preserve macOS aliases. If the original file or its location may be moved or synchronized by another service, embedding it is safer.
For supported formats, Curio can offer additional choices based on the file’s extension and contents. These include converting the file into a native list, mind map, stack, or table; importing Markdown or rich text; creating a file-backed text figure ; or creating a figure with a sync file .
See Importing Files for the complete mapping of file types and choices, or List Import/Export and Mind Map Import/Export for outline formats.
In general the asset figure is rendered as a simple icon and file title. If an image or video file, it is rendered in preview form so you see the image and can interact with the video.
Opening/Editing
Double-click the figure to open its corresponding asset file in the appropriate editing application.
If it’s opening in the wrong application you may want to right-click and choose Reveal In Finder, then use the Finder’s Get Info to see what application is associated with that file extension. Choose a more appropriate application then click the Change All button so all files with that extension open with that app.
Alternatively right-click on the asset figure and choose Open With and select an application on-the-fly.
Quick Look Preview
Press Spacebar to see a popup Quick Look preview of the file.
Show As Icon or Preview
Right-click on an asset figure and choose Show As Icon or Show As Preview, to change how the asset figure is rendered. If you choose preview then, for image types, the image itself is rendered, otherwise a Quick Look preview is retrieved and rendered.
Default Show As Per File Type
You can set the default state for whether a type of file dragged into Curio shows as icon or preview. First, drag in a representative file (image, PDF, video file, or other document) then select the figure and use the Format > Default Figure Settings submenu to set the default show as format as either icon or preview for that specific file type.
Show As Text Figure
For an embedded or aliased text asset, right-click the figure and choose Show As Text Figure to display and edit its contents directly in Curio. This creates a file-backed text figure.
See File-Backed Text Figures under Syncing Figures to Files for supported formats, behavior, styling, and comparisons with Curio sync files.
Image Figures
Drag any image from the Finder, a browser, or an app like Photos directly into your Curio idea space.
See Creating Asset Figures for embedding, moving, and aliasing options when dragging files from the Finder.
Images can be resized, rotated, and styled using the style inspector.
Image Text Recognition
Curio uses Apple’s Vision framework to recognize text in imported images so that Quick Find and the Search shelf can find them. Search results highlight matching image figures, although they cannot highlight the individual recognized words within an image.
Use the figure’s Image Text Recognition information to review the recognized text or change its detection language. For a selected image figure, you can also press Spacebar and use macOS Live Text in the Quick Look preview to select and copy visible text.
Markup Image
You can right-click on a JPEG or PNG image figure and choose File > Markup Image to bring up the standard macOS markup popover. This allows you to crop, annotate, highlight, and scribble on the image then instantly see the result on your idea space.
Note that while markup operations, including crop, are undoable during your run session in Curio, once you close the project the changes cannot be undone.
Resample Image
Large JPEG and PNG images, Retina (144 DPI) screenshots, and iOS photos in Apple’s new HEIC image file format can all be slow to load and manipulate on an idea space, and consume lots of disk space in your project.
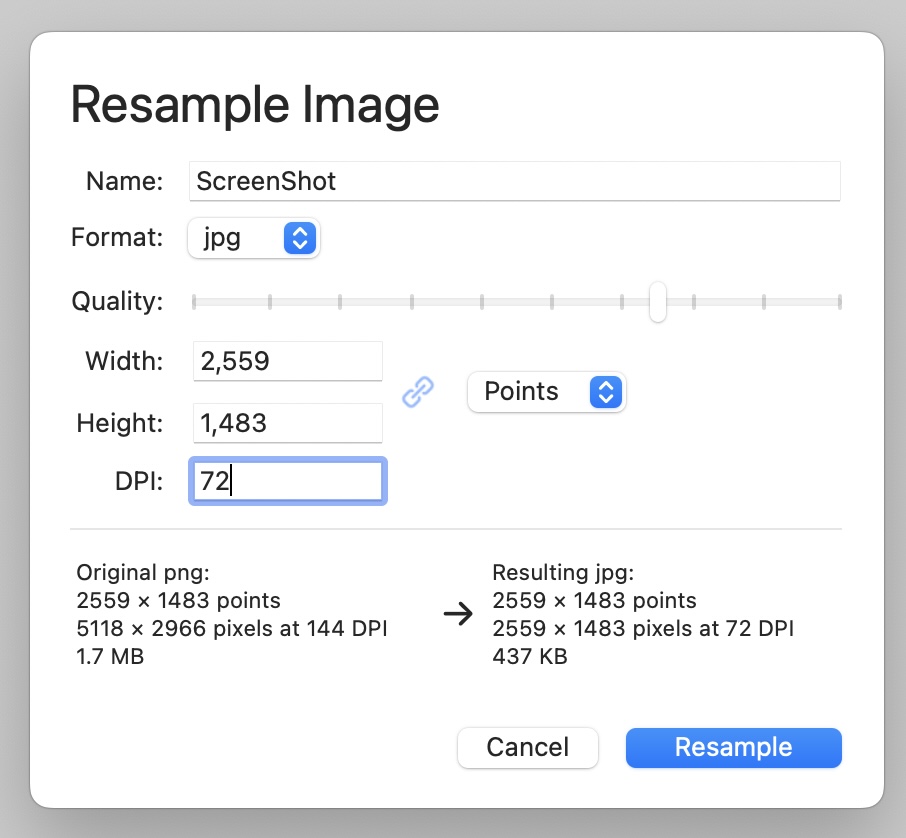
Resampling an image so it has smaller dimensions, a 72 DPI resolution, and/or a more efficient format is an easy way to boost this performance and save some disk space.
- Right-click on a JPEG, PNG, or HEIC image figure.
- In the sheet that appears you can choose the JPEG or PNG format, a JPEG compression factor, new width and height dimensions, new DPI resolution, and optionally change its file name as well.
- While you make changes the resulting dimensions and file size are displayed so you can see the impact.
After committing the resample you can undo the operation if you don’t like the changes.
Optimized Image Loads
When Curio loads the image for an image figure from disk, it uses the Mac’s Core Graphics method to retrieve an image for a given file no larger than 1500 × 1500, proportionally sized, which allows much faster inital rendering and reduced memory usage.
If you resize the image figure to a size larger than that, Curio will simply scale that initially loaded image. Resizing to a smaller size will cause Curio to re-render from that initial image, consuming even less memory.
Of course, double-clicking the image figure opens the full-sized image in the appropriate application.
You can customize that 1500 × 1500 size via Curio’s advanced settings if you’d like to retrieve full-size images no matter how large.
Natural Size
After importing the image, Curio may size the loaded image to a smaller size if going into a mind map or list, for example.
You can use the Natural Size button in the Geometry inspector (or press the N shortcut) and the image figure will grow to its natural size, but remain constrained by the current width of the idea space.
When clicking Natural Size or pressing N, you hold one these key modifiers:
- Hold the Shift key and the idea space will expand if necessary.
- Hold the Option key and the full, non-optimized image will be reloaded, in case a size constraint was imposed on a large image for optimization reasons, and the idea space will expand if necessary.
SVG Images
Curio includes support for SVG image figures.
Simply drag in a .svg file or paste a raw text SVG and a scalable, vector-based image will be rendered.
Note that the SVG format itself defines the various fills, gradients, and stroke colors for the internal vector paths within the image. The Curio figure inspector’s stroke and fill color settings can’t override those internal values.
Also, the ISVG library that Curio may not support every feature of SVG.
For instance, currently the text element is not supported in SVG images.
Popular SVG image libraries
Several of these SVG image repositories include an integrated editor. You can either download the SVG file and drag it in or, even faster, click the Copy button to copy it then paste it into Curio.
- SVG Repo - can change the stroke coloring on the site before copying
- Phosphor - can change the stroke coloring on the site before copying/downloading
- Remix - can change the stroke coloring on the site before copying/downloading
- Iconify - can change the stroke coloring on the site before copying/downloading
- Lucide - can change the stroke coloring on the site before copying/downloading
- Tabler
- Feather - can change the stroke coloring on the site before downloading
- Huge - stroke icons are free, can change stroke color before downloading but have to manually edit svg text file and tweak the
currentColorattribute with the actual color from the<svg>line. - Framer Shapes - cool gradient shapes
- Sketch Shapes - several massive collections of colored icons
- Bootstrap
- SVG Viewer - you edit the svg code live on the site to tweak shape and colors with preview before copying or downloading
- SVG Shape Generator - random, organic blobs
- ssshape - more absract organic blobs
- SVG Backgrounds - interesting shape collections, can change the stroke coloring on the site before copying/downloading
Online graphics editors that support SVG editing
You can either download the SVG file and drag it in or click the Copy button to copy it then paste it into Curio.
- SVG Viewer
- Fun editor by Amelia Wattenberger (example)
- Mediamodifier’s SVG Editor
- vectormixer
- DEEditor for simple stroke and color tweaking
- vectormaker to convert JPEG or PNG images to SVG
Commercial online graphics editors that support SVG editing
Commercial Mac apps that support SVG editing
Text Figure Attachments
You can attach a file to a text figure which can be useful in a number of situations, such as associating a Microsoft Excel document file with a mind map text node.
If the file attachment is an image file type, then the resulting attachment will be displayed as a preview image, otherwise for other file types a thumbnail icon will be displayed for the attachment image. The size of the image or icon is controlled using the Icon Size slider in the Shape inspector popover’s Options tab.
As with preview captions, the attachment is an actual component of the text figure, not a trick using a grouped figure. This feature is particularly useful in mind maps where an attachment can be associated with an existing node in the mind map instead of added as a separate child node.
Attach an External File Located on Your Hard Disk to a Text Figure
- Right-click on a text figure and choose Attach File then choose a file from anywhere on your hard disk in the dialog that appears. This file can be copied or moved into the project as an embedded asset or referenced as an alias.
Attach an Image from Outside of Curio to a Text Figure
- Copy an image from outside of Curio, perhaps from Safari for example.
- Right-click on a text figure and choose Paste As > Attachment For Selected Text Figure. The image will be added as a new asset to your project and will be displayed as an attachment for the text figure.
Attach a Existing Asset to a Text Figure
- Select an existing asset figure on an idea space or an asset in the Library and copy it to the clipboard.
- Right-click on a text figure and choose Paste As > Attachment For Selected Text Figure. Here the attachment will simply reference the same underlying asset.
Change the Size of the Attachment Icon
- Use the icon size slider in the Display panel of the shape popover inspector.
Remove a Text Figure Attachment
- Right-click on a text figure and choose Remove Attachment.
Audio and Video Recordings
Curio can record audio and video directly into your project, so a spoken note or a quick demonstration becomes a figure on the idea space instead of a file you have to track down later.
Making a Recording
- Choose Audio Recording or Video Recording in the Insert popover.
- Choose your input. Audio recording lists every microphone and external audio device connected to your Mac, with a live level meter so you can check your levels before you begin. Video recording adds a camera picker and a live preview of what the camera sees.
- Click Insert. Curio adds a new recording figure to the current idea space and immediately begins recording into it.
- Click the red stop button on the media bar to finish. See Using the Media Bar.
Curio remembers the input devices you chose and preselects them the next time.
Note
While a recording is in progress, the Audio Recording and Video Recording choices are hidden in the Insert popover since Curio records into one figure at a time.
Recordings Are Embedded
The recording is captured as a QuickTime movie and embedded in your project as an asset, so it travels with the project file. Once recording stops it behaves like any other multimedia figure, described next, and can be played back and adjusted using the media bar.
Multimedia Figures
You can play back videos, music, and sounds directly within an idea space.
Playing a Video or Audio Multimedia Figure
- Double-click the figure to begin playback, or click the Play button on the media bar.
- To stop playback, click the Stop button on the media bar.
Using the Media Bar
When you click on a multimedia figure notice media controls appear on the right side of the inspector bar next to the navigator controls.
These media controls can be used to control playback of the multimedia figure with common operations like play, pause, fast forward, and rewind. If you need more control of the playback then right-click and choose Open With Finder to open the media file in QuickTime Player.
The media controls includes a More Options button (⋯) with additional functionality in its popup menu:
- Start Time. During playback of a movie or audio file, pause the playback then, if necessary, use the time scrubber (or arrow keys) in the media player’s overlay controls to find a precise moment. Then set the current time as the new starting time for the media file.
- Stop Time. Similarly you can specify a stop time for the movie or sound file.
- Loop. You can specify that the media playback continuously loops during playback.
- Poster Frame. You can set a new poster frame for a movie, which is displayed before the movie begins playing.
- Copy Frame. Grab the current frame of a movie as an image for pasting within your idea space or elsewhere.
During Playback
If the media asset figure is rotated, then it will automatically change to a 0º angle of rotation for playback, then return to its original rotation angle when playing stops.
Inline Movie Controls
Inline movie controls appear briefly on top of the media playback when it first starts and if you move the mouse over it. You can use these controls to scrub to a specific location.
URL Figures
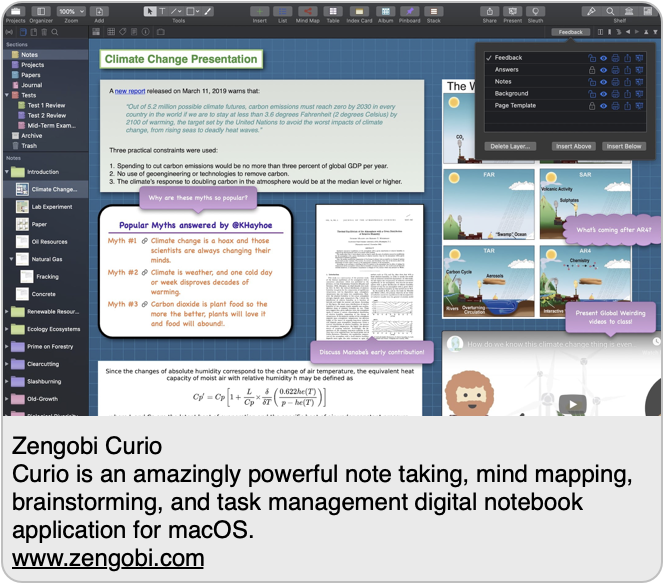
Curio supports URL figures which can be displayed as simple URL links with icons, as web preview figures, or as live web views so you can surf within Curio itself.
Copy or drag an URL from your browser’s location bar and place it directly on an idea space to create an URL figure.
Curio will attempt to download the referenced URL and parse out any specified OpenGraph meta information including image, description, and title.
By default Curio will automatically choose how to display the URL figure based on the information retrieved from the page. If OpenGraph meta information exists Curio will construct an image figure using the OpenGraph image with the OpenGraph description as the image caption.
If no OpenGraph image is found then a normal link figure with icon is displayed. If the site favicon can be retrieved then that is used in place of a generic URL icon.
You can turn off this automatic preview vs icon determination if you wish, then Curio will create URL icon figures by default, unless overridden with styles as described below.
Double-clicking the URL figure or right-clicking and choosing Open Link in Browser will launch the URL in your browser.
Dragging Content From the Web
Drag selected text or images from Safari or another browser directly into an idea space. When possible, Curio remembers the source URL; imported text receives a source attribution, and an imported image can return to its source using Open Link in Browser.
Dragging a YouTube URL into an idea space also offers to create an embedded video figure for inline playback.
URL Figure Display Options
Generally when you drag or paste an URL into Curio it will create an asset figure in preview mode, if OpenGraph meta data is found on the page. The caption of the preview will use the OpenGraph title (no title, max length), description, and URL (no URL).
Otherwise, if no OpenGraph meta data is found it is added in icon mode.
Right-click on an URL figure to switch between icon, preview, or live web view modes.
If preview mode is specified for an URL figure with no OpenGraph meta info then a generic web icon is displayed.

Disabling Auto Preview Mode
If you right-click on an URL figure and switch it to icon mode Curio will remember this state as the default and future pastes or drops will also default into icon mode.
If you right-click and change an URL figure to preview mode then Curio will automatically re-enable automatic preview detection for future pastes or drops and use it if OpenGraph data is found.
You can permanently disable auto preview mode detection.
URL Figure Styles
Use the Format menu to create figure styles for URL figures shown in preview mode, including caption background color and text color. All URL figure preview styles are grouped together in their own style category.
When you set a new default style for URL figures displayed as previews Curio will also store the size of the selected figure and use that size as the new default for future URLs dragged into Curio.
Live Web Views
If an URL figure is displayed as a live web view then Curio will construct a live web browser embedded within the idea space allowing you to browse a site from within Curio. If a web view figure is selected, the inspector bar displays the appropriate web browsing controls.
Note: The following is for web view figures that exist on an idea space. If you drag a URL to the Organizer then the browsing tools on the inspector bar are always available as the web view completely fills the content area of the Curio window. For more information, see the section on Organizer Documents.
Tip
There are some advanced settings you can use to change the live web view’s user agent if you wish.
Activated state
When you first create a live web view it is activated and rendered live.
If the web view is in a deactivated state then after clicking the Start Browsing button or by double-clicking the web view, the web view is activated and the view is rendered live.
You can now interact with the web site by clicking, dragging, and typing within the web view.
You are able to browse around within the live web view and even surf to different locations. However, the default URL associated with the web view will stay as-is unless you click the Save URL button in the inspector bar.
Click Stop Browsing when you are done. This will happen automatically if you go to another idea space or close the project.
Deactivated state
When in deactivate state, the web view displays a slightly faded preview of the web URL so you realize that it’s not a live connection to the web site. The preview was generated and stored the last time you surfed to that location.
When in this mode it acts as a normal figure where it can be easily moved, resized, and various figure attributes can be changed in the inspectors.
You can right-click and choose Open Link in Browser to launch the URL in your browser.
Resizing and Moving
You can resize the resulting embedded web view by dragging on the figure’s selection handles. The figure will resize proportionally maintaining the video’s aspect ratio.
Since clicks within the live web view bounds are processed by the embedded web content, it’s a bit tricky to move the figure, so here are some tips:
- You can move an activated, live web view if you click and drag on the very edge of the frame, or
- First click Stop Browsing in the inspector bar, which deactivates the live web view, and then you can click and drag from anywhere in the figure bounds. Click Start Browsing or double-click the figure to activate the web view control again.
Grab Web Archive
In the right-click context menu for the URL figure you can choose Grab Web Archive to download the contents of the weblink as a paginated PDF, a PDF image, or a web archive (which can be opened with Safari). This new figure will be created and placed alongside the selected URL figure.
Note that Curio is unable to grab a web archive for sites that require a user name and password entered via popup dialog.
Also note that Curio from the Mac App Store doesn’t support remote, insecure http web links when retrieving web archives.
Mac App Store Restriction
Remote, insecure http connections are not supported in embedded web view figures, as Organizer documents, as Sleuth sites, or during web archive or favicon retrieval. However, you can create insecure http web link figures and figure actions, which will open in your default browser. See Sandbox for more details.
YouTube Videos
Choosing YouTube Video in the Insert popover asks for a video’s address and embeds that video in the current idea space as a live web view you can play in place.
Paste any normal YouTube link and click Insert. Curio accepts the usual forms — youtube.com/watch?v=…, youtu.be/…, and direct embed links — and converts them into the embed address the player needs. If the link carries a start time, such as a t=46 picked up from Copy video URL at current time, the embedded video starts at that moment too.
Tip
You can also drag a YouTube link straight into an idea space and Curio will offer to create an embedded video figure for inline playback.
Web Views
Choosing Web View in the Insert popover inserts a live web view figure: a real web browser embedded in your idea space. It opens on Google’s home page as a starting point, and from there you can browse using the web controls that appear in the inspector bar whenever a web view figure is selected.
A web view is a display mode of a URL figure, so everything URL figures can do applies here as well. See Live Web Views for details on activating, deactivating, and interacting with them.
Note
If a site misbehaves inside a web view, it may be reacting to the browser Curio identifies itself as. You can change that with the WebView User Agent advanced setting.
Google Docs
Choosing Google Doc in the Insert popover inserts a live web view already pointed at Google Drive and sized for working with documents, so you can keep a Google Doc open alongside the rest of your material.
Otherwise it behaves exactly like any other web view.
Note
Google’s sites are especially sensitive to the browser Curio identifies itself as, and depending on the value you may see sign-in failures, spreadsheet errors, or an upgrade warning. If you run into one, the WebView User Agent advanced setting explains the tradeoffs between the Safari, Chrome, and empty user agent strings.
PDF Figures
When you drag a PDF file to your idea space Curio will construct a PDFView to render the PDF and permit annotation. If a PDF figure is selected, the inspector bar displays the appropriate PDF navigation and annotation controls.
Note
The following is for PDF figures that exist on an idea space. If you drag a PDF to the Organizer then the annotation tools on the inspector bar are always available as the PDF completely fills the content area of the Curio window. For more information, see the section on Organizer Documents in this user manual.
Tip
You may also want to check out Curio’s amazing Spread PDF feature!
Deactivated State
Normally the PDFView displays the contents of the PDF but the annotation tools in the inspector bar are not enabled. When in this mode it acts as a normal figure where it can be easily moved, resized, and various figure attributes can be changed in the inspectors.
Activated State
After clicking the Start Annotating button (or Option-double-clicking) the PDFView is activated and the annotation controls become available in the inspector bar. By carefully grabbing the border area the PDFView can still be moved and resized. However, you can now interact with the PDF by clicking and dragging within the PDFView.
Click Stop Annotating or press the Escape key when you are done annotating the page and the updated PDF will be saved to disk.
Annotation Tools
Select text within the PDF and use the annotation tools in the inspector to apply highlighting colors, strikethrough, or underline.
Only the PDF annotation tools on the inspector bar can create annotations that are embedded within the PDF itself. Anything you create on top of or around the PDF figure using any other Curio features — such as text figures, images, scribbles, lists, mind maps, etc. — are not stored within the PDF and only exist on the idea space.
If you need more annotation tools than what Curio offers you can double-click on the PDF figure to launch the PDF file in your default PDF viewing application. After annotations are made, returning back to Curio will cause the PDF to refresh itself on the idea space to reveal those new annotations.
Resizing and Moving
You can resize the resulting embedded PDFView by dragging on the figure’s selection handles. The figure will resize proportionally maintaining the video’s aspect ratio.
Since clicks within the PDF view bounds are processed by the embedded PDFView, it’s a bit tricky to move the figure, so here are some tips:
- You can move the PDF view if you click and drag on the very edge of the frame, or
- First click Stop Annotating in the inspector bar, which deactivates the embedded PDFView control, and then you can click and drag from anywhere in the figure bounds. Click Start Annotating or double-click the figure to activate the PDF view control again.
Working with PDF Figures
Some tips when laying out and working with your PDF figures:
- Make sure to size them so they are somewhat readable, altough they don’t need to be too large because you can zoom into them.
- For example, use the Smart Zoom feature so can double-tap to quickly zoom into a PDF figure for reading and annotating then double-tap again to restore your zoom.
- While PDF figures should be quick to render, keep in mind that dozens of PDF figures or PDF’s with pages containing complex fonts or embedded graphs can be slow to render.
- You can extract a selection of text from a PDF figure and paste it on the idea space as a new text figure, complete with a jump action link to the original selection in the PDF, via Copy As Jump Target.
Spread PDF
Curio includes a special feature you can use with PDF assets called Spread PDF. If you have a multipage PDF file that you would like to spread across a single idea space or across multiple idea spaces, Curio makes it super simple. This feature is mainly used when taking notes alongside slides or annotating the slides in a PDF presentation.
You can spread a PDF across a single idea space. This is useful when spreading a short PDF or only the first few pages of a longer PDF to prepare it for spreading across multiple idea spaces.
You can also continue a spread across multiple idea spaces if you have an especially long PDF.
Spread PDF Within This Idea Space
- Create a new idea space or use an existing idea space.
- Drag the PDF into the idea space.
- Resize and position the PDF figure any way you wish. If you wish, create a text figure for text annotations and/or a list figure for key points or questions then place those next to the PDF with some placeholder text.
- Select those figures then right-click on the selected figures and choose Spread PDF Within This Idea Space. A single idea space has a 20 page spread limit primarily for performance reasons.
- You can then enter in how many columns and rows of the pages you’d like to create, plus the spacing gap between those columns and rows.
- Curio will duplicate the figures and spread them across then down the idea space, growing the idea space as necessary, where each PDF figure instance shows the subsequent page in the PDF document. After the process is completed you can move the figures around manually if you wish.
Tip
Read the tips above for more information on working with PDF figures.
Spread PDF Across Idea Spaces
- Begin just like spreading a PDF file across a single idea space, as described above. Note that this idea space you create will be used as a template when creating the subsequent idea spaces. Any other figures that you add to this idea space will be replicated on all the other idea spaces.
- Right-click on the idea space in the Organizer and choose Spread PDF Across Idea Spaces.
- Curio will generate a copy of the idea space as many times as needed to show all the pages in the PDF.
Equation Editor
Create and edit equations using LaTeX, AsciiMath, or MathML syntax. Previews are instantly rendered as you type your equation. When you click to Insert or Update the equation the final high quality and scalable PDF rendering occurs instantly.
Curio renders your typed equations using MathJax, the de facto standard in web-based equation typesetting for mathematics, science, and engineering. MathJax accepts three different standard equation syntaxes:
- LaTeX
x=\frac{-b\pm\sqrt{b^2-4ac}}{2a} - AsciiMath
``x=-b+- sqrt(b^2-4ac}/(2a)`` - MathML
<math ...</math>
Of the three, LaTeX is the most popular by far. It is also the standard format for Markdown equations which Curio also supports.
Equation Rendering Details
Read the details on how equation rendering works in Curio and how it can be customized. Curio bundles an HTML Local folder containing MathJax’s scripts so internet access is not required.
Curio supports equations in several ways:
- As a standalone figure on the idea space.
- As an equation written in the LaTeX Markdown syntax within a Markdown text figure.
- As an equation image within a rich text figure.
Standalone Equation Figures
To insert an equation figure on the idea space:
- Make sure you aren’t editing a text figure.
- Choose the Insert > Equation menu item (⌃⌘E) or click the Insert toolbar button then choose Equation.
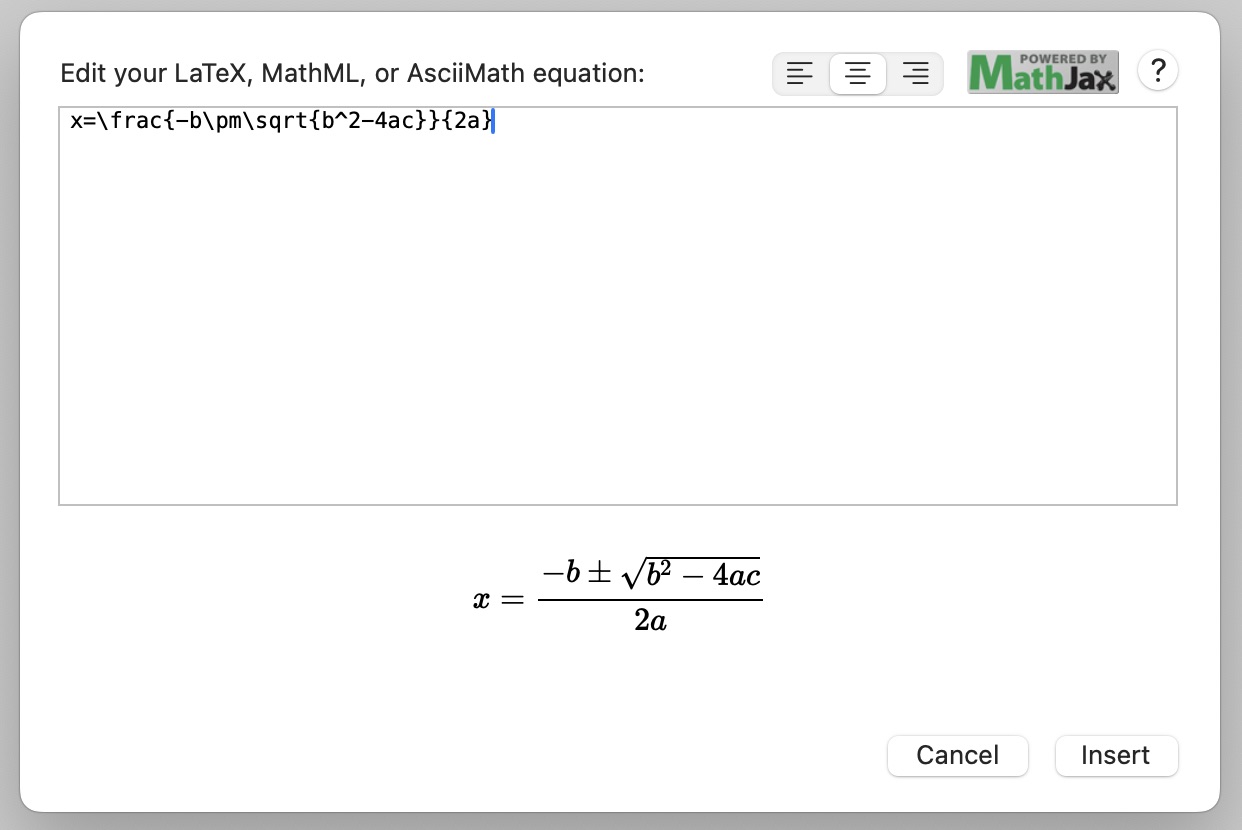
- Use the equation editor to enter your equation. A preview area below shows what your equation will look like.
- Click Insert to insert a PDF rendering of the equation on the idea space.
Help with Equations
Click the help button in the equation editor window to see the popup menu displayed here. It includes several examples in LaTeX, AsciiMath, and MathML form, and includes links to several useful websites for more information.
Equation Delimiters
Curio assumes an entered equation is LaTeX unless it finds one of the following in your typed equation:
``- Indicates that this is an AsciiMath equation of the format``...``<math- Indicates that this is a MathML equation of the format<math ... </math>
Complex Equations
Your equation can include other text, other equations, and even special color tags as demonstrated here:
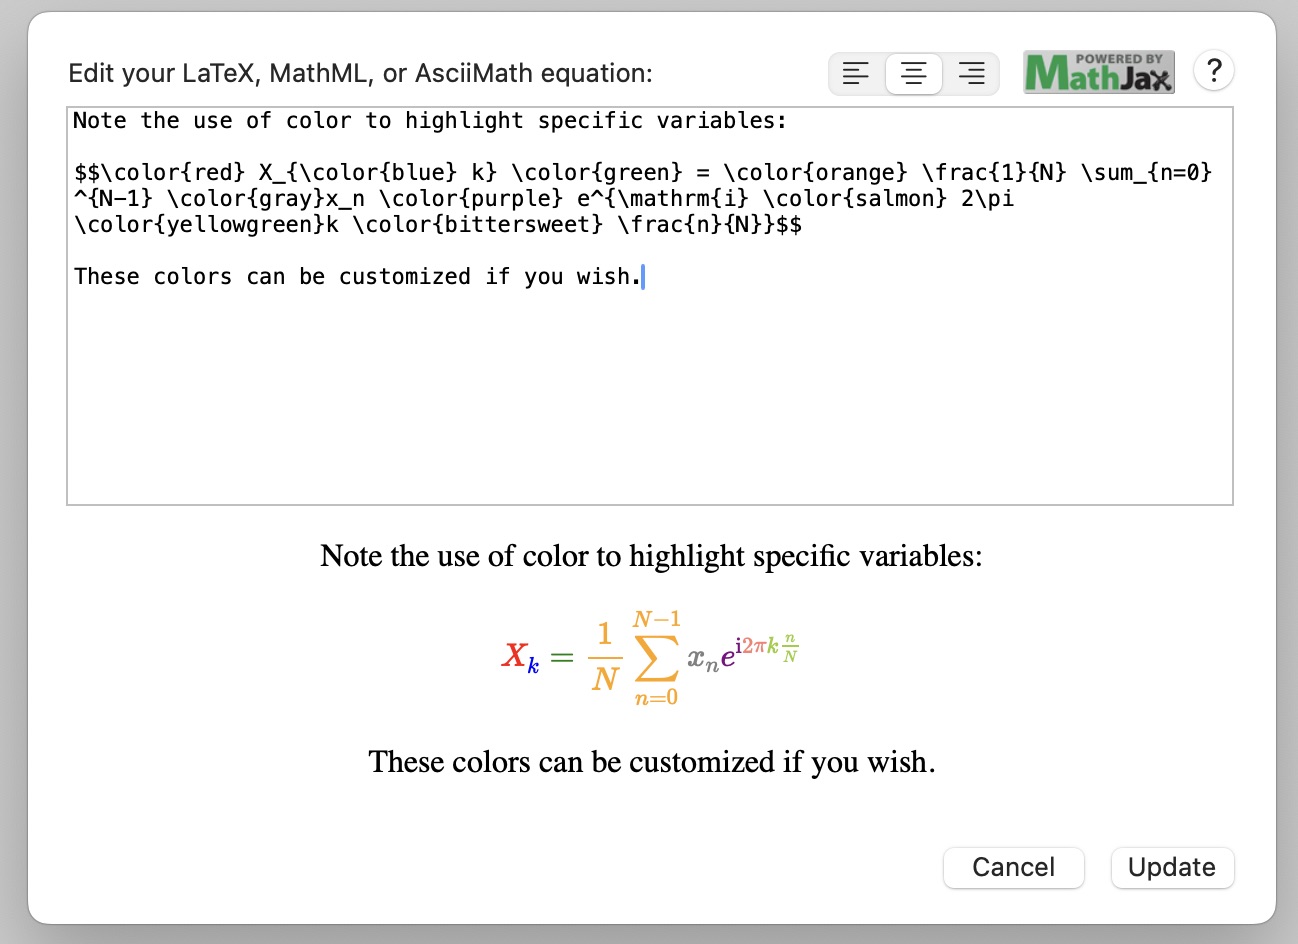
If you mix non-equation text and/or multiple independent equations then you’ll need to surround your equations with the appropriate delimiters so MathJax will recognize the equations.
Use $$⏎...⏎$$ delimiters for block equations on their own lines and either $...$ or \( ... \) delimiters for inline equations within other text.
Alignment
By default equations are centered when rendered, although you can choose the left, center, or right alignment buttons can be used to change this alignment. This only impacts the alignment of the entered equation and non-equation text, not how it is placed within a text figure. If inserting into a rich text figure then you can use the normal text paragraph alignment inspector buttons to horizontally align the paragraph containing the equation image.
Editing an Equation Figure
Simply double-click your equation on the idea space to bring it back into the equation editor. Then click the Update button when you finish your changes.
Equations in Markdown Text Figures
Curio includes native support for LaTeX Markdown equations.
This means you can enter your equation in LaTeX syntax directly into the Markdown text figure and see the results instantly when you finish editing.
Block equations ($$⏎...⏎$$), inline equations (\(...\), $...$), and math code blocks (```math⏎...⏎```) are all supported.
That said, you can also use the Equation Editor and its handy live preview to create, insert, and edit your Markdown LaTeX equations!
Inserting a New Equation
When you’re editing a text figure and Markdown is either enabled or Markdown autodetect is enabled the Equation Editor will automatically insert LaTeX into your Markdown:
- Edit a Markdown text figure and position the text cursor where you would like to place the equation. If the cursor is on its own line then you’ll insert a “block” equation, else if between existing text you’ll insert an “inline” equation with automatic baseline adjustment to align itself with neighboring text.
- Choose the Insert > Equation menu item (⌃⌘E) or click the Insert toolbar button then choose Equation.
- Use the equation editor to enter your equation. A preview area below shows what your equation will look like.
- Click Insert to insert the LaTeX into your text figure. Curio will automatically prepend and append the appropriate block (
$$⏎...⏎$$) or inline ($...$) delimiters to the equation for proper rendering. - When you finish editing the figure the equations will be dynamically rendered.
Editing an Existing Equation
When you need to edit your LaTeX equation you can do it by hand, of course, or you can use the Equation Editor:
- Edit the Markdown text figure and position the text cursor anywhere within the equation text.
- Choose the Insert > Equation menu item (⌃⌘E) or click the Insert toolbar button then choose Equation.
- Use the equation editor to edit your equation.
- Click the Update button when you finish your changes and the LaTeX Markdown will be updated.
Learn more about Curio’s support for Markdown equations and how equation sizing is determined.
Equations in Rich Text Figures
Inserting a New Equation
For rich text figures you can use the Equation Editor to insert equations:
- Edit a text figure and position the text cursor where you would like to place the equation. If the cursor is on its own line then you’ll insert a “block” equation, else if between existing text you’ll insert an “inline” equation.
- Choose the Insert > Equation menu item (⌃⌘E) or click the Insert toolbar button then choose Equation.
- Use the equation editor to enter your equation. A preview area below shows what your equation will look like.
- Click Insert to insert a PDF rendering of the equation into the text figure as an inline image.
These images will render identical to Markdown block and inline equations.
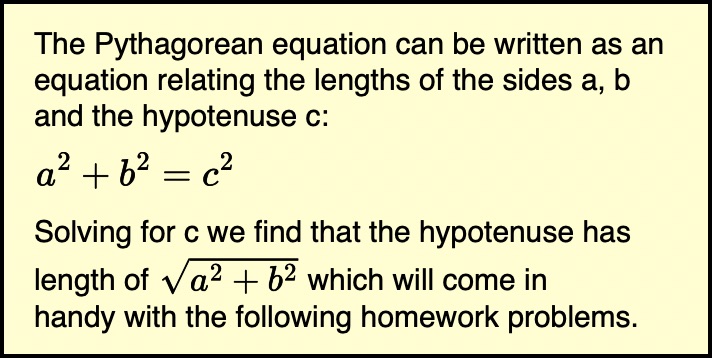
Here is an example text figure with a block equation on its own line and an inline equation within some text:
Tip
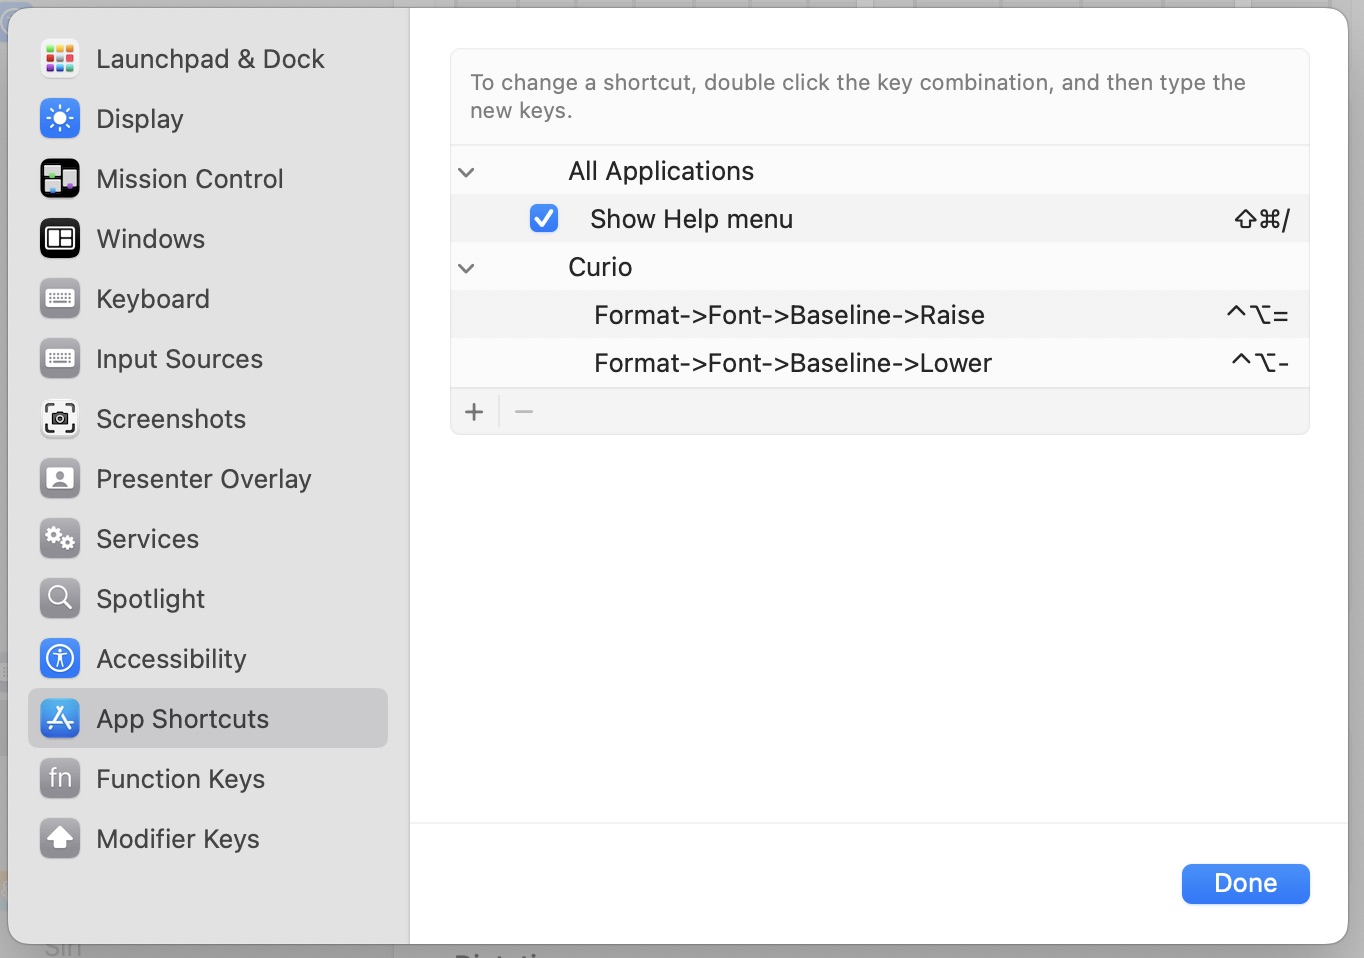
While Curio will attempt to vertically align the baseline of an inline equation with its surrounding text as best it can, you can fine tune the baseline by selecting the equation image and using the Format > Font > Baseline > Raise/Lower menu.
If you do this often you may want to set up a keyboard shortcut via System Settings > Keyboard > Shortcuts > App Shortcuts.
Editing an Existing Equation
Double-click a text figure to begin editing its text then double-click the equation image to edit the equation. Click the Update button when you finish your changes.
Rich Text Figure Equation Sizing
The size of the equation is based on the font size of the surrounding text. Its baseline is also set to align it with the baseline of the surrounding text.
If you modify the figure’s text size using techniques such as the following, your equation will scale its size and baseline to match automatically:
- Select the figure itself and use ⌘+ or ⌘-.
- Select a range of text within the figure and use ⌘+ or ⌘-.
- Select the figure itself and use the inspector text size control.
- Select a range of text within the figure and use the inspector text size control.
Exporting Rich Text Figure Equations
The inline equation is a PDF image attachment within your text figure so will be included automatically if you export as rich text. And since we’re using the standard baseline attribute to adjust its vertical placement it should render correctly in other editors that adhere to that standard such as TextEdit.
If you export as Markdown then instead of the image the actual MathJax equation syntax will be output within $$⏎...⏎$$ or $..$ delimiters, unless your equation text includes its own delimiters.
That way any Markdown renderer with MathJax support will render it on-the-fly correctly.
Mermaid Figures
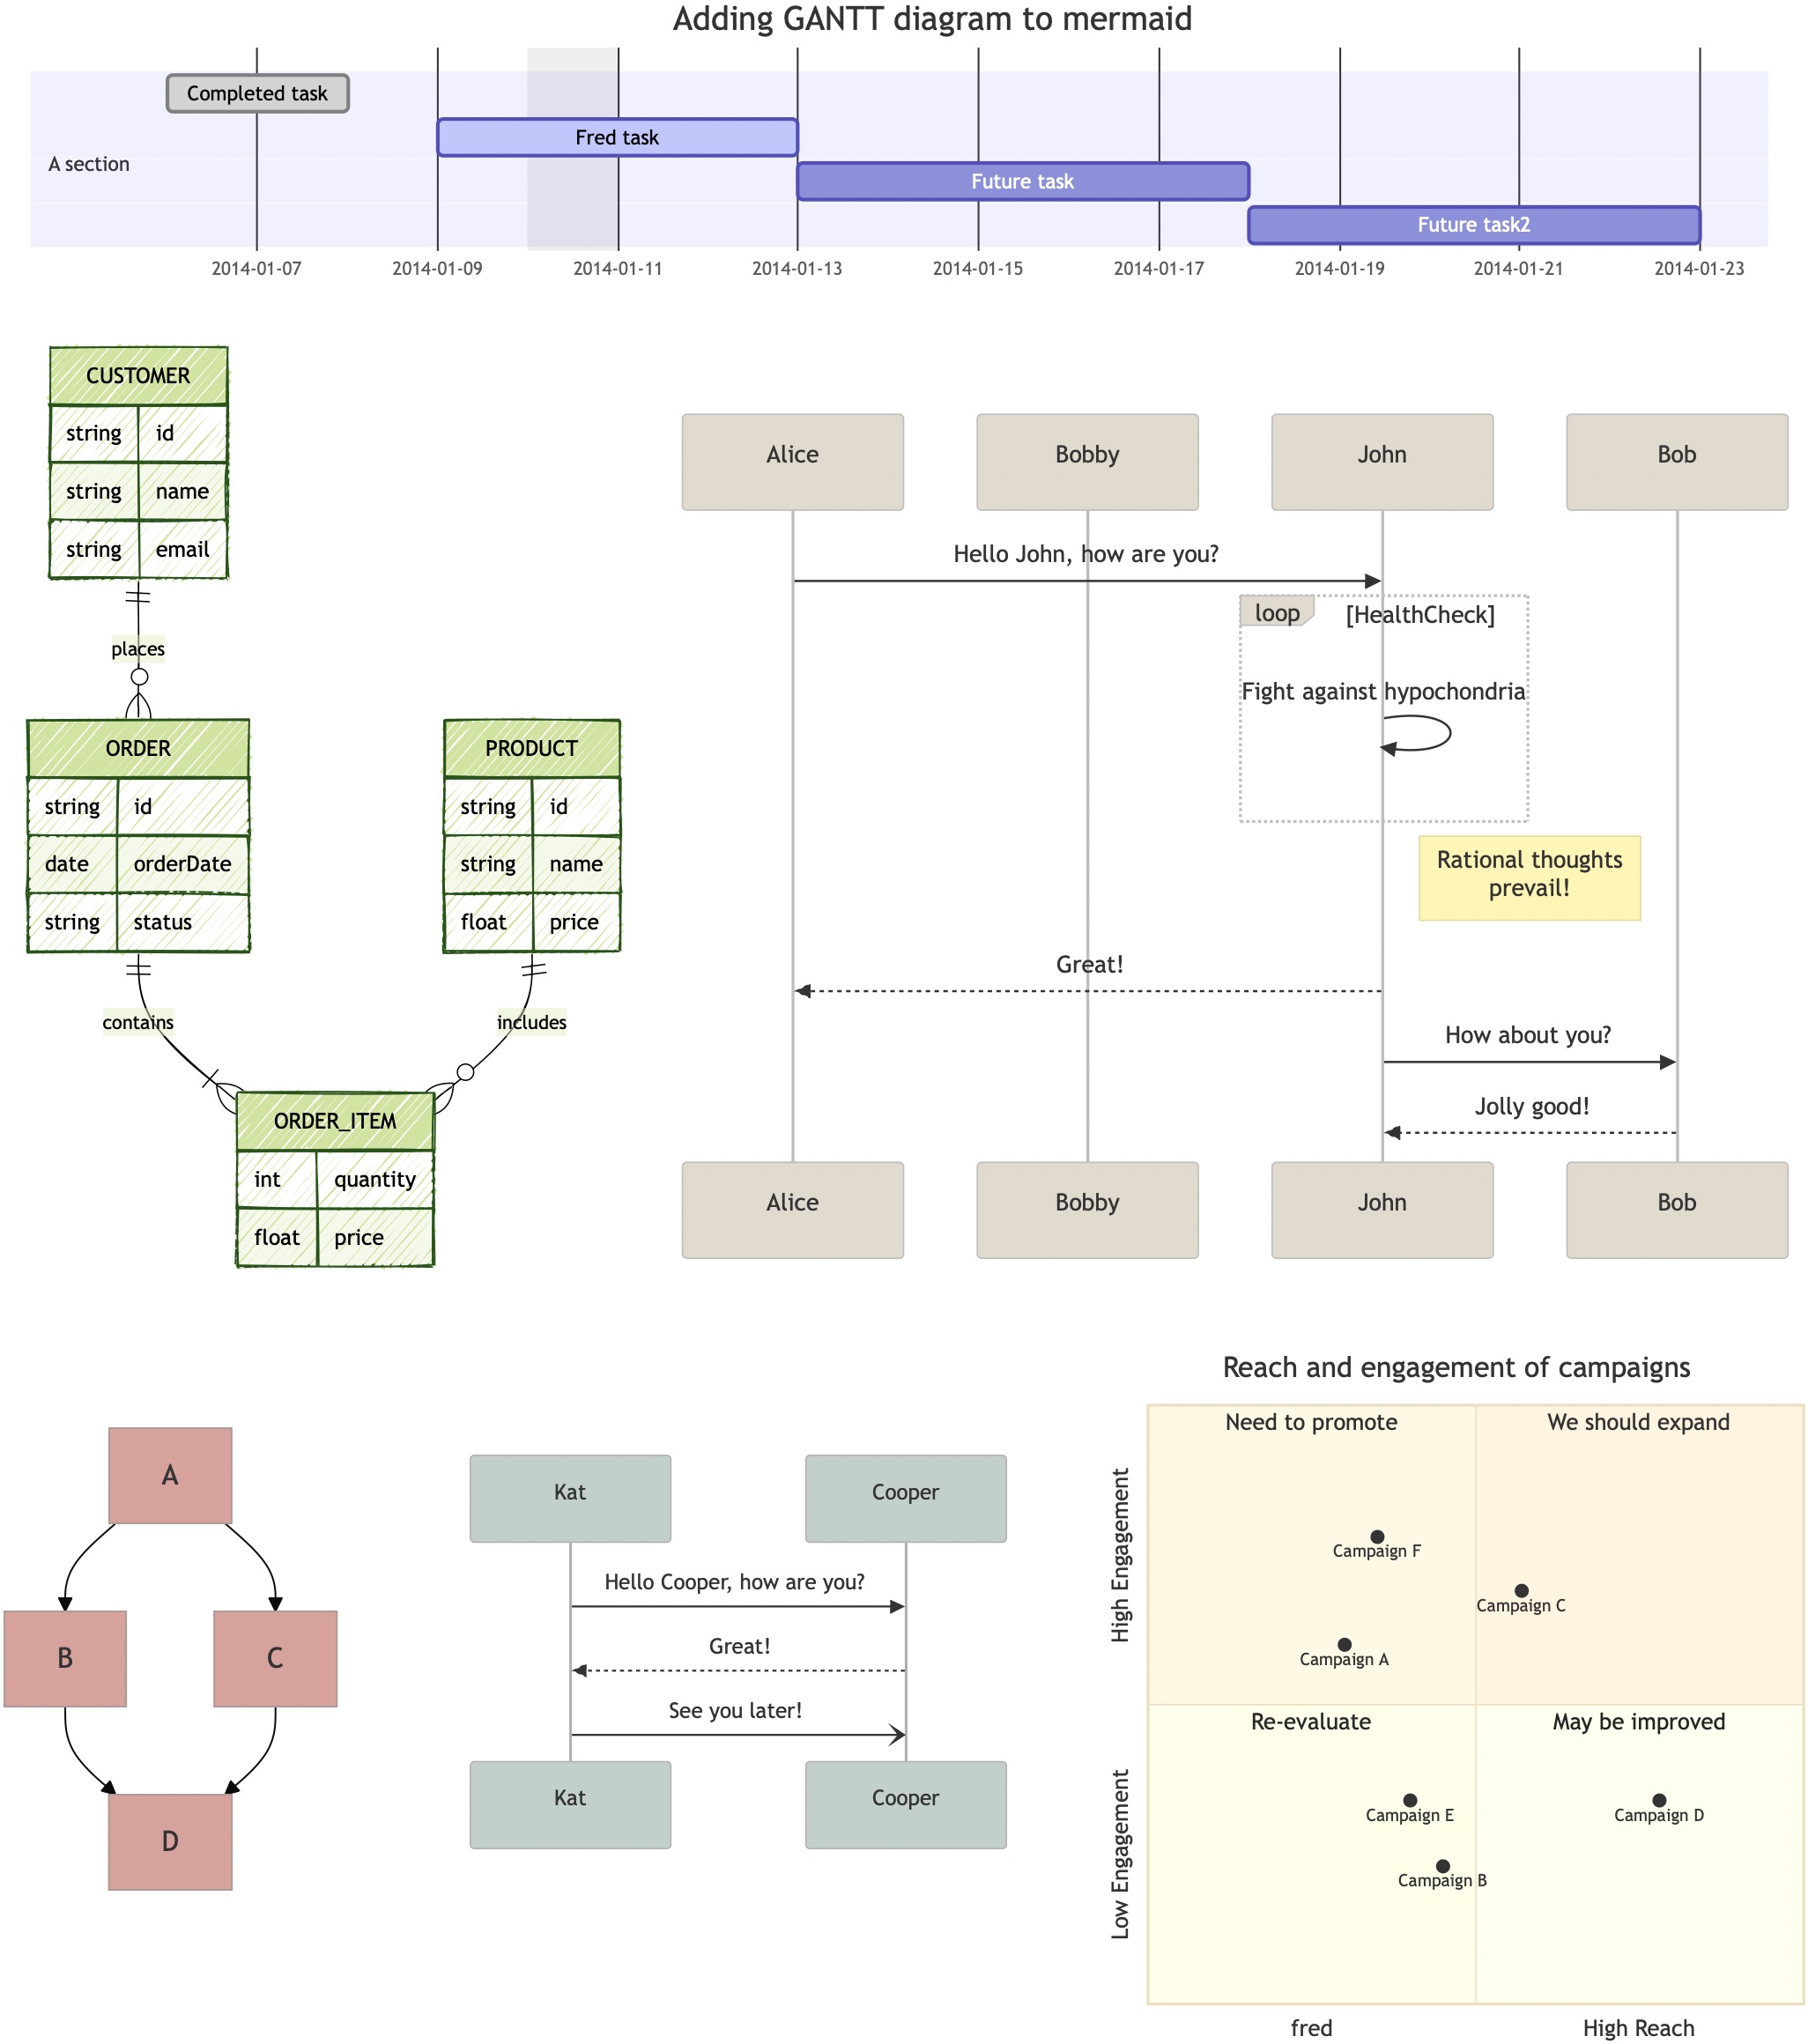
Curio Pro includes support for Mermaid, a popular and extensible diagramming format also used by AI services like ChatGPT, Claude, and Gemini.
Tip
Curio Pro supports Mermaid figures, Mermaid in Markdown code blocks, and Mermaid Organizer documents. If you’d like to see Mermaid in action you might check out Mermaid Live and Mermaid Chart.
Mermaid Rendering Details
Read the details to learn more about Mermaid diagrams, how Mermaid rendering works in Curio, and how it can be customized. Curio bundles an HTML Local folder containing Mermaid’s scripts so internet access is not required.
Creating a Mermaid Figure
- Drag in Mermaid files (
.mermaidor.mmd) or copy Mermaid source code from elsewhere then use Curio’s Paste As > Mermaid Diagram to instantly see a rendered diagram. - The generated PDF image has a transparent background and will resize, zoom, and print perfectly.
Editing a Mermaid Figure
- Double-click to open your Mermaid diagram’s source code in a text editor.
- Make your changes and save.
- When you switch back to Curio your diagram will automatically refresh itself.
Sizing a Mermaid Figure
- To resize the rendered diagram simply resize the figure and the PDF will scale itself proportionally. This means everything within the PDF, including fonts and diagram elements, will all resize.
Rendering Using a Figure’s Width
When generating the Mermaid image a max width has to be given to the rendering system. The default for new figures dragged or pasted into Curio is 800.
Again, the is the max width, and most Mermaid diagrams size themselves to a natural size which may be smaller than than that max width. Curio will make sure the PDF bounds tightly enclose the rendered diagram.
However, some diagrams, like Gantt chart, will fill the given max width, even if that means some elements have huge spacing gaps or are too close with overlapping edges.
To better support those types of diagrams you can resize the diagram then right-click and choose Render Using Width as Max and Curio will re-render the diagram using the figure’s width as the max. The result isn’t a scaled version of the original diagram but allows the diagramming algorithm to best fill the width if it needs it.
Here’s an example:
1️⃣ Initial diagram:

2️⃣ Resizing the generated PDF simply scales everything including fonts:

3️⃣ Render Using Width as Max gives the diagram more room to position elements:

Notice the original font sizes are maintained and the “Completed Task” element is inside its rectangle now that it has more room.
Table of Contents Figure
Curio Professional and Standard customers can now insert a Table of Contents as a native Curio list or mind map collection. This collection is dynamically generated and dynamically updates if changes are made to your project’s Organizer hierarchy.
Dynamic Content
It’s important to remember that the information in the Table of Contents is dynamic and not a static snapshot. If you modify any items within the Table of Contents or their expand/collapse states then this will be reset the next time it has to regenerate.
If you drag the idea space containing the Table of Contents to a different location in the Organizer it will regenerate itself based on its new placement. Similarly, a duplicate or copy/paste of the idea space containing the Table of Contents will regenerate based on its new placement.
Of course, the specified Table of Contents style will be kept between regenerations.
Create a Table of Contents Figure
- Insert a Table of Contents either via the Insert main menu or the Insert toolbar button.
- A list or mind map collection is inserted into the current idea space and automatically populated. The collection is comprised of idea space link figures, displayed in icon mode, to all Organizer items after the idea space that contains the Table of Contents itself.
- Clicking a link will jump to that idea space in your project. If you export your project as PDF, then clicking a link in the exported Table of Contents will jump to the appropriate page within the PDF.
Managing the Contents of the Table of Contents
The hierarchy included in the Table of Contents is based on where its containing idea space is located in the Organizer:
- If the next Organizer item after this idea space is a child, thus this idea space is a parent, then the Table of Contents is of those children, recursively. This option, in particular, is useful if you’d like to create multiple Table of Contents within the same project or section.
- Else the Table of Contents is made up of the siblings that come after this idea space and the children of those siblings, recursively.
Styling the Table of Contents
- Table of Contents collection is made up of standard idea space link figures, displayed in icon mode. The containing list or mind map collection can be styled with any bundled or personal list or mind map style simply by choosing the style from the inspector style galleries.
- You can also customize the collection then use Format > Set as Default Style to store that as the new default style. For example, choosing Format > Set as Default Style for List (Table of Contents) Figure will make it the new default for list Table of Contents.
Updating the Table of Contents
- The titles and previews of the idea space link figures which make up the Table of Contents will update automatically if changes are made to their destination idea spaces.
- And, when the Table of Contents idea space is revisited, either manually or when exported or printed, the Table of Contents will automatically determine if it contains an out of date hierarchy and regenerate itself, if necessary.
- You can also press the Regenerate button in the Table of Contents inspector to force a regeneration.
Table of Contents Inspector
Select a Table of Contents then click its inspector icon in the inspector bar to change the following attributes.
- Text Only Starting at Level
By default, Curio includes previews until hierarchical level 3 when it switches to text only entries. - Collapse at Level
By default, Curio automatically collapses the 2nd hierarchical level in the Table of Contents. If you’d like to see more, simply click a parent’s expand widget to see those child items. - Include up to Level
By default, Curio includes the first 3 hierarchical levels in the Table of Contents. For complex projects, reducing the number of levels can make generation faster. Note that Curio may throttle the specified value if a massive number of entries would be created, see below for more details.
The Table of Contents detects when it needs to be regenerated automatically, but you can click a button here to force a refresh.
Date and Time
Choosing Date and Time in the Insert popover lists the current date and time rendered in several formats, using the date and time conventions of your Mac’s preferred language:
- The full, long, medium, and short date, such as Monday, March 19, 2012 through 3/19/2012.
- The time with and without seconds.
- The full date combined with the time, with and without seconds.
Select the format you want and choose Insert.
Static Text
The inserted text is a snapshot of the moment you inserted it. It is never updated afterwards, which is usually what you want when date-stamping a note.
If you want a date that keeps itself current, insert a variable instead. Variables re-evaluate whenever the figure is displayed, printed, or exported, and they can be formatted with their own date and time styles.
Line Figures
Creating Lines
Lines can be created in many ways including:
- The main menu’s Insert > Line submenu,
- The Line Tool,
- Idea Graphs,
- The Basic Shapes choice in the Insert popover.
Styling a Line
- Use the Shape inspector to change the pen color (aka border color) and pen pattern.
- Use the Line inspector with more options specific to lines such as scaling, and head and tail arrowheads.
- Right-clicking on a line allows you to quickly change multipoint lines between straight, curved, and orthogonal line styles.
Sticky Lines
- Make sure Sticky Lines is checked in the Arrange menu. If not, select it to enable the sticky lines feature.
- Drag the endpoint or midpoint on the line.
- As you hover that point over another figure, you can stick to specific points on the figure:
- Specific Connection Point
If you hover and release on a specific connection point along the edge of the figure then it will stick to that specific connection point even if the connecting figures are rotated or moved. - Closest Connection Point
If you hover and release close to but not on a connection point along the edge of the figure then it will dynamically connect the line to the closest connection point, potentially connecting to a new connection point if the connecting figures are rotated or moved. - Towards the Center
Otherwise if you hover and release along the edge of the figures away from any connection points then it will connect against the edge of the figure pointing towards the figure’s center. - Specific Position
If you hover and release anywhere else within the figure or if you hold the Command key, then it will stick to a specific position on the figure. Note the position will scale appropriately if the figure itself is scaled. Also note that if you stick a line to a position on another line it will also scale if the line is scaled. - Non-Sticky Point
If you press the Control key the figure will stop glowing and the line will not stick to the figure at all. The Control key temporarily disables the sticky feature.
- Specific Connection Point
- As described for the Line tool, if you also hold down the ⌥ key during the creation of a new line then you can create a multipoint line on-the-fly where any of the points on that line can be stuck to other figures using the normal sticky techniques. Note this Option key trick only works when dragging out brand new lines, not editing existing lines.
Sticky Curved Lines
If you use a sticky line to connect two figures, and the line is a curved type with no midpoints then Curio will internally create the midpoints necessary to render an elegant, swoopy curved line.
If you add midpoints then Curio will curve the line through those defined points instead.
Adding and Removing Midpoints
- Right-click on a line to quickly add a midpoint at the given click location.
- Right-click on a midpoint to remove it.
You can also use the main menu’s Insert > Line > Midpoint menu item to insert a midpoint into a selected line.
Adding a Label to a Line
- Double-click on a line figure to create one or more text figures which can act as line labels. These text figures are just like regular Curio text figures, thus they support the same formatting features, but they are stuck to the line.
- You can slide a text figure up and down along the line using the mouse or the arrow keys to reposition it. Using the arrow keys on the keyboard is generally more accurate especially for curved lines. You can also hold Shift while pressing the arrow keys to move the label in larger steps.
- To nudge a label off the line — for example to move it just above or below the line so it doesn’t overlap — select the label and hold ⌥ (Option) while pressing the arrow keys. Each press shifts the label 1 point; add Shift (⌥⇧+arrow) for 10 point steps. The offset is capped at ±50 points by default and rotates with the line, so rotating the line carries the label offset along with it. Dragging the label to a new spot on the line clears the offset.
- The offset limit can be changed with the Line Label Pixel Offset Limit hidden setting.
- To remove the label, select it and press the Delete key.
Idea Graphs
Sometimes you need more flexibility than a mind map. Fortunately Curio makes it incredibly easy to quickly create a flowchart or freeform graph of figures connected together with line figures. Curio calls these Idea Graphs.
An Example Workflow
Create a text figure, hold ⌘ and click to a blank area on your idea space, and instantly a new text figure will be created at that location with an automatic sticky line between the previous and new text figures.
These automatically created lines are true Curio line figures so you can change the line color, dash pattern, width, and arrowheads using the inspector controls. You can also double-click on a line to add line labels, or right-click on a line and add one or more midpoints to make it a curved or orthogonal line.
Creating Idea Graphs
There are 4 ways to create idea graphs within Curio.
Tip
There are a number of advanced settings you can set for idea graph lines to change their default style including color; dash pattern; straight, curved, or orthogonal; auto added midpoint; head and tail decoration; and much more.
1. Via Insert > Line
- Select two figures.
- From the main menu choose a type of line under the Insert > Line submenu including nondirectional, directional, or bidirectional.
- A sticky line will be created going from the first figure you selected to the last figure you selected.
2. Via Figure Resize Handles
- Select an existing figure.
- Hold ⌥ and click and drag on any resize handle.
- This will create a directional line (one arrowhead, →) allowing you to quickly connect it via Sticky Lines to another figure.
3. Via Command Clicks
- Edit or select an existing figure.
- Click on the idea space background while pressing one of the following modifier key combinations:
- ⌘: directional line (one arrowhead, →)
- ⌘⇧ (Command-Shift): bidirectional line (two arrowheads, ⟷)
- ⌘⌥ (Command-Option): nondirectional line (no arrowheads, —)
- ⌘⌥⇧ (Command-Option-Shift): nondirectional dashed line (no arrowheads, ┈)
- A new figure will be created and joined to the currently selected figure with the appropriate line.
Pinboard Exception
Technically you can make these types of connected figures within one specific type of collection: a pinboard. Just drag one figure on a pinboard on top of another figure while holding one of the key modifiers above.
The resulting line will connect the two figures and move if either figure is moved. If both figures are within the same pinboard then the line itself will be owned by the collection so moving the pinboard will move the connection line, as well.
Collection Figures
Note that if the Select tool is active in the toolbar, and the currently selected item is a collection figure (such as a list, mind map, table, or index card), then the created connected figure will be that same type of collection. Using this technique you can quickly create a connected graph of index cards, for example.
However, if the Text tool is active instead then the created connected figure will always be a text figure. This way you can easily create a text figure connected to a collection.
4. Via Drag and Drop
This drag-and-drop method will work on the idea space but not within collections:
- Drag figure A on top of figure B and, before dropping, press and hold one of the following modifier key combinations and the mouse pointer change to a little curly icon:
- ⌘: directional line (one arrowhead, →)
- ⌘⇧ (Command-Shift): bidirectional line (two arrowheads, ⟷)
- ⌘⌥ (Command-Option): nondirectional line (no arrowheads, —)
- ⌘⌥⇧ (Command-Option-Shift): nondirectional dashed line (no arrowheads, ┈)
- Release the mouse and figure A will move back to its original position and the appropriate line will be created connecting figure A to figure B.
Focusing an Idea Graph
View > Focus also works with freeform idea graphs on the idea space. Curio follows snapped line connections and keeps related figures undimmed by traversing downstream from the selected figures.
Any arrowhead implies direction: - Head arrow: tail → head - Tail arrow: head → tail - Both arrowheads: bidirectional
By default, nondirectional lines (no arrowheads) are ignored by focus graph traversal. If needed, enable Focus Flow Include Undirected Lines to treat those lines as bidirectional connections.
Focus traversal is cycle-safe and refreshes automatically if lines are added, removed, re-snapped, or changed between directional and nondirectional.
Keeping Figures Together
Curio offers three ways to keep related figures together.
-
A group figure encapsulates figures within itself. You can even create nested groups. The end result is a single figure so can be used in places that take a single figure, like a mind map node. Accessing figures deep within a group hierarchy can be difficult.
-
A follow figure is a figure that follows the movements of an assigned leader figure. Move the leader and all the followers move, too. Followers are otherwise completely independent and can be selected, moved, resized, styled, edited, deleted, copied, etc. A leading figure could have many followers scattered anywhere on an idea space. Right-clicking a leader or follower gives you quick access to related actions.
-
A bundle figure is almost identical to the following figures but they all follow each other if any of them is moved. You can temporarily disable the bundle to move one or more then re-enable the bundle to track movements again. Right-clicking a bundled figure gives you quick access to related actions.
Grouping Figures
A grouped figure converts a selection of several figures into a single figure. Once within a grouped figure the individual figures can no longer be selected, resized, or re-styled.
- Select the figures you wish to group.
- Choose Arrange > Group from the main menu.
- To ungroup figures, select the group and choose Arrange > Ungroup from the main menu.
Following Figures
You can create a loose collection of figures which follow the movements of their assigned leading figure. The followers are independent and can be easily repositioned, edited, deleted, styled, and sized, but will move with the main figure.
Any figure on the idea space can be a leader or follower including collection figures. However, figures within a collection are excluded since the collection itself manages the layout of its contained items.
These are very useful in many situations:
- You want to create a bunch of annotation figures alongside a main figure, pointing out or discussing areas of interest. You can easily reposition, add, or remove annotations, yet they move with the main figure.
- You want to create a large title or caption figure above or below a main figure that can be positioned and sized independently yet moves with the main figure.
Tip
Review the grouping, following, and bundling comparison.
Video ▶️
Watch a following figures demonstration video on our YouTube channel.
Follow a Figure
- Select a figure that will act as the leading figure.
- Hold Shift and continue selecting figures that will be the followers of that first selected figure.
- Choose Arrange > Follow > Follow First Selected from the main menu or via the right-click context menu.
- You can add more followers at any time by repeating this process.
When you move a leading figure, its followers will move as well. However, you can move followers independently to reposition them around the leader. All figures are independent and can be edited, selected, deleted, cut, copied, exported, printed, etc without impacting the others.
Adding More Followers
There are several ways to add more followers to an existing leading figure.
- You can follow the steps above and select the leading figure, then the figures you wish to follow that figure, and choose Arrange > Follow > Follow First Selected.
- You can select a mix of existing followers and figures you want to become followers and choose Arrange > Follow > Follow Same Leader.
- You can copy/paste, duplicate, or ⌥drag an existing follower and the new created figure will also be a follower of that same leader.
Glow Colors for Leaders and Followers
- When you select a leading figure its followers will have a yellow glow.
- When you select a follower its leader will have an orange glow.
Note these associated glowing figures aren’t selected, the glow is only used to indicate the leading/following relationship.
Unfollow a Figure
At any time you can specify that one or more figures should no longer follow a figure:
- Select one or more figures and choose Arrange > Follow > Unfollow from the main menu or via the right-click context menu.
Selecting Leaders and/or Followers
- Select either the leading figure or one of the following figures.
- Choose Arrange > Follow > Select Leader, or Arrange > Follow > Select Followers, or Arrange > Follow > Select Leader and Followers from the main menu.
Context Menu
If you right-click on figures to show the figure context menu a handy Follow submenu will be available to give access to common follow figure actions.
Toolbar Button
If you right-click on the toolbar and choose Customize Toolbar you can drag a Follow button onto your toolbar.
This button acts as a toggle based on the selected figures to easily follow or unfollow a leading figure.
Bundling Figures
Similar to the following figures described above, you can create a loose collection of figures but instead of following a single leading figure, they follow each other. Move any figure in the bundle and they all move, yet you can still resize and edit individual figures within the bundle.
So, how do you move a single item? You can temporarily toggle off the bundle (described below), reposition the figures within the bundle, then turn it back on.
Any figure on the idea space can be in a figure bundle including collection figures. However, figures within a collection are excluded since the collection itself manages the layout of its contained items.
Tip
Review the grouping, following, and bundling comparison.
Video ▶️
Watch a bundling figures demonstration video on our YouTube channel.
Bundling a Figure
- Select several figures.
- Choose Arrange > Bundle > Bundle from the main menu or via the right-click context menu.
- If any of the selected figures are already in a bundle then the unbundled figures will be added to the same bundle, else a new bundle will be created with all selected figures.
Note that if you select several figures in a mix of existing bundles then you can’t bundle them together, as a safety precaution. You would first need to unbundle those figures, then bundle them in a new bundle.
When you move any figure in the bundle, all figures in the bundle will also move. Yet those individual figures can still be independently edited, resized, selected, deleted, cut, copied, exported, printed, etc without impacting the others.
Adding More Bundled Figures
There are several ways to add more figures to an existing bundle.
- You can select a mix of existing bundled figures and figures you want to to add to the bundle and choose Arrange > Bundle > Bundle.
- You can right-click to temporarily disable the bundle, then copy/paste, duplicate, or ⌥drag an existing bundled figure and the new created figure will also be in the same bundle. You can then right-click to re-enable the bundle via the context menu.
Glow Colors for Bundled Figures
When you select any figure in a bundle the other figures in the bundle will have a yellow glow so you know they’re associated with each other.
Note these associated glowing figures aren’t selected, the glow is only used to indicate the bundle relationship.
Unbundle a Figure
If you want to remove one or more figures from the bundle then:
- Select one or more figures and choose Arrange > Bundle > Unbundle from the main menu or the right-click context menu.
Select Bundle
To select all the figures in a bundle:
- Select any figure in a bundle.
- Choose Arrange > Bundle > Select Bundle from the main menu.
Temporarily Disable Bundle
To temporarily disable a bundle:
- Select any figure in the bundle and choose Arrange > Bundle > Temporarily Disable Bundle or via the right-click context menu.
You can now freely reposition any of the figures in the bundle.
The bundle will be re-enabled automatically if you go to another idea space or close the project, or you can manually do this by toggling toff the Temporarily Disable Bundle menu item or via the right-click context menu.
Context Menu
If you right-click on figures to show the figure context menu a handy Bundle submenu will be available to give access to common follow bundle actions.
Toolbar Button
If you right-click on the toolbar and choose Customize Toolbar you can drag a Bundle button onto your toolbar.
This button acts as a toggle based on the selected figures to easily create or add figures to a bundle, or unbundle the selected items.
Linking Figures
Curio has several methods for linking figures together including jump actions, jump anchors, idea space link figures, curio:// links, and references.
Jump Actions
You can assign a jump action to a figure so that double-clicking that figure can navigate to a specific idea space or even a specific figure — even in another project!
The figure will also get a little jump image adornment so it’s clear that a jump action is associated with the item. You can use the Actions inspector to hide this adornment if you wish.
Set a Jump Action for a Figure via the Jump Popup
- Select the figure to which you wish to assign the jump action.
- Choose Format > Jump or press ⌘J to bring up the jump popup.
- The jump popup is based on the Quick Find popup which means:
- Start typing to find a figure’s text or idea space’s title via autocomplete then choose a result.
- Enter a query like
@georgeordue < 2wor#activethen choose a result. - If you’ve copied a figure or idea space from the same project you can simply paste into the jump popup and the item will appear in the results so you can select it.
- If you’ve copied a figure or idea space from a different project you can simply paste the
curio://link into the jump popup and click Set.
- After choosing a destination for the jump the popup will be dismissed and a jump action assigned to your figure.
Set a Jump Action for a Figure via the Clipboard
- Select your jump destination: either a target figure within an idea space or a target idea space within the Organizer.
- Choose Edit > Copy from the main menu.
- Select the figure(s) to which you wish to assign the jump action.
- Choose Edit > Paste As > Jump Action to set the jump action.
Opening a Jump Action
- Click on a figure’s jump action adornment.
- If the jump destination is within this project it will appear in the current view, if Option (⌥) is held when clicking it will open in the opposite split view.
- If the jump destination is in a different project, the jump will open in a separate window or tab (depending on your System Settings > Desktop & Dock tabs setting), if Option (⌥) is held when clicking it will open within the current window replacing the current project (reverse this).
Clear a Jump Action for a Figure
- Select the figure and choose Format > Jump or press ⌘J to bring up the jump popup then clear the current destination and press Set.
- Or, open the Actions inspector and click Restore Default.
Extract PDF Selection to Text Figure with Jump Action
You can extract a selection of text from a PDF figure and paste it on an idea space as a new text figure, complete with a jump action to the original selection in the PDF.
- Option-double-click a PDF figure on your idea space to begin PDF annotations.
- Select a region of text within the PDF.
- Choose Edit > Copy As > Jump Target.
- Elsewhere in the project choose Edit > Paste and a new text figure will appear containing the selected text from the PDF. A jump action to the original selection in the PDF figure will be automatically associated with the new figure. Clicking the figure’s jump adornment will jump to the idea space containing that PDF and highlight that selection of text within the PDF.
Wikilinks
A wikilink is a special extension of Markdown which looks like this [[Apple iMac]] when you’re editing but turns into a clickable link to an inner-project jump destination when rendered.
Insert a Wikilink to Existing Destination
- Edit a text figure.
- Type
[[and the Format > Jump (⌘J) popup will automatically appear allowing you to find and select a destination figure or idea space. - The jump popup is based on the Quick Find popup which means:
- Start typing to find a figure’s text or idea space’s title via autocomplete then choose a result.
- Enter a query like
@georgeordue < 2wor#activethen choose a result. - If you’ve copied a figure or idea space from the same project you can simply paste into the jump popup and the item will appear in the results so you can select it.
- If you’ve copied a figure or idea space from a different project you can simply paste the
curio://link into the jump popup and click Set.
- After choosing a destination for the jump the popup will be dismissed and the wikilink will be inserted into your text figure.
- Note that Markdown rendering will be automatically enabled for your figure if necessary.
The automatic jump popup when you type [[ can be disabled so you would have to press ⌘J to bring it up.
The automatic trailing bracket ] when you type a leading bracket [ can be disabled.
Alternative Title
Curio supports the [[title|alternate title]] wikilink syntax so if you don’t like the default title (which can be customized) you can give it an alternate which will be displayed when rendered.
Link Storage
You might wonder where Curio is storing the link to the jump destination, after all it’s not visible anywhere. When editing the link it is stored as a hidden rich text attribute across the wikilink. When rendered that attribute is turned into a standard rich text link attribute so you end up with a clickable link.
Insert a Wikilink to New Idea Space
For the wikilink you can enter an idea space title that doesn’t exist yet and it will be automatically created as a sibling of the current idea space the first time you click on it.
Via Typing
- Edit a text figure.
- Type
[[and the Format > Jump (⌘J) popup will automatically appear. - In the Jump popup, simply type a new title for your idea space and press Return or click the Set button. You don’t have to choose an existing destination.
- The title will be inserted into the wikilink brackets and the text cursor will be placed just after the wikilink.
- Continue editing your text if you’d like then press Escape when you’re done.
- The first time you click on the wikilink Curio will see if an idea space with that title already exists as a sibling of the current idea space. If not a new idea space with that title will be created as a sibling. The wikilink’s URL will then be refreshed to point to this idea space using its ID, which is more robust, and Curio will jump to that idea space.
Alternatively if you disable the automatic jump popup you can manually bring it up via ⌘J or simply type the new idea space title directly within the wikilink brackets.
Via Text Selection
- Edit a text figure.
- Select a range of text within the figure that you would like to turn into a wikilink.
- Type
[and you’ll see that the selected range gets left and right brackets on either side of the selection. Press[again to get the second bracket to enclose the selection with the[[wikilink]]syntax. - Press Return to skip past the wikilink.
- Continue editing your text if you’d like then press Escape when you’re done.
- The first time you click on the wikilink Curio will see if an idea space with that title already exists as a sibling of the current idea space. If not a new idea space with that title will be created as a sibling. The wikilink’s URL will then be refreshed to point to this idea space using its ID, which is more robust, and Curio will jump to that idea space.
This automatic selection bracketing can be disabled.
Instead you would manually enclose the text with leading [[ and trailing ]].
Pressing Return within a wikilink to skip past it can also be disabled.
Edit a Wikilink
- Edit the text figure containing the wikilink.
- Place the text cursor anywhere within the wikilink itself and choose Format > Jump or press ⌘J to bring up the jump popup.
- Use the jump popup to find and select a different destination.
If the text cursor is anywhere within the wikilink then pressing Return will skip past the end of the wikilink. This feature can be disabled.
Opening a Wikilink
- If editing, move the text cursor anywhere within the wikilink and press Enter (not Return) to open the wikilink.
- If not editing, make sure the figure is selected then click the wikilink to open it.
- If the jump destination is within this project it will appear in the current view, if Option (⌥) is held when clicking it will open in the opposite split view.
- If the jump destination is in a different project, the jump will open in a separate window or tab (depending on your System Settings > Desktop & Dock tabs setting), if Option (⌥) is held when clicking it will open within the current window replacing the current project (reverse this).
Pressing Enter within a wikilink to open it can be disabled.
Wikilink Limitations
Wikilinks in File-backed Markdown Text Figures
There are some key points to consider if you plan to use wikilink syntax within file-backed Markdown text figures.
Note this specifically applies to Markdown (.md) backing files not rich text files.
The Markdown file format is plain text which means Curio can’t store wikilink URL information in rich text attributes. This imposes limitations on what kinds of wikilinks Curio can dynamically reconstruct when it needs to render the Markdown.
-
✅ Wikilinks to sibling idea spaces will work. Curio will automatically try to find an idea space with the wikilink’s title as a sibling of the current idea space. If successful, it will dynamically construct a link to that idea space. If not, a new idea space with that title will be created as a sibling when the link is clicked.
-
❌ Wikilinks to other non-sibling idea spaces in the project or to figures in the project will not work, as Curio doesn’t have enough information to reconstruct the link.
-
⚠️ If syncing your file-backed Markdown files with Obsidian then keep in mind Obsidian does not allow the following characters in Markdown file titles:
# ^ [ ] |. This means if you’re creating a wikilink to an idea space you may not want to use those characters in the idea space’s title. For example, a wikilink like[[Curio is #1]]to an idea space with that title wouldn’t work in Obsidian because it doesn’t allow you to create a Markdown file named Curio is #1.md.
Markdown Jump Links
In contrast to a wikilink, which is a non-standard extension to the Markdown syntax, you can also insert a standard Markdown link for your jump links.
The format is a bit more verbose compared to wikilinks [title](link) where the link is a visible curio:// link, however it is standard Markdown.
Insert a Markdown Jump Link
- Edit a text figure, Markdown should be enabled if it isn’t already.
- Choose Format > Jump or press ⌘J to bring up the jump popup.
- The jump popup is based on the Quick Find popup which means:
- Start typing to find a figure’s text or idea space’s title via autocomplete then choose a result.
- Enter a query like
@georgeordue < 2wor#activethen choose a result. - If you’ve copied a figure or idea space from the same project you can simply paste into the jump popup and the item will appear in the results so you can select it.
- If you’ve copied a figure or idea space from a different project you can simply paste the
curio://link into the jump popup and click Set.
- After choosing a destination for the jump the popup will be dismissed and a Markdown link will be inserted into your text figure.
The wikilink is of the form [title](link).
If you don’t like the default title (which can be customized) you can easily change it by replacing the contents of the [title] portion.
Edit a Markdown Jump Link
- Edit the text figure containing the Markdown jump link.
- Place the text cursor anywhere within the Markdown link and choose Format > Jump or press ⌘J to bring up the jump popup.
- Use the jump popup to find a different destination.
Rich Text Jump Links
If you prefer rich text to Markdown then you can also insert standard rich text links to jump destinations.
Insert a Rich Text Jump Link
- Edit a text figure, Markdown should be disabled if it isn’t already.
- Choose Format > Jump or press ⌘J to bring up the jump popup.
- The jump popup is based on the Quick Find popup which means:
- Start typing to find a figure’s text or idea space’s title via autocomplete then choose a result.
- Enter a query like
@georgeordue < 2wor#activethen choose a result. - If you’ve copied a figure or idea space from the same project you can simply paste into the jump popup and the item will appear in the results so you can select it.
- If you’ve copied a figure or idea space from a different project you can simply paste the
curio://link into the jump popup and click Set.
- After choosing a destination for the jump the popup will be dismissed and a rich text link will be inserted into your text figure.
If you don’t like the default title (which can be customized) you can edit the link text.
Edit a Rich Text Jump Link
- Edit the text figure containing the rich text jump link.
- Place the text cursor anywhere within the link text and choose Format > Jump or press ⌘J to bring up the jump popup.
- Use the jump popup to find a different destination.
Backlinks
Once you’ve established a number of jumps to various destination figures or idea spaces you may wonder, given a destination, what items link to it? Backlinks are jumps from other items to a given item.
Viewing Backlinks
- Right-click on a figure or Organizer item.
- In the context menu that appears, the Backlinks submenu will list all originating source figures by their title and location within the project.
- Choose one of those backlinks and you will promptly jump to that figure within the project, if Option (⌥) is held when clicking it will open in the opposite split view.
Note these only list jumps within the same project, not from other projects, and won’t include links since those can be placed anywhere even outside of Curio.
Optional Backlink Adornment
Figures with backlinks can optionally show a link adornment if you’d like to make figures with backlinks more obvious. Then you can click on the link adornment to quickly access backlinks, in addition to the right-click context menu technique, if Option (⌥) is held when clicking it will open in the opposite split view. If a figure has references it’s already showing the link adornment so Curio will automatically show backlinks in that popup menu as well, regardless of this setting.
Renaming a Destination
If a jump destination figure or Organizer item is edited in a way that changes their link title then that change can propagate to all backlink figures that have inline links to that destination. However, the change will not be made if the inline link’s title has been modified by the user.
For example, if you have an idea space titled “Butternut” then rename it to “Peanut” then here’s what will happen to backlinked figures that have inline links to that idea space:
| Inline Link Type | Before Rename | After Rename |
|---|---|---|
| Wikilink | [[Butternut]] | [[Peanut]] |
| Same wikilink but with modified title | [[My Dog]] | [[My Dog]] |
| Same wikilink with alternate display title | [[Butternut|My Dog]] | [[Peanut|My Dog]] |
| Markdown link | [Butternut](curio://?i=87) | [Peanut](curio://?i=87) |
| Same Markdown link but with modified title | [My Dog](curio://?i=87) | [My Dog](curio://?i=87) |
| Rich text link | Butternut | Peanut |
| Same rich text link but with modified title | My Dog | My Dog |
Jump Anchors
As an alternative to assigning a figure a jump action, you can use a jump anchor to jump to different locations. A jump anchor is a small, unassuming icon you can place anywhere on an idea space. When double-clicked the user will jump to the destination location.
Add a Jump Anchor
- Select your jump destination: either a target figure within an idea space or a target idea space within the Organizer.
- Choose Edit > Copy from the main menu.
- Go to the idea space where you want to place the anchor.
- Choose Edit > Paste As > Jump Anchor from the main menu.
- Curio will create a jump anchor figure. You can click and drag this figure anywhere. You can also copy & paste it, duplicate it, or change its attributes in the Inspector.
Idea Space Link Figures
You can also create links between idea spaces even from different projects by adding an idea space link figure. When double-clicked the user will go to the destination idea space.
The new figure will display a preview of the represented idea space unless the represented idea space is the same as the idea space on which it was placed or is from a different Curio project. If the represented idea space is the same as the idea space on which it was placed, Curio will display a distinctive “you are here” icon. If the represented idea space is from a different Curio project, Curio will display a distinctive “external project” icon.
Add an Idea Space Link Figure
- Drag the idea space from the Organizer of a project window and drop it onto an idea space.
- A new idea space link figure will be created with a preview of the represented idea space.
- You can right-click on the resulting figure and choose “Show As Icon” then give the figure an appropriate title like “Click here to learn more”.
- The icon or preview image will automatically update as the destination idea space changes.
- When displayed as icon, the title automatically reflects the idea space’s title and dynamically updates if that title is changed. You are able to manually override the figure’s title with your own text if you wish and Curio won’t replace it. Later, if you’d like it to reflect that actual idea space title again, simply remove all text from the figure’s title and Curio will replace it.
Links
You can easily create links to figures or idea spaces within a Curio project for use outside of Curio, for example in a browser web page or another application.
These are of the form curio://.
If you have text selected within the selected text or PDF figure then the link will deep link to that selection. Similarly if you’re playing back a video or audio figure then the link will deep link to that start location.
Clicking the resulting link, whether it’s in Curio or another application, will tell Curio to jump to that project, that idea space, and that figure, then set the selection of that text figure or PDF figure, or start playing back the media at that location.
Relative Links
If the link is used within the same project then it’s a relative link and doesn’t include project information, as it’s not necessary.
When exporting text as PDF, rich text, or Markdown, local project links, specified via rich text link attributes or Markdown links or wikilinks, are converted into longer absolute links that include project information suitable for use outside of Curio.
Create a Link to an Idea Space or Figure
- Select an idea space in the Organizer or figure within an idea space. You can also select a range of text within a text figure or PDF figure, or start playing an video or audio figure, and the link will deep link to that selection or playback location.
- Choose Edit > Copy As > Link.
- Use it outside of Curio or even within Curio by selecting text and using the Format > Link menu (⌘K). If you use it within a text figure in the same project then the project path is removed automatically turning it into relative link so it will work even if the project is moved or renamed.
- Clicking the resulting link, whether it’s in Curio or another application, will tell Curio to jump to that project, that idea space, and that figure, then, if appropriate, set the selection of that text figure or PDF figure, or start playing back the media at that location.
Link Format
Here’s an example Curio link:
curio://Biology?p=WJzoFVMoS9iltl5LziCxeQ&f=6SbyZLC1Rl6AQIQx5qdPPA
- All Curio project links start with
curio://, which is our custom URL scheme. - Next, if this isn’t a relative link within the project, is the name of the project.
- Next, if this isn’t a relative link within the project, is a
p=variable with the project’s unique identifier (URL-safe base64 encoded) which is stored as acom.apple.metadata:kMDItemIdentifiermetadata extended Finder attribute on the project file. Using that identifier we can use Spotlight to find the project if it has been moved, renamed, or is now on another volume. Note this only works if Spotlight is indexing the volume containing the project file. If you duplicate a project then it will also have the same unique identifier. - Next there may be optional variables based on the type of link.
i=the unique identifier to a specific idea space (URL-safe base64 encoded).f=the unique identifier to a specific figure (URL-safe base64 encoded).n=the page number of a PDF figure.s=the starting selection range for text or time for an audio/video recording figure.e=the ending selection range for text or time for an audio/video recording figure.
These terms may change as Curio’s link capabilities evolve.
Old Link Format
Our link format from Curio 14 through Curio 27 included an encoded path to the original file:
curio://$Projects/Classes/Biology.curio?p=WJzoFVMoS9iltl5LziCxeQ&f=6SbyZLC1Rl6AQIQx5qdPPA
However, even though we used special smart variables to simplify the path, it wasn’t as robust as just using the project unique ID technique described above.
Resolving Links
If Curio is unable to find the project based on the supplied link information, it will ask you to locate it via a standard Open dialog, then remember that new location so future links to that project will work automatically.
Supporting Universal Links
In the future Apple may migrate custom URL schemes, like curio:// links to a new type of link created by Apple called a Universal Link, such as:
https://www.zengobi.com/curio/link/Biology?i=y_6ticqKTl6
Universal links are more secure than custom URL schemes as they are tied to a registered Internet domain, instead of a programmer simply claiming a scheme potentially overriding someone else’s claimed scheme.
While Apple will presumably support custom URL schemes indefinitely, so existing app links won’t break, we’ve taken these preemptive steps in case Apple starts encouraging developers to do so:
- On Apple’s developer portal, we’ve declared that our Curio app (with its
com.zengobi.curiobundle ID) supports universal links and our registered domain iszengobi.com. - We’ve added the https://www.zengobi.com/.well-known/apple-app-site-association file to our website declaring that Curio handles universal links of the form:
https://www.zengobi.com/curio/link/... - The Curio app itself already knows how to handle universal links of that form.
- On a user’s machine, based on the apps installed, macOS periodically queries and locally caches this site association information so it immediately knows to launch Curio directly when clicking on a universal link.
Apple hasn’t shifted macOS to universal links yet, as they have on iOS, but we’re ready if they do!
Hookmark Integration
By default the popular Hookmark utility creates hook:// links to the current Curio project itself, not to the selected content within the project.
However, if you want Hookmark to track curio:// deep links to a specific idea space or figure, or even to selected range of text within a text figure or PDF figure, then you have two options:
-
Enable Hookmark’s Curio AppleScript integration which will make Hookmark use Curio’s AppleScript interface to retrieve
curio://deep links for selected items. -
Or, use Curio’s Copy As > Link to place the deep link on the clipboard then use Hookmark’s Focus on Link in Clipboard.
Reference Links
Curio Professional customers can create cross references from Curio figures and Organizer items to other Curio figures, Organizer items, and even web sites using a sophisticated new feature we call references.
These reference connections can be of a specified type, such as a Rebuttal or Evidence, allowing you to create a number of typed connections between your Curio items, even if they’re scattered throughout a project or in different projects.
Compared to normal jumps or wikilinks and backlinks, a reference link is much more advanced since it includes the type of connection made between the two figures. Therefore you know why the items are connected.
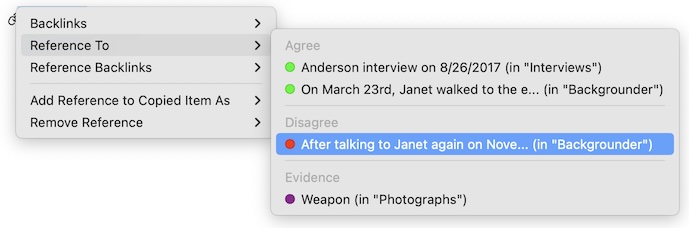
Sample Use Case
For example, say you’re using Curio to take notes on a research paper detailing a lab experiment. You can use references to associate your text figures detailing your experiment, to various image figures located elsewhere in the project, with a Experiment Snapshot reference type. They may also link to other notes which describe the results of prior experiments via Prior Data reference type.
Then, at any time, you can view a figure’s references, via the link adornment or context menu item. It lists all figures this figure refers to so you can jump to them with just a click.
If within the same project, you can even see all figures to point to it, thus are reference backlinks to this figure. (Note that a remote reference in a different project can’t see all the references that point to it.)
A single figure might have references to multiple figures such as two Source figures, three Rebuttal figures, and one Example figure. Likewise, a figure can have multiple figures that all point to it, such as a figure which is an Agree reference for some figures (thus a support for those statements), and Disagree reference for others (thus a counterargument).
Reference Type Scopes
Using the inspector shelf, click the Project tab and then use the new Reference Types inspector panel to see all the available reference types.
The Scope
There’s a popup at the top of this inspector panel where you can choose whether to view and modify:
- Bundled reference types that are included with Curio.
- Custom reference types for all projects.
- Custom reference types for a specific project.
When you first launch Curio you won’t have any project or personal types, so let’s begin by looking at the bundled types.
Bundled Reference Types
Click the popup at the top to show all the bundled types. The list underneath will reveal the global reference types available to all projects including Agree, Disagree, and Example, among many others. Each type is color coded for quick identification, such as green for Agree and red for Disagree.
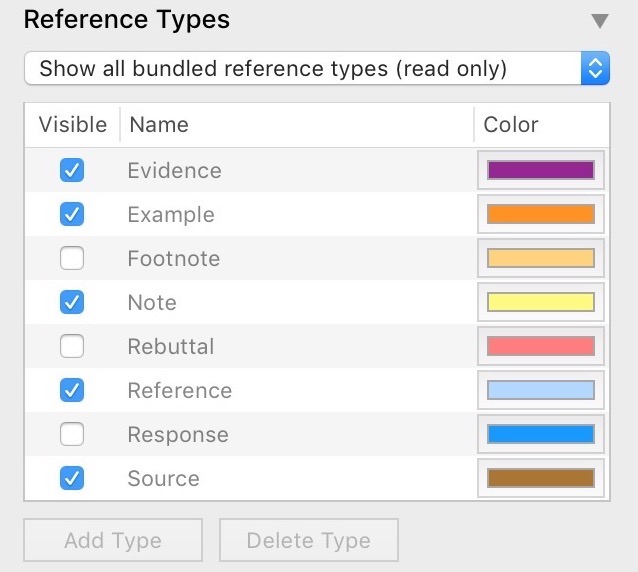
Editing
Bundled reference types are read-only, however, if there are types you don’t think you’ll ever use you can uncheck the visible checkbox and they won’t clutter your interface when creating references. They can be re-enabled at any time in the future if you change your mind.
Example
As an author of mystery novels, you might decide that you’ll never need the bundled Footnote, Rebuttal, and Response types so you uncheck them so they aren’t listed as choices when you make a reference association.
Custom Types for All Projects
At the top, switch the popup so you’re looking at the the custom types you’ve created and made available to all projects. This list is empty by default, of course, so you’ll need to add some types to get started.
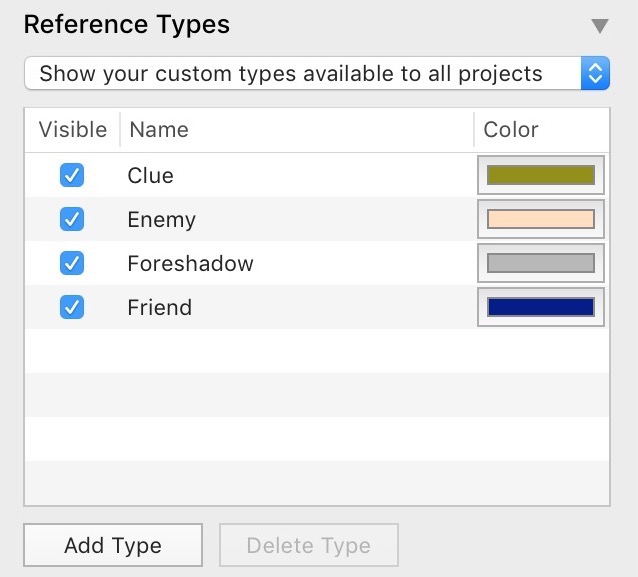
Example
Continuing the example above, let’s say you create a handful of custom global reference types that you’ll use as you brainstorm and organize your novels: Clue, Enemy, Foreshadow, and Friend. You can use these to quickly link notes together as you work on your latest mystery. These custom types will be available to all of your Curio projects.
Editing
As custom types you can edit these names and colors at any time. Uncheck a type if you no longer want it to be available for new references, or delete it via the Delete key or Delete Type button to remove it permanently.
Custom Types for This Project
And finally, switch the popup at the top so you can see the custom reference types you’ve created for this specific project.
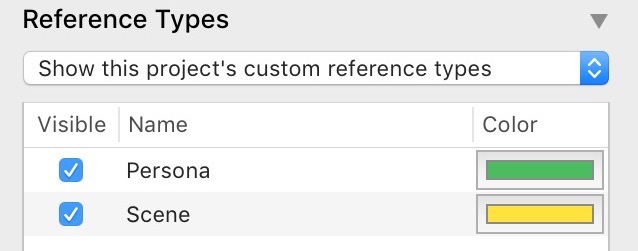
Example
To continue our earlier example, in this particular project you’re working on a novel that could use a couple of project-specific types, Persona and Scene, which you can use to help associate certain notes with specific notes and image figures which describe important themes.
Editing
As custom types you can edit these names and colors at any time. Uncheck a type if you no longer want it to be available for new references, or delete it via the Delete key or Delete Type button to remove it permanently.
Defining Reference Types
- Using the inspector shelf, click the Project tab and then use the new Reference Types inspector panel to see all the available reference types.
- At the top use the popup to specify whether you want to view and modify (a) bundled reference types that are included with Curio and available to all projects, (b) custom reference types for all projects, or (c) custom reference types for this project, specifically.
- Bundled reference types are read-only, however, if there are types you don’t think you’ll ever use you can uncheck the visible checkbox and they won’t clutter your interface when creating references.
- With custom types you can edit these names and colors at any time. Uncheck a type if you no longer want it to be available for new references, or delete it via the Delete key or Delete Type button to remove it permanently.
Adding a Reference
- Select and copy the figure or Organizer item you want to reference. This is the item you want to refer to.
- Next select one or more other figures where you want to add a new reference which points to that copied item. Right-click, and in the context menu that appears choose a reference type in the Add Reference to Copied Item As submenu to create your new reference.
- The reference connection has now been created, and a reference adornment will then appear beside both the source and destination figure, if within the same project.
Adding a Link Reference
- In your browser:
- Right-click on a link and choose Copy Link, which should also give Curio the title of the page.
- Or copy the link location itself (ex: www.zengobi.com/support).
- Next select one or more other figures where you want to add a new reference which points to that copied link. Right-click, and in the context menu that appears choose a reference type in the Add Link Reference As submenu to create your new reference.
Viewing an Item’s References
- If a figure either has references or is a reference (in the same project) then it will have a special references link adornment. Clicking it will list all references, grouped and color coded by reference type, and allow you to add or remove references.
- Alternatively, right-click on a figure or an Organizer item which either has references or is a reference and its context menu will contain a References submenu identical to the one displayed when clicking an adornment.
- From that menu you can select an item to instantly jump to it.
- If the jump destination is within this project it will appear in the current view, if Option (⌥) is held when clicking it will open in the opposite split view.
- If the jump destination is in a different project, the jump will open in a separate window or tab (depending on your System Settings > Desktop & Dock tabs setting), if Option (⌥) is held when clicking it will open within the current window replacing the current project (reverse this).
Removing a Reference
- Click on the references adornment or right-click and choose the References submenu.
- Within that menu you should see a Remove Reference option so you can select a reference to remove.
Search References
Once you’ve connected figures together via references Curio includes a number of ways to use those connections.
- You can use the Quick Find popup or Search shelf to find all figures with which have references of a specific type (
^agree), or even any reference type (^*). - You can also find all items that are references of a specific type (
=^agree) or any type (=^*). - When you use the export button on the search results screen, any references associated with a figure are included in the resulting rich text, Markdown, or CSV export.
- By default, references are included in CSV exports under named columns such as “Agree Reference” and “Disagree Reference”. As each figure’s row entry is exported, if the figure includes one or more references of that type then those jump URLs are exported in that column. The search results export button also has a new menu option, Export Resulting References as CSV, which can be used to export only figure reference information to a separate CSV file with reference named columns.
Synced Figure Instances
You can create synced copies of a figure and Curio will sync the text contents and all meta properties (checked state, percent complete, dates, tags, resources, priority, etc.) between the original figure and all instances.
If you want to sync an entire collection hierarchy instead of individual figures, see Synced Collection Instances.
Modify the original figure or any of the instances and those changes will be synced to all other figures.
This means you can mark one as completed, and all will be marked as completed. Change a date, and all reflect that same date change. Modify the text context, and all have the updated text.
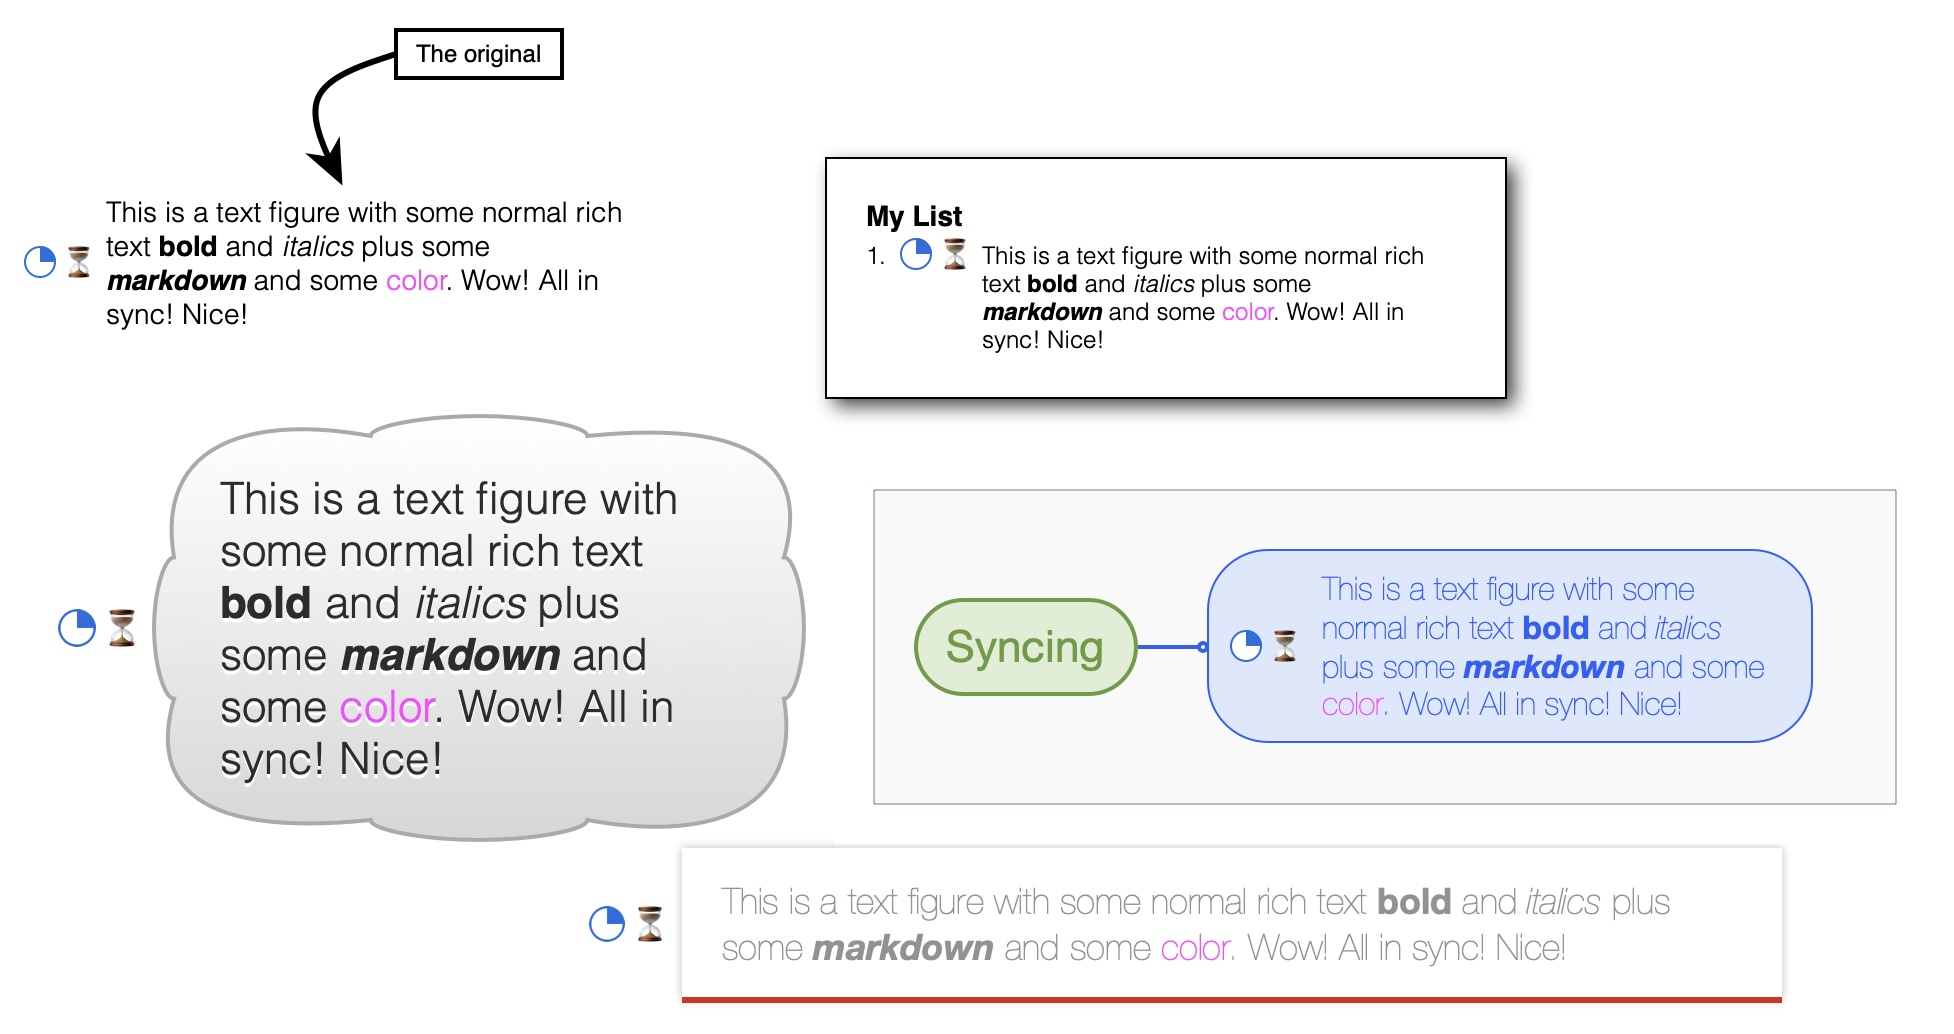
The screenshot above shows a rich text figure marked as 25% complete with an #GTD/OnHold tag with its associated hourglass icon, with its content and meta synced to multiple instances each styled independently.
The figure styling is not synced and can therefore be different between all the instances. The styling associated with a figure is applied to the shared text content right before rendering.
So you can have an instance of an original figure in a list, in a mind map, and in multiple other places on idea spaces throughout your project, each styled independently, but their content and meta are all synced.
This is a powerful feature. A few other applications have similar functionality where it may be called transclusion or embedded block references. Some only allow the original figure to be edited, thus all instances are read-only, while a select few allow any instances to be edited as well (like Curio).
Video ▶️
Watch a synced figure instances demonstration video on our YouTube channel.
Creating a Synced Figure Instance
- Select one or more figures and copy them.
- Choose Paste As > Synced Figure Instance(s).
Some additional notes:
- You can paste into a collection or onto an idea space.
- Repeat the paste as synced figure instance as often as you wish.
- Item order is preserved if you copy to/from collections. For example, if you copy items in a list then paste as synced figure instances into another list then the items will be in the same order.
- If you duplicate or do a normal copy/paste of an instance then the duplicate is an instance of the original figure (it is not an instance of an instance).
Jumping to Figure Instances
- Right-click on an original figure and choose an instance from the Synced Figure Instances submenu.
Given that the instances all have the same text content, the submenu is listed based on the containing idea space title, in alphabetically sorted order.
Jumping to the Original Figure
- Right-click on a figure instance and choose Jump To Original Figure.
Disconnecting from the Original Figure
- Right-click on a figure instance and choose Disconnect From Original Figure.
Deleting the Original Figure
If you attempt to delete a figure that has instances you will be warned that the syncs will no longer work.
The existing instances will maintain their text from the last sync. They will not be deleted as this could cause cascading issues if they are parent nodes in lists, etc.
Note that you aren’t warned if you delete one or more idea spaces or entire sections that happen to contain a figure within that is an original figure.
Glow Coloring
Instead of the normal blue selection glow color, you will see the following selection colors:
- Purple, for figures that have instances.
- Pink, for the instances themselves.
Note for performance reasons this is just a quick check. If you’ve deleted figures (or did an undo/redo of a figure deletion), or idea spaces, or sections that have original figures or instances then the quick check won’t be updated until project reload.
Limitations of Synced Figure Instances
Currently you cannot create synced figure instances of grouped figures, line figures, or collection figures like lists and mind maps.
Styling Synced Figure Instances
Styling synced figures figures is quite similar to the logic applied to styling file-backed rich text figures.
When you edit a figure those changes are then broadcast to each synced instance where the text contents are transformed to that figure’s styling using the following logic:
-
Same Font and Font Size Throughout
If the entire text content shares the same font and font size (and ignoring traits like bold and italics) then the figure’s font and font size are applied to those contents right before rendering. Subtext containing bold and italic attributes remain intact after applying the new font. -
Same Font Size Thoughout
Else, if the entire text content has a mix of fonts but they’re all the same font size, then the figure’s font size is applied to those contents right before rendering. So the mix of fonts remains intact but they all adjust in size. Bold and italic attributes also remain intact. -
Text Coloring
Curio will then apply the figure style’s foreground text coloring to the text, while making sure colored subtext remains intact.
If there’s a mix of fonts and sizes then Curio leaves the text formatting as-is as it doesn’t want to jeopardize your rich text formatting by applying a new syling erroneously.
Compared to File-Backed Text Figures
Curio has a similar feature called File-Backed Text Figures where an asset figure that points to a text file can be displayed as a text figure which you can read about below. With that feature, you can drag in an embedded or aliased text file then right-click on it and choose to show it as a text figure.
Since it’s an asset figure, all copies of that figure will share the same underlying file asset. So changing the text contents of any of the copies will modify the shared underlying text file, thus updating all the other copies of the asset figure. This sounds much like the synced figure instance feature, right?
However, there are some key differences:
- Synced figure instances store their text data within the figure data itself, not to a separate text file.
- Synced figure instances will also sync figure meta information. Checking off or changing the due date on one will change all the others. With file-backed text figures each figure is independent and only the content is synced since they share the same underlying asset file. (Technically, for historical reasons, tags are synced between file-backed text figures as they are associated with the asset, not the figure.)
- Synced figure instances allow you to easily jump between the original and instances of that original.
Cool Trick
You can actually create a synced figure instance of a file-backed text figure to get the best of both worlds: synced figure meta with synced text contents stored to a file which can be embedded within the projet or even aliased to a file possibly synced via a cloud service to your other Macs and devices.
Syncing Figures to Files
Curio Pro offers two approaches for connecting figure content with files:
| Approach | Works with | Relationship to the file |
|---|---|---|
| File-backed text figures | Text figures only | The file itself stores the figure’s content. This approach uniquely supports rich text files as well as Markdown and other text formats. |
| Figures with sync files | Text, list, mind map, stack, and table figures | Curio stores the figure’s content and synchronizes it with a separate file, either bidirectionally, export only, or import only. |
Use a file-backed text figure when you want an embedded or aliased text document itself to appear as an editable text figure. Use a sync file when the Curio figure should remain the primary item, especially for collection figures, metadata, or one-way synchronization.
A figure’s text has at most one source of truth outside the project, so a text figure can’t be file-backed and sync bidirectionally with a second file. A file-backed text figure can still have a sync file, but only as an export. That’s handy when the format you want to edit in isn’t the format you want to publish: you might edit a figure backed by a rich text file while exporting a Markdown copy to a cloud-synced folder for backup or for reading elsewhere.
File-Backed Text Figures
When you drag a text file into Curio it is normally displayed as an asset figure with simple icon. To get a read-only view of the contents of the file, you could press Spacebar or right-click and choose Show as Preview. To edit those contents, you have to double-click the asset figure to open the text file in its appropriate editing application.
A much more powerful feature is to right-click on the asset figure and choose Show As Text Figure. The result looks and acts like a normal Curio text figure, however instead of storing the text figure’s contents in the figure’s internal data, it is stored within the asset text file, thus a file-backed text figure.
- Drag any text file into Curio and insert it as a normal file asset figure, displayed with its icon.
- Right-click and choose Show As Text Figure.
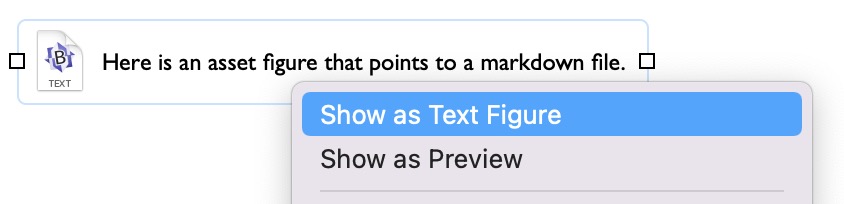
Important
If you don’t see a normal asset figure when you drag in a Markdown file then it may be that you’ve told Curio to always insert Markdown files as text figures directly, where Curio extracts the content of the file and inserts it into a new figure. To fix this click here to reset the alert then drag a Markdown figure into Curio again. This time make sure to choose “As File” from the alert that appears so it comes in as a normal embedded or aliased file. Now you should be able to right-click on it and choose Show as Text Figure.
Now the asset figure looks like a normal text figure:
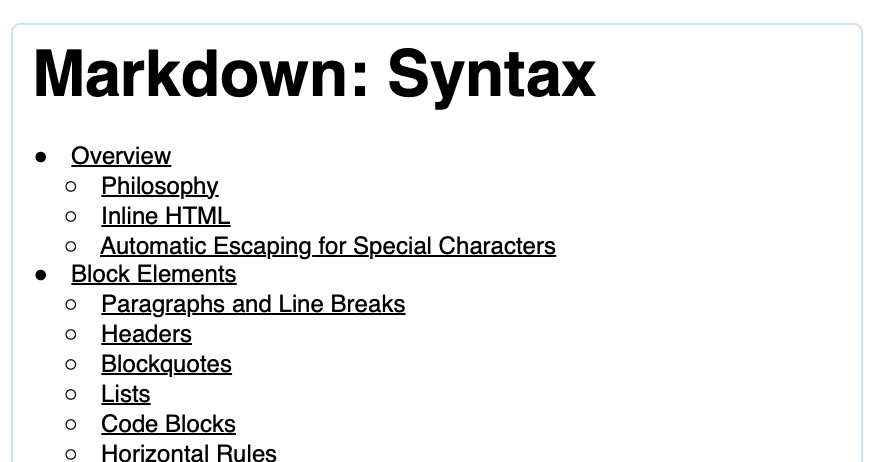
To change it back to a normal asset figure with icon:
- Right-click on the figure and choose Show As Icon.
Plain text, rich text, Markdown, and even simple HTML files are supported.
If the file has a markdown or md extension then Markdown rendering will automatically be enabled for the figure.
For rich text, if images are added to or removed from the figure then the file will automatically be converted between rtfd and rtf formats.
Video ▶️
Watch a file-backed text figures demonstration video on our YouTube channel.
Converting an Existing Text Figure
You don’t have to start with a file. Any text figure you’ve already written within Curio can be handed off to a file of its own:
- Right-click on the text figure and choose Convert To File-Backed Figure.
- Choose where the file should live and what format it should use.
Curio writes the figure’s current text into that new file and the figure becomes file-backed, reading and writing that file from then on. Since you chose where the file lives, Curio aliases it rather than embedding it within the project, so it’s yours to edit in any other app or sync via a cloud service.
The format you choose determines how the text is stored:
- Markdown stores the text as Markdown source and turns on Markdown rendering for the figure. If the figure was styled rich text then that styling is converted into Markdown, so bold text becomes
**bold**and so on. - Rich text (
rtforrtfd) keeps the figure’s styling as-is. A figure containing images or other attachments is stored asrtfd, sincertfcan’t hold them. - Plain text stores just the text, without styling.
Note
A figure that already has a sync file can’t be converted, since its text would then have two different sources outside the project. Disconnect the sync file first.
Disconnecting From the Backing File
To bring a file-backed text figure’s text back into the project:
- Right-click on the figure and choose Disconnect.
The file’s current contents move into the figure itself, which becomes an ordinary text figure again. An aliased file is left exactly where it is, untouched, so anything else pointing at it is unaffected. A file embedded within the project only existed to back this figure, so it is moved to the Trash.
Duplicates Share Contents
As with any asset figure, if you duplicate the figure, all copies share the same underlying asset file. So all copies of the figure will render and modify the contents of that same underlying file. This means editing any text figure will dynamically update all the others.
Copies of a file-backed text figure can all be styled independently. The styling associated with a figure is applied to the shared text content right before rendering.
Using File Aliases
This asset file can be an embedded file, or an aliased file that you Option-dragged into the idea space.
In the case of an alias, changing that text file outside of Curio will cause all the text figures that use that file to dynamically update themselves.
For instance, you could store the results of a lab experiment in a separate file elsewhere on your hard disk, and those results can be included in multiple text figures within your project.
This file, if located within a folder synced by a cloud service like iCloud or Dropbox, could even be edited on an iOS device which will then sync back to your Mac for rendering within Curio!
Tip
If focus is on Curio and you use another device to change an underlying cloud-synced text file, you may need to either go to another idea space and back or switch to another app and back to force Curio to refresh the idea space.
Important
Please note that some sync servers, like Synology Cloud Station servers, do not support aliases to files so any aliases created in Curio will break!
Opening Associated Text File
If you press and hold the Option key while double-clicking the text figure then the associated text file will be launched for editing.
Alternatively you can right-click on the text figure and choose to open the file, or open it with a specified editing application.
Styling File-Backed Text Figures
The contents of the text backing file are used as the contents of the text figure. So how is that text styled within Curio’s figures?
Plain Text Files
If the text file is a plain text file, then the figure’s style such as font, font size, text color, etc, is applied to that content.
Similarly Markdown files, which are simply plain text files, are styled the same way, then the Markdown-specific attributes, such as those for headings and list items, are then applied.
Duplicates of the figure, which share the same underlying text file, are handled by applying that figure’s text syling right before rendering. Thus the same plain text content can look vastly different in various figure instances as those instances apply their figure stylings to it.
Rich Text Files
Rich text files add a wrinkle since they already contain text stylings. Characters, words, and paragraphs may already have certain fonts, font sizes, traits such as bold and italics, foreground text colorings, and background highlight colorings. And there may be duplicates of a figure, each independely styled.
How are figure styles applied to those rich text contents?
Curio tries its best to adopt as much of each figure’s style to the figure without impacting the contained text using the following logic:
-
Same Font and Font Size Throughout
If the entire text content shares the same font and font size (and ignoring traits like bold and italics) then the figure’s font and font size are applied to those contents right before rendering. Subtext containing bold and italic attributes remain intact after applying the new font. -
Same Font Size Thoughout
Else, if the entire text content has a mix of fonts but they’re all the same font size, then the figure’s font size is applied to those contents right before rendering. So the mix of fonts remains intact but they all adjust in size. Bold and italic attributes also remain intact. -
Text Coloring
Curio will then apply the figure style’s foreground text coloring to the text, while making sure colored subtext remains intact.
If there’s a mix of fonts and sizes then Curio leaves the text formatting as-is as it doesn’t want to jeopardize your rich text formatting by applying a new syling erroneously.
Lastly, after editing a figure and making changes to the text, then the reverse happens: the original font, font size, and text coloring based on the original styling from the rich text file when it was first read in, is then re-applied to the text before saving, using the same logic as detailed above. That way the figure’s styling is independent of the styling saved to disk. However, if you’ve edited the figure and, using Curio’s text inspectors, modified the text so it’s a mix of fonts and sizes, then Curio will keep all of this intact when saving to disk, so it doesn’t jeopardize your applied formatting.
Overlay Icon or Adornment
File-backed text figures can optionally display a small overlay icon in the corner and/or a figure adornment indicating the type of backing file: a rich text page icon for rich text files or a text page icon for plain text and Markdown files.
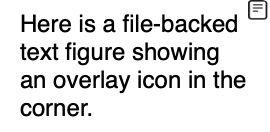
This is off by default. You can enable the overlay icon and/or the figure adornment.
Similar overlay icons and figure adornments can be displayed for sync file figures as well.
Compared to Synced Figure Instances
And you may also wonder if this is related to Curio’s Synced Figure Instances. With this feature you can copy a text figure then paste synced instances throughout your project.
Like asset figures displayed as text figures changing the contents of any copy will be reflected to the others throughout your project. However, there are some key differences:
- Synced figure instances store their text data within the figure data itself, not to a separate text file.
- Synced figure instances will also sync figure meta information. Checking off or changing the due date on one will change all the others. With file-backed text figures each figure is independent and only the content is synced since they share the same underlying asset file. (Technically, for historical reasons, tags are synced between file-backed text figures as they are associated with the asset, not the figure.)
- Synced figure instances allow you to easily jump between the original and instances of that original.
Cool Trick
You can actually create a synced figure instance of a file-backed text figure to get the best of both worlds: synced figure meta with synced text contents stored to a file which can be embedded within the projet or even aliased to a file possibly synced via a cloud service to your other Macs and devices.
Figures With Sync Files
Curio Pro can sync the contents of text figures and list, mind map, stack, and table collection figures to external files, either bidirectionally, export only, or import only.
That file can be located anywhere including within a cloud-synced folder like iCloud or Dropbox. For example, you can sync a Vacation to-do list figure with a Markdown list file located within a cloud-synced Obsidian vault allowing you to add, remove, modify, and rearrange items using Obsidian on iOS which are instantly reflected back to your Curio on macOS. Synced list items can include images and meta such as checkmarks and dates.
When Syncs Occur
When the project is loaded Curio will check for sync file modification and import the changes.
Then while the project is open, the figure and sync file are constantly monitored to export or import changes as appropriate. The file syncing occurs instantly when a change is detected either to the figure or the sync file. You don’t have to manually refresh the figure or force a save for the sync to occur.
Compared to File-Backed Text Figures
While this feature is somewhat similar to Curio’s file-backed text figures (FBTF) there are some key differences:
- Text Figures Only
- A FBTF is only for text figures.
- In contrast, a sync file can be established for more complex types like list and table collection figures.
- Text Content Only
- A FBTF only deals with the content of the text figure.
- In contrast, a sync file for figures includes not only the content of each contained item but also any meta information. For collection figures it also includes the arrangement of its contained figures.
- File Formats
- A FBTF can render many different text formats including
md,rtf, and any type of text file. - In contrast, a sync file can only sync with specific file formats.
- A FBTF can render many different text formats including
- Content Storage
- A FBTF doesn’t store any content of the underlying file’s data within Curio itself. It simply renders the contents of its backing file. If that file is deleted or missing then Curio can’t render anything.
- In contrast, an item with a sync file stores its data within Curio and syncs those contents with the sync file. If the sync file is lost or deleted then that’s okay.
- Bidirectional or One Way
- A FBTF is essentially bidirectional as the file itself is the backing store for the text figure.
- In contrast, a sync file can be bidirectional, export only, or import only. The latter two options are useful if you only want to export up-to-date contents to a remote file or if you only want an item within Curio to reflect the contents of the remote file but not change it.
- A FBTF can have a sync file too, but only as an export. Its backing file is already the source of truth for its text, so importing into it would quietly make the sync file the master of a file you own.
Overlay Icon or Adornment
Sync file figures displayed as text figures can optionally display a small overlay icon in the corner indicating the sync direction: an up arrow for export only, a down arrow for import only, or an up-down arrow for bidirectional.
You can also choose to enable the icon as an adorment alongside the sync file figure. Note this works for any type of figure, like the table synced to a Markdown file below, not just text figures.
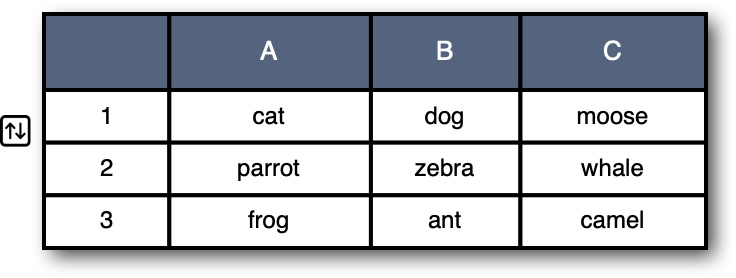
This is off by default. You can enable the overlay icon and/or the figure adornment.
Similar overlay icons and figure adornments can be displayed for file-backed figures as well.
Working with Sync Files
Connecting to a Sync File
- Option-drag a file into the idea space and Curio will ask if an appropriate figure should be created and sync with that file. For example, Option-drag in a Markdown file containing only a simple list and Curio will ask if a list, mind map, or stack collection figure should be created and begin syncing with that file.
- Or right-click on an existing figure and choose to sync it with a new or chosen file.
- If syncing with a new file then Curio creates the file, immediately exports the figure to that file, and then begins bidirectional sync.
- If you choose an existing file then Curio immediately imports that file, replacing the current contents of the figure, and then begins bidirectional sync.
- You can also specify whether the sync is bidirectional, export only, or import only.
- For a file-backed text figure the only option is export only, since its backing file is already the source of truth for its text.
The sync file location is stored internally as an alias to the file. This means when Curio isn’t running, you can move or rename the sync file and macOS should be able resolve the alias in most situations. If not, you can simply disconnect and re-connect manually.
Changing the Sync File Direction
- Right-click on a the figure with the sync file and choose Bidirectional, Export Only, or Import Only.
A file-backed text figure only offers Export Only.
Revealing the Sync File
- Right-click on a the figure with the sync file and choose Reveal in Finder.
Disconnecting the Sync File
- Right-click on a the figure with the sync file and choose Disconnect Sync File.
Finding Figures with Sync Files
- Use Quick Find or the Search shelf to search for
#meta/syncfileor choose Meta Misc > Has Sync File from the typing button menu.
Undoing a Sync Change
- Curio records a sync import as an undoable change so if you don’t like how a list was updated after a sync import you can just press ⌘Z to undo it.
Sync File Finder Attributes
When you connect a figure with a sync file that file is given two Finder attributes. These attributes are automatically removed if you disconnect the figure from the file.
The Curio Sync File Tag
The Curio Sync File Finder tag will be associated with the sync file.
With that tag in place you can find all Curio sync files on your machine:
- Via a Spotlight query:
tag:"Curio Sync File" - Or the Finder’s File > Find (⌘F):
Tags matches Curio Sync File - You can also save that query as a Finder Smart Search.
The Where From Attribute
The Where From Finder extended attribute will be set for that file to the curio://... link to the figure.
Then in the Finder you can select the file and choose File > Get Info (⌘I) and you will see that link in the More Info section. Right-click on the link and choose Open Link to open that Curio project and jump directly to the figure.
With that extended attribute in place you can find all Curio sync files on your machine:
- Via a Spotlight query:
wherefrom:curio:// - Or the Finder’s File > Find (⌘F):
Where From begins with curio:// - You can also save that query as a Finder Smart Search.
- If want to find all sync files that jump to a specific project you can look for
curio://projectnameinstead of justcurio://.
Sync File Formats
Curio syncs with file formats appropriate for the synced item:
- Text figures can sync with Markdown
mdfiles. - List, mind map, and stack collections can sync with lists in
mdfiles,opmlfiles, ortaskpaperfiles. - Table collections can sync with tables in
mdfiles,csvfiles, ortsvfiles.
Sync With Markdown Files
Markdown is the preferred format as it offers several advantages:
- Support for rich text attributes via Markdown syntax.
- Support for images, such as images within list figures, although images embedded within a rich text figure are not supported.
- Support for exporting and importing meta attributes such as checked/unchecked state, progress, start/due dates or duration, tags, priority, rating, resources, and figure notes.
As a tip, if you want to add a web link to the Markdown file, you can type the full weblink like https://zengobi.com, and Curio will automatically turn that into a web link figure and export as a Markdown link during the next sync.
Markdown Collection Files
If the Markdown file contains only a single collection then it can sync with a native collection figure:
- Markdown list ↔︎ Native list, mind map, or stack
Option-drag a.mdfile containing only a single Markdown list and it can become a native list figure, mind map figure, or stack figure (if the Markdown list has a single level of hierarchy). - Markdown table ↔︎ Native table
Option-drag a.mdfile containing only a single Markdown table and it can become a native table figure.
If the Markdown file contains multiple collections or a mix of collections then Curio falls back to creating a Markdown text figure.
When you release the dragged file Curio will ask what you want to create and if the sync should be bidirectional, import only, or export only.
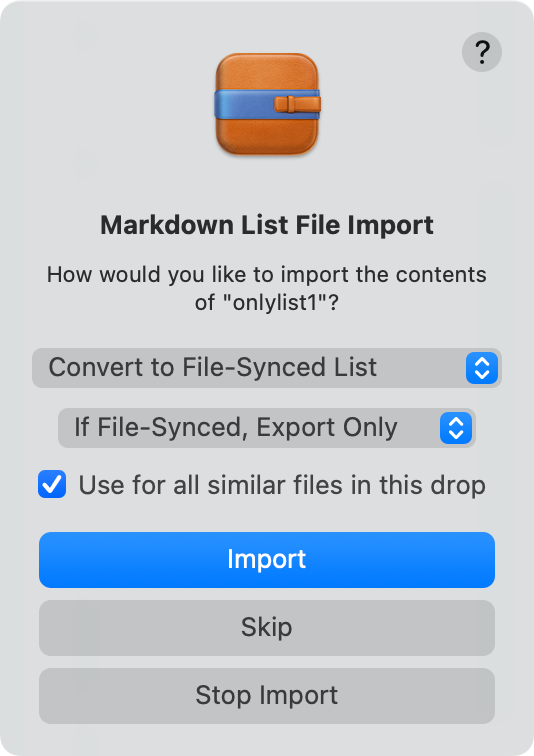
Markdown Meta
As mentioned, generated Markdown list items support meta attributes during export and import. Here are some additional notes:
Curio also appends an HTML comment such as <!--id:Ab3--> to each exported collection item. These short identifiers preserve the corresponding figure UUID when the file is imported again. External tools that generate or rewrite a synced collection should retain each item’s marker exactly. Omitting or stripping the markers causes Curio to treat the imported entries as new figures, so figure-only metadata, styling, and links can lose their identity even when the visible text is unchanged.
- If the item has a Markdown checkbox like [ ] or [x] and is 0 percent or 100% done then Curio does not output @progress(). (force always output)
- Relatedly if in-between 0 and 100 Curio will still output [ ] and not [-] as that’s not a widely used standard. (force output mixed)
- @duration is output only if due=start+duration, likewise if @duration is there then @due is ignored and instead due is computed via due=start+duration.
- Inline tags and resources, like
#vacation @george, remain as inline meta and the @tags() and @resources() meta attributes are used for non-inline tag and resource associations. - Importing a Markdown footnote into a figure’s note is normally disabled but can be enabled as detailed in meta import.
Also csv and tsv supports this meta syntax as well.
Markdown Images and Assets
During sync export, if Curio encounters an image or asset figure, an _Assets folder is created and the asset file is copied to that location.
- If the file name already exists, like
Image.jpg, then the new image will be give a new name in sequence, likeImage 2.jpg. - A
_Manifest.plistfile will be created within the_Assetsfolder to help map the internal asset ID with its exported name. - The generated Markdown for this item will include an encoded ID as detailed below.
Export Markdown Image Size Format
Standard Markdown doesn’t support image sizes but there are some popular Markdown syntax extensions that Curio can support via the Export Markdown Image Size Format setting:
| Setting | Title | Example |
Description |
|---|---|---|---|
| 0 | Resized export |  |
The default. No size specification, the exported image is resized to the image figure’s displayed size on the idea space. |
| 1 | Full size export |  |
No size specification, the full size image is exported. |
| 2 | Full size export but sized when rendered using Obsidian syntax |  |
The full size image is exported but sized when rendered using Obsidian width syntax. |
| 3 | Full size export but sized when rendered using Marked syntax |  |
The full size image is exported but sized when rendered using Marked width syntax. |
| 4 | Full size export but sized when rendered using DEVONthink syntax |  |
The full size image is exported but sized when rendered using DEVONthink width syntax. |
Markdown Identifiers
During the sync import process the item’s contents are completely recreated based on the sync file. For example, a synced list will be cleared and instantly re-filled based on the items within the sync file, as an undoable step.
Because of this Curio will sometimes encode a short identifier within a comment alongside an item. This is used for several purposes such as re-establishing jumps to figures and re-connecting a figure to its underlying image asset file.
For example, a checklist item with an image may look like this:
- [ ]  <!--id:GnR-->
That <!--id:GnR--> is the comment, which is not visible when rendered by Markdown renderers.
The GnR short ID is used internally to find the figure that previously existed within the list.
An ID is only exported if Curio deems it necessary to re-establish certain properties when reconstructing the contents during import.
Limitations
- Text figures within collections should be relatively simple in content. Text and rich Markdown syntax is fine, but they can’t include one or more Markdown lists, tables, code fences, images, etc, as Curio can’t encode/decode all of that into a form that could fit neatly into a single Markdown list item or Markdown table cell.
- During import the figure’s contents are completely recreated from the sync file. This means any overriding styles or attributes made to individual items unsupported by the sync file format will be lost.
- You shouldn’t point mutiple collections to the same underlying sync file due to the possible use of identifiers, detailed above, which can only work with a single owning collection figure.
Can you connect multiple text figures to the same sync file?
Technically yes, since there are no identifiers embedded within, however there’s a more robust way to do this. Instead of having multiple text figures simultaneously monitoring and syncing with the same file use Curio’s synced figures feature:
- Create a text figure that is synced with a file.
- Copy that figure.
- Edit > Paste As > Synced Figure Instance, as many times as you’d like, anywhere in the project. (As a tip: if you copy a synced instance you can simply paste to create another synced instance.)
That way you change any of the figures and they’ll sync with each other and the original figure will then sync back to the file. Likewise if you make changes in the file then the original figure will sync import those changes and then update all of the synced instances throughout your project. This means only one figure is monitoring and syncing with the file which is a more robust solution.
Figure Layers
Figure layers are incredibly useful with more complex idea spaces where you want to neatly separate figure content into separately manageable layers arranged in z-order.
Figures on top of Figures: On your idea space you have one or more figures, which are arranged and drawn in a back-to-front order. For example, with two rectangle figures, you can drag one and it will either drag behind or in front of the other. You can use the methods like the Arrange > Send to Back menu to rearrange this figure ordering.
Layers (of Figures) on top of Layers (of Figures): All of those figures currently exist on a single, default “foreground” layer on your idea space. With layers in Curio Professional, your idea space supports multiple independent layers, themselves arranged in a back-to-front order, each containing their own figures in back-to-front order.
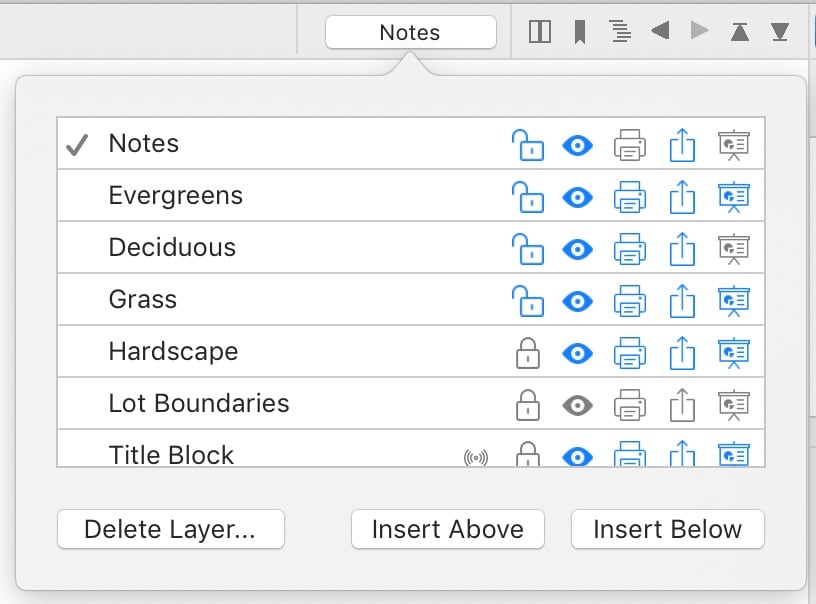
Example
For example, say you have a Background layer which is located under a Foreground layer. Curio will draw all the Background figures first in back-to-front order, then it will draw the Foreground figures in back-to-front order.
You could have a much more complex example, with a dozen layers that you use to encapsulate and order information. Layers can be visible or hidden, or perhaps visible in general but not printed or presented.
The Active Layer
A key aspect of layers is that only one layer at a time can be active. The active layer receives all mouse clicks and user interactions, essentially ignoring the other layers. This means you can select, create, delete, rearrange, and modify figures only on the active layer, which safeguards your other layers from accidental changes.
Selecting Figures Across Multiple Layers
While only one layer can be active at a time, you can opt in to selecting figures across several layers at once — handy when you want to move, duplicate, or delete a group of figures that spans layers.
- Click the Layers popover button located in the far-right area of the inspector bar.
- ⌘-click additional layer rows in the popover to include them in selection. Their rows stay highlighted to indicate they’re participating.
- ⌘-click a highlighted row again to remove it. A plain click on any row sets the active layer and collapses the selection back to just that one layer.
When more than one layer is selectable, the Layers button in the inspector bar shows a colored “+N” suffix (e.g. “Layer 3 +2”) to indicate extra layers are in play. A footer hint in the popover reflects the current state as well.
Once the popover is closed, canvas marquee selection and click hit-testing will include figures on any of the selectable layers, and operations like move, duplicate, cut, and delete will work across them. Copy and paste remain layer-agnostic — pasted figures land on the active layer regardless of which layers the originals came from. Hidden layers are never included. Locked layers can be added to the selectable set so their figures can be copied, though individual figures on those layers still can’t be moved or deleted.
Layers Popup Menu
Curio has a quick access popup menu to switch layers, just hold Option (⌥) and click the Layers button to see the layers menu instead of the popover.
Activating a Layer
- Click the Layers popover button located in the far-right area of the inspector bar. This button may be titled “Layer 1” as that’s the default layer in all idea spaces.
- In the popover that appears, click the layer to switch to. This will be the new active layer and you can now create and modify figures on that layer.
Renaming a Layer
- Click the Layers popover button located in the far-right area of the inspector bar.
- Double-click on a layer to rename it, type in the new name, then press Return.
- Note you cannot rename a layer inherited from a master template. It can only be renamed in the master itself. An icon alongside the layer name indicates if it is inherited from a master template.
Inserting Layers
- Click the Layers popover button located in the far-right area of the inspector bar.
- Click either the Insert Above or Insert Below button to insert a new layer above or below the current, active layer.
Deleting the Active Layer
- Click the Layers popover button located in the far-right area of the inspector bar.
- Click the Delete Layer button to delete the layer. Or, with a touchpad or Magic Mouse, you can swipe a layer’s entry in the list to delete it.
- Note you cannot delete a layer inherited from a master template. It can only be deleted in the master itself. An icon alongside the layer name indicates if it is inherited from a master template.
Rearranging Layers
- Click the Layers popover button located in the far-right area of the inspector bar.
- Drag-and-drop to rearrange the front-to-back ordering of your layers.
Locking Layers
- Click the Layers popover button located in the far-right area of the inspector bar.
- Click the lock icon to lock a layer so its figures cannot be edited.
Changing the Visibility of Layers
- Click the Layers popover button located in the far-right area of the inspector bar.
- Click the visible icon to hide or show a layer. Note hiding a layer acts as a override forcing the layer to be hidden when printing, exporting, or presenting regardless of the restrictions discussed below.
Like Photoshop, the Layer popover inspector supports ⌥-clicking the visibility icon for a layer to instantly hide all other layers. ⌥-click the same visibility icon again and all other layers will be made visible once again.
Using Restrictions to Control the Visibility of Layers
- Click the Layers popover button located in the far-right area of the inspector bar.
- Assuming the layer is normally visible, you can restrict a specific layer from printing, exporting, or presenting by toggling the appropriate icon.
Moving Figures Between Layers
- Right-click on selected figures and choose “Move Selected Figures and Switch” to move the figures to another layer and switch to that layer.
- If Option is held when right-cilcking then it will say “Move Selected Figures and Stay” so you stay on the current layer.
You can also move figures via cut and paste:
- Select and cut the figures in their current layer.
- Activate the layer where you wish to place them.
- Paste the figures into this layer. They will be pasted in the same location as they were in their original layer.
Master Templates and Layers
- Layers that are inherited from a master idea space template will show a special masters icon.
- This indicates the layer cannot be renamed or deleted, although you can still rearrange, hide, or change its permissions.
- Changes made to that layer in the master template will automatically be reflected in all idea spaces that inherit that master.
- If you change to a different master template (via Change Masters) then any layers inherited from the current master will be removed and the new master layers added.
- Any layers that were created just for this idea space, thus not inherited, will remain as-is.
- Any edited figures that came from the previous master that have identifiers (via the Info inspector) will be copied over to figures with the same identifiers in the new master. So if you changed a figure identified as title from the old master then its content will be moved to a figure from the new master with the same identifier.
Text Styles
Text styles let you reuse and update text formatting across your project, similar to figure styles but focused on text content. Text styles are stored with the project and can be applied to any text you edit in Curio.
Curio supports two types of text styles:
- Paragraph styles apply to the entire paragraph (alignment, spacing, font, color, and other paragraph-level attributes).
- Character styles apply to a selected range inside a paragraph (font, color, underline, etc.).
When both are used the rendering precedence is:
figure defaults → paragraph style → character style → local overrides
Local formatting tweaks are treated as overrides, so you can customize individual paragraphs or ranges without losing their style association.
Apply a Paragraph or Character Style
- Edit a text figure or select one or more text figures on an idea space.
- Use the Paragraph Style or Character Style popup in the Figure Shape popover, or choose a style from the Format > Paragraph Styles or Format > Character Styles submenu.
- Choose a style name, or choose None to clear the style.
Paragraph styles apply to the current paragraph(s) while character styles apply to the current selection or typing attributes.
Paragraph styles are listed in order of descending font size, so titles and headings are listed first then body styles then small styles like captions and footnotes. If styles are the same size then they are listed alphabetically. Character styles are listed alphabetically.
Tip
Since the Format > Paragraph Styles or Format > Character Styles submenu items are in the main menu you can create keyboard shortcuts to your favorite styles using System Settings > Keyboard > Shortcuts > App Shortcuts. A handy tutorial can be found here.
Bundled Headings
The bundled heading paragraph styles use the following attributes:
| Attribute | Heading 1 | Heading 2 | Heading 3 | Heading 4 | Heading 5 | Heading 6 |
|---|---|---|---|---|---|---|
| Font face | HelveticaNeue-Medium | HelveticaNeue-Medium | HelveticaNeue-Medium | HelveticaNeue-Medium | HelveticaNeue-Medium | HelveticaNeue-MediumItalic |
| Font family | Helvetica Neue | Helvetica Neue | Helvetica Neue | Helvetica Neue | Helvetica Neue | Helvetica Neue |
| Italic | No | No | No | No | No | Yes |
| Color | #000000 | #000000 | #000000 | #000000 | #000000 | #000000 |
| Line height multiple | 1.2 | 1.3 | 1.3 | 1.3 | 1.3 | 1.3 |
| Font size | 22 | 18 | 15 | 14 | 13 | 12 |
| Paragraph spacing before | 20 | 18 | 14 | 12 | 10 | 10 |
| Paragraph spacing after | 12 | 10 | 8 | 6 | 6 | 6 |
Default Paragraph Style
When you press Return in a text figure, Curio normally continues with the same style as the current paragraph style.
However, you can use Set as Default Paragraph Style in the Paragraph Style More Options button menu (⋯) to set the current paragraph style as the default. With this set, if the current paragraph has a paragraph style applied, like Heading 1, then pressing Return at the end will automatically select the default style, like Body, for the next paragraph. You can disable this behavior if you’d like.
Create a New Paragraph or Character Style
- Select the text that represents the formatting you want to capture, or place the insertion point and set the typing attributes.
- Click the More Options button (⋯) next to the Paragraph Style or Character Style popup.
- Choose “New Paragraph Style…” or “New Character Style…” and enter a name.
Curio will create the style based on your selection if possible. If there’s no text, Curio uses the current typing attributes or the figure’s default text attributes as a fallback.
Update a Style From a Selection
If you modify styled text, Curio detects local overrides. When overrides exist the Update button becomes enabled.
- Select text that uses the style you want to update.
- Click the Update button next to the Paragraph Style or Character Style popup.
For a paragraph style, Curio takes the formatting at the insertion point or start of the selection, applies it to the entire current paragraph, then updates the style definition and refreshes other text using that style. Character style updates use the selected text. Local overrides elsewhere are preserved.
Clear Overrides
- Select the styled text with overrides.
- Click the More Options button (⋯) next to the Paragraph Style or Character Style popup.
- Choose “Clear Override”.
This reverts the selection back to the style’s definition.
Rename or Delete a Style
- Click the More Options button (⋯) next to the Paragraph Style or Character Style popup.
- Choose “Rename Style…” or “Delete Style…”.
Renaming changes only the style name. Deleting removes the style association but does not change the rendered text.
Import or Export Global Text Styles
You can share styles between projects using the Global Text Styles file stored in your personal repository.
- Click the More Options button (⋯) next to the Paragraph Style or Character Style popup.
- Choose one of the export options (Export Selected… or Export All…) or choose “Import … From Global Text Styles”.
Note
Text styles are saved with the project in a Text Styles.plist file. If a project doesn’t have one yet, Curio seeds it from your personal repository (if present) or from the bundled default styles when the project is saved.
Limitations (Currently Stored Attributes)
Paragraph and character styles currently store the following attributes. Other attributes are treated as local overrides and will not be updated when the style changes.
Paragraph styles: paragraph alignment, line spacing, paragraph spacing, paragraph spacing before, first line head indent, head indent, tail indent, line height multiple, minimum line height, maximum line height, hyphenation factor, default tab interval, and all character style attributes.
Character styles: font, text color, background color, underline style, underline color, strikethrough style, strikethrough color, kern, baseline offset, shadow, obliqueness, expansion, ligatures, stroke width, stroke color.
Paragraph styles currently do not store tab stops. Character styles do not store gradient text colors.
Master Markdown Styles
Markdown rendering can reference these text styles by name. In your project’s master Markdown style file you can map Markdown tokens to text styles using paragraph-style: or character-style:.
# = paragraph-style: Heading 1
*** = character-style: Strong
Figure Styles
As mentioned earlier, a figure style defines the look of the figure including properties such as color, border, font, and shading. You can apply a style to a new or existing figure.
Curio organizes figure styles based on the type of figure including:
- Basic Figure
- Document Icon (an asset figure displayed as icon)
- Image (an asset figure displayed as preview) with distinctions made for PDF Image and Equation subtypes
- URL (displayed as preview)
- Line
- List
- Mind Map
- Table
- Index Card
- Pinboard
- Album
- Stack
You can easily create new figures styles containing all of its display attributes.
Styles with Sizes
When you save certain types of figure styles, sizing information will automatically be saved as well. These figure types include images, albums, index cards, pinboards, stacks, and tables.
For image figures, Curio will then apply the style’s size if you save the style as a default for image figures (Format > Save as Default Image Style) and then drag in a new image, or if you apply a style to an existing image figure that you haven’t sized yet.
For the collection figures (albums, index cards, pinboards, stacks, and tables) these sizes be used when you create a new collection using that style, or if you apply a style to a collection that doesn’t have any content in it yet.
Styles with Captions
If captions are enabled for a figure when a style is created then the style will include that caption state and applying that style to figure will enable captions automatically.
However, by default if a style doesn’t include caption information then apply that style to a figure with existing captions will not hide those captions, although they can be hidden if you wish.
Create a New Figure Style
- Select a figure in an idea space.
- Configure the attributes how you want them.
- Right-click on the figure then choose “Save As FigureType Style” where FigureType will be replaced by the type of figure that is selected such as “Basic Figure” or “Line” or “Mind Map”.
- In the dialog that appears give the style a name and press the Save button.
Apply a Style to a Selected Figure
- Click on the Style inspector button or right-click on the figure and choose “Apply Style” to bring up the Style Gallery for that type of figure.
- The style popup menu will only display the named figure styles appropriate for the selected figure. For example, if you have selected an image figure, then only the image styles will be displayed.
Curio will also show the bundled, personal, and master styles in handy submenus under the Format menu, based on the selected figures or the idea space itself if no figures are selected.
Create a Brand New Non-Collection Figure Based on an Existing Style
- Click the Figures button on the toolbar.
- The Gallery containing basic text figure styles and all non-collection stencils will appear.
- Choose a style then click the Choose button. You may also simply double-click the style.
- Some boilerplate text will automatically be added to your new text figure so you can see the effects of the style more easily.
Create a Brand New Collection Figure Based on an Existing Style
- Click the appropriate collection button on the toolbar. For instance, click the List, Mind Map, Table, or Index Card toolbar button.
- The Gallery for that collection figure will appear.
- Choose a style then click the Choose button. You may also simply double-click the style.
Creating Figures via Gallery Drag
- Click the Insert toolbar button or appropriate collection toolbar button to bring up a gallery.
- Drag-and-drop an item from the gallery to your idea space to create a new item.
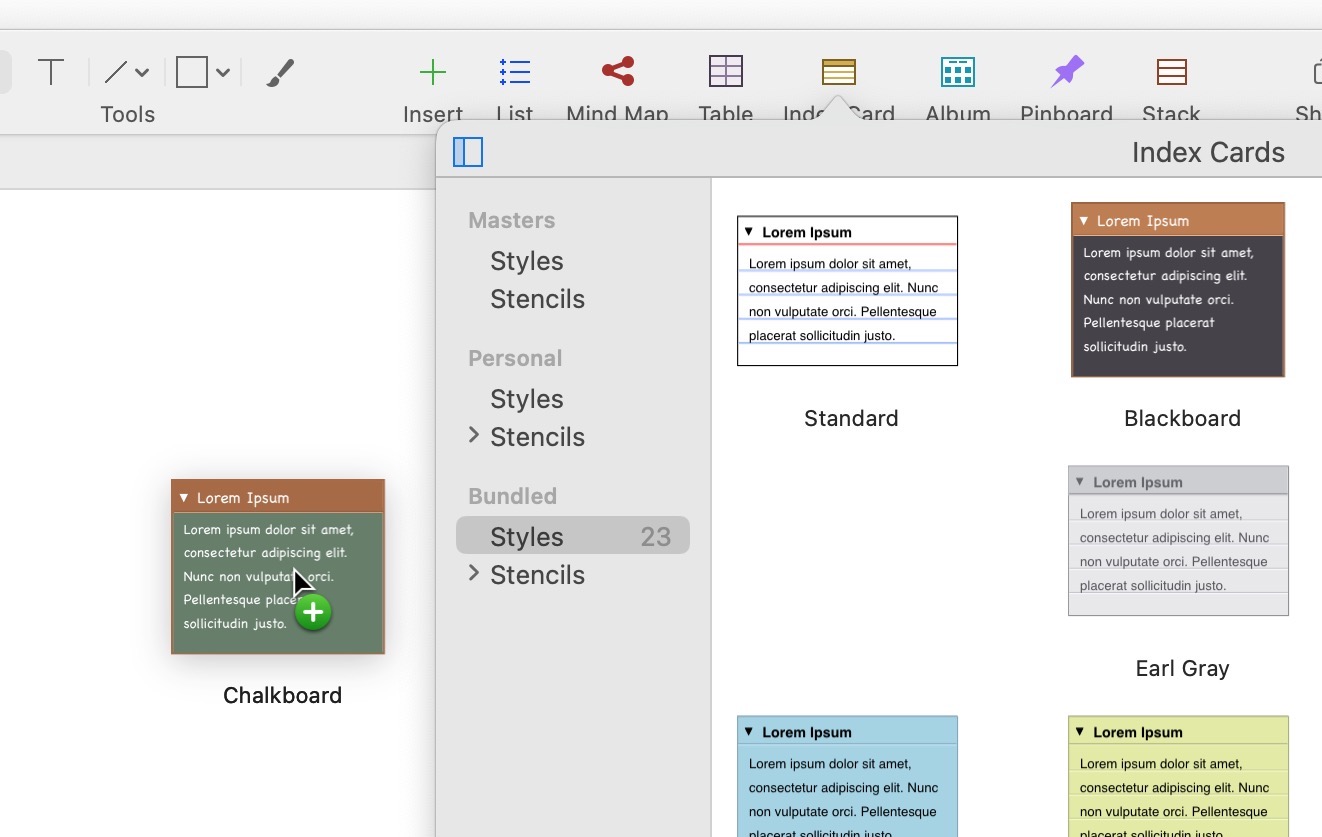
Detaching a Gallery
- Click the Insert toolbar button or appropriate collection toolbar button to bring up a gallery.
- Drag the gallery popover to create a free-floating gallery that you can drag-and-drop from to create new items. You can even drag the Insert popover itself to turn it into a free-floating chooser.
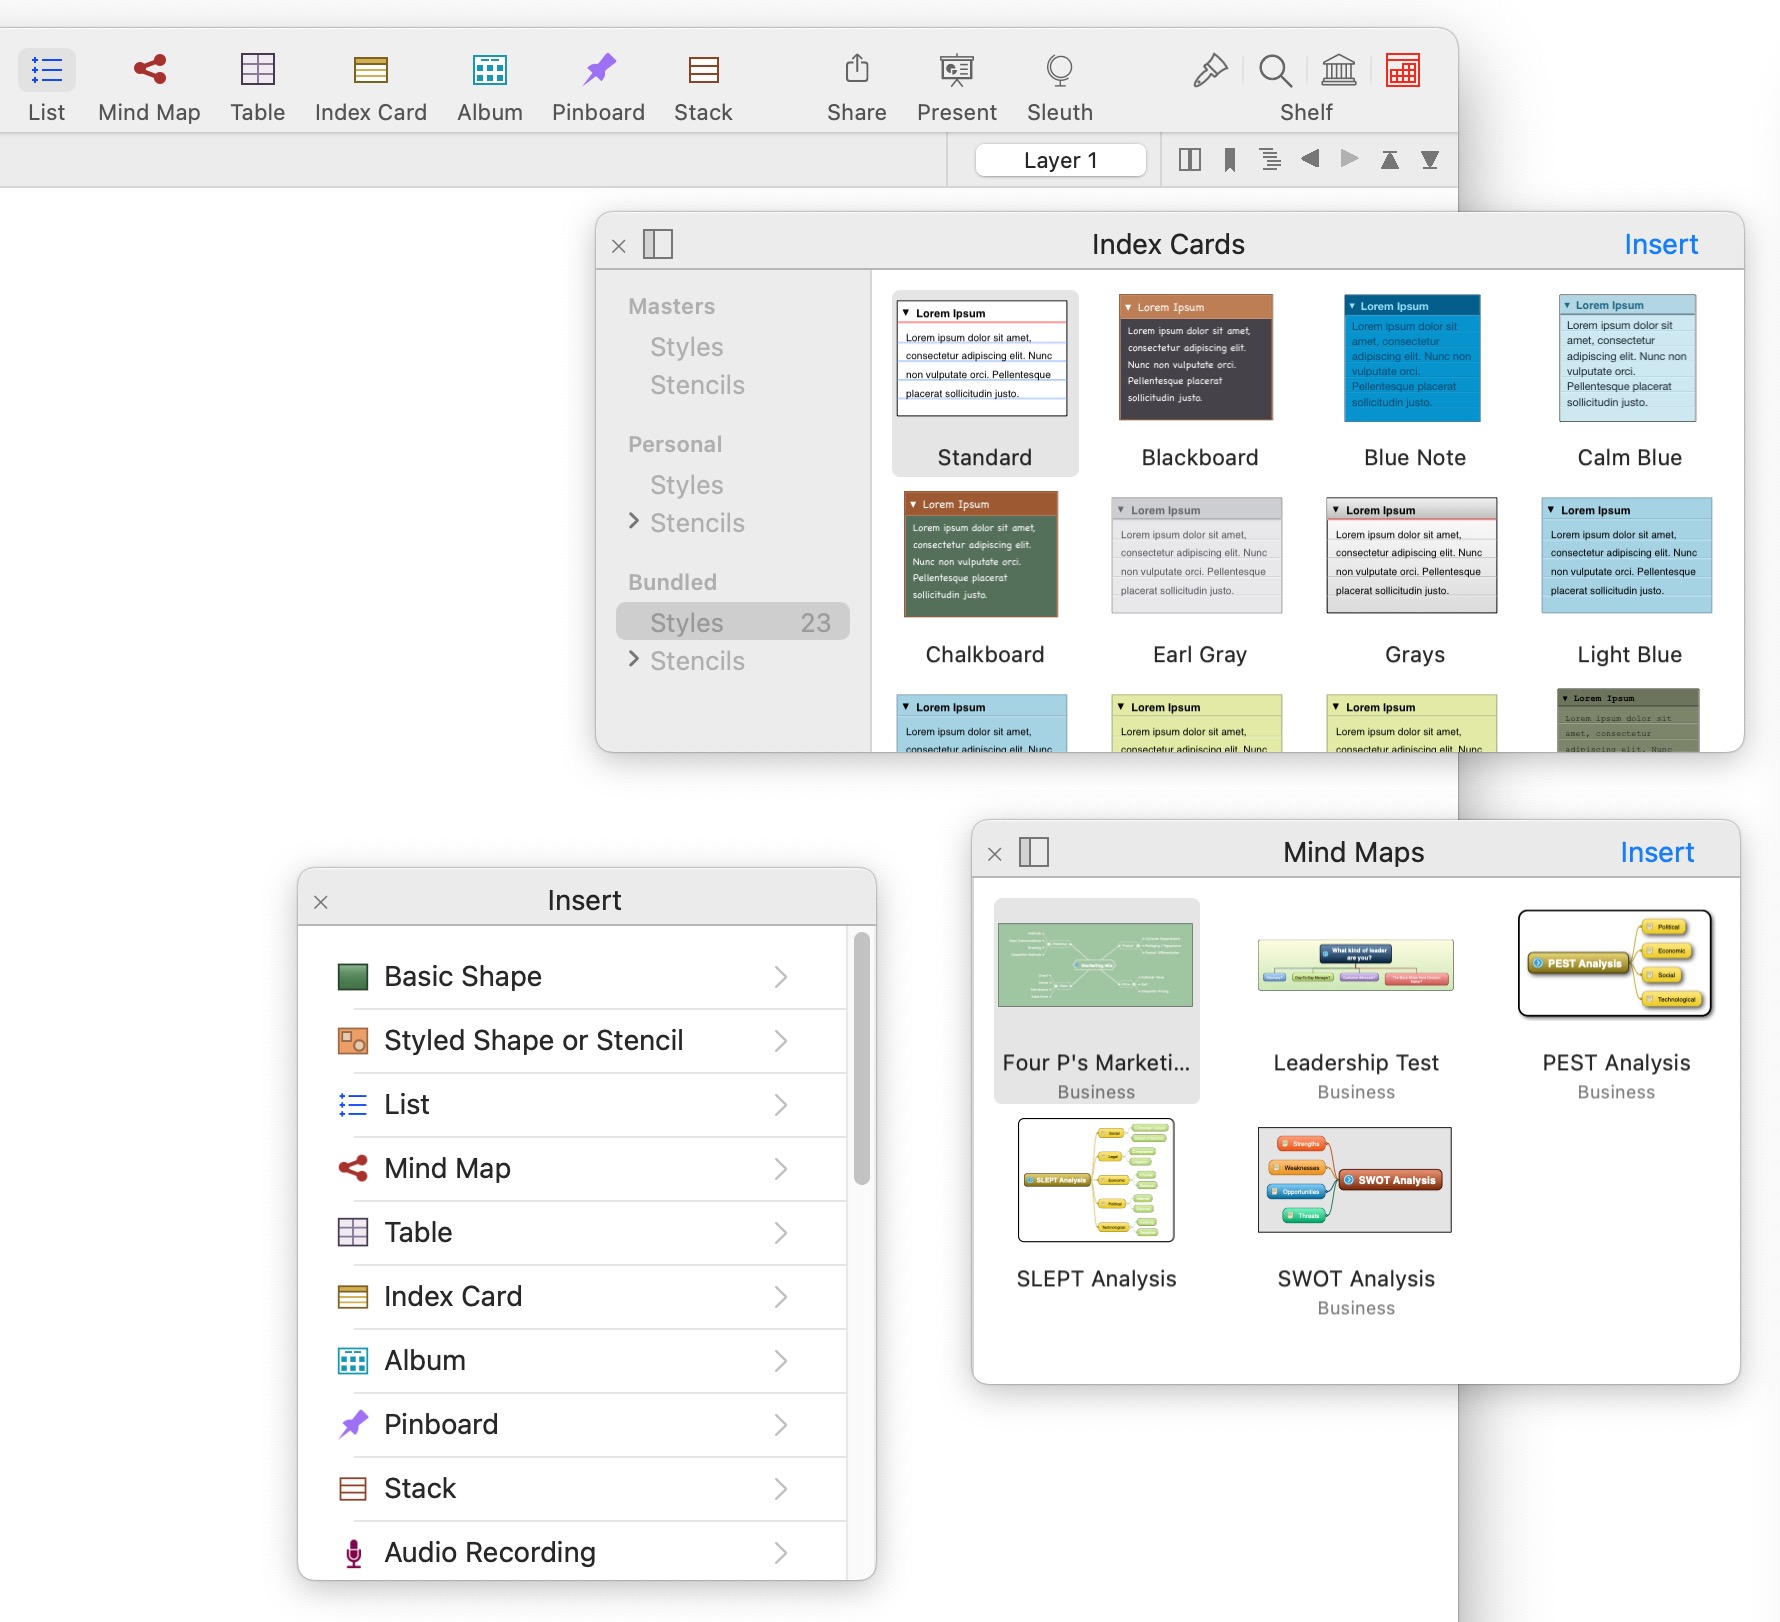
Managing Figure Styles with the Gallery
- Within the Idea Space Style Gallery you can perform a number of operations to better manage your idea space styles.
- Copy a style simply by drag-and-dropping it into your Personal collection.
- Delete a Personal style by selecting the style and pressing the Delete key.
- Share a Personal style by right-clicking on the style and choosing Send to Friend or Send to Zengobi.
Default Figure Style
You can change the default look for several types of figures. For instance, you want all new text figures to be 10 point Times or new web link figures should be 14 point Helvetica with a curved, bordered, and gradient-shaded outline.
Default styles can be overridden for each of the following figure types independently:
- Text
- Each of the various geometric shapes including rectangle, rounded rectangle, triangle, circle, trapezoid, speech, cylinder, house, etc, available from the Drawing Tools popup or the Basic Shapes gallery.
- Lines
- Mind map relationship lines
- Document Icon - any asset figure displayed as an icon
- Images and asset figures displayed as preview with distinctions made for PDF Image and Equation subtypes
- URL figures displayed as preview
- Video
- Audio
- Groups
- Lists
- Mind maps
- Tables
- Index Cards
- Pinboards
- Albums
- Stacks
All asset figures displayed as icons share the same “Document Attributes included in the stye include text attributes, border shape, color, thickness, and pattern, fill color and style, interior margin, opacity value, corners value, the visibility of shadows, to-do checkboxes, and ratings, and icon size.
Note if you’re using Curio Professional then if a master figure is selected when following the steps below then you are defining a default master style for the current project (since masters are local to the project) instead of a global default.
Asset Figure Default Stylings
Normally all asset figures displayed in icon mode share the same default “Document Icon” styling, so they all look similar. This styling can be overridden via the Format > Set Default Style For Document Icon Figure menu item.
Similarly normally all images or asset figures displayed as previews share the same “Image Figure” styling, with “PDF Image” and “Equation” as the only exceptions. This styling can be overridden via the Format > Set Default Style For Image Figure menu item.
If you switch back and forth between icon and preview, via right-click Show As Icon or Show As Preview, the appropriate default styling will automatically be applied.
You can set the default state for whether a file dragged into Curio shows as icon or preview via the Format > Default Figure Settings submenu.
Asset Figure Default Stylings For Specific Extensions
You can also set default stylings for specific file extensions for preview and/or icon display modes using advanced settings. For example, a specific default styling for PNG files dragged in and displayed as icons or previews.
Save a New Default Style for a Figure Type
- Select a figure of the appropriate type in an idea space.
- Change its look using the inspector, or apply an existing personal or bundled figure style from a Style popup. This is an important point as you can simply change the attributes directly without using a saved style if you don’t want to.
- Choose Format > Save as Default Style for Figure from the main menu.
- Any new figures of the given type will be created using the default style you set.
List and Mind Map Styles
Hierarchical collections, like lists and mind maps, store a style per hierarchical level.
For a walkthrough of customizing colors and shapes at each mind map level, saving a personal style, and making it the default for new mind maps, see Creating Custom Mind Map Styles.
This is important because when defining your own styles you need to make sure you style at least one figure for each hierarchical level, then save the collection style.
- Create the list or mind map collection.
- Quickly create a hierarchical series of child nodes: a child under the first, then a child under that child, then a child under that child, etc.
- Go as far as you’d like but perhaps 5 or 6 levels should do it.
- Style the child at each level the way you’d like it: border shape, color, and fill; text font, color, size; attributes like bold, italics, etc.
- Once you finish your 5 or 6 levels select the collection figure itself.
- Choose Format > Save as Default Style for Figure from the main menu.
Table Styles
Similarly tables store styles for each type of table cell, like a body cell vs a header cell, so you need to make sure you’ve defined a style to each type before saving your table style.
- Create a table.
- Show color or row headers and footers as you wish.
- Select each type of node and use the table inspector to set the style for that type of cell.
- Once you finish select the collection figure itself.
- Choose Format > Save as Default Style for Figure from the main menu.
Restore the Factory Default Style for a Figure Type
- Select a figure of the appropriate type in an idea space.
- If you’ve overridden its default styling then the Format > Restore Default Style for Figure menu will be available.
- Choose that menu item and the styling override will be removed from your settings and factory default styling for that figure type will be restored.
- Any new figures of the given type will be created using the factory default styling, and that factory styling is applied to the currently selected figure, as well.
Apply the Default Format for a Figure Type
- Select one or more unlocked figures on the idea space.
- Choose Format > Apply Default Style for Figure from the main menu.
- The appropriate default styling (whether that be the factory default or a user-overridden default) will be applied to all selected figures.
Figure Stencils
Curio users can easily create new figure stencils that define not only the look of the figure but can also contain placeholder or boilerplate text or figure items. Since a stencil is a copy of the original figure used to create the stencil then sizing information is also included.
Recall that a simple figure stencil is one that includes a single figure. Even a single collection figure such as a mind map which can in turn contain multiple figures within it is considered a single figure.
On the other hand a complex figure stencil is a stencil made up of multiple top-level figures. A perfect example is a landscaping stencil where flowers, shrubs, and trees are represented by individual figures, images, or grouped figures. Those figures aren’t contained within a collection, they exist directly on the idea space.
Create a New Simple Figure Stencil
- Select a single figure or a single collection figure in an idea space which you would like to copy as a stencil.
- Right-click on the figure then choose “Save As Stencil”.
- In the dialog that appears give the stencil a name and press the Save button.
Create a New Complex Figure Stencil
- In an idea space, carefully arrange all the figures you would like to have in the resulting stencil. The stencil will be stored and displayed with the figures in these exact positions. So, in the landscaping example described above, you might place the flowers on one area of the idea space, trees in another, and shrubs in another.
- Select one or more figures from the idea space.
- Right-click and choose “Save As Complex Stencil”.
- In the dialog that appears give the stencil a name and press the Save button.
Create a New Complex Figure Stencil Using All Figures in an Idea Space
- If you want to grab all of the figures in an idea space, carefully position them as described above then right-click on the idea space in the Organizer then choose “Save Contents As Figure Stencils”.
- In the dialog that appears give the stencil a name and press the Save button.
Inserting a Stencil
- Click the Insert toolbar button and choose either Styled Shape or Stencil, for general figure stencils, or for collection-specific stencil click on that collection type like List or Mind Map and you will find those stencils within that gallery. More information below in the “Using the Stencils Gallery Window” topic.
- Drag and drop stencils from the Stencils Library shelf, which is discussed in detail below.
- Use the Insert main menu menu where you will find submenus for Bundled Stencil, Personal Stencil, and Master Stencil. Then choose the stencil to insert.
Using the Stencils Gallery Window
- You can easily manage your stencils from within the Gallery window (accessible via Insert toolbar button, then click the appropriate gallery you wish to see, like the List gallery) you can perform a number of operations to better manage your figure stencils.
- Create personal stencil tags by right-clicking in the Personal area in the repositories list on the left and choosing “Add Tag”. These tags are unique to the figure stencils repository and won’t conflict with tags created for idea spaces in the templates repository, for example. These tags are available to all types of stencils including collection stencils (lists, mind maps, etc.) and other simple and complex stencils.
- Organize your personal stencils by drag-and-dropping them into different tags. A template can be associated with more than one tag. So, a template can be in your “Favorites” and “Work” tagged collections.
- You can also associate or disassociate a personal stencil with a tag by right-clicking on the template and choosing a tag in the menu that appears.
- Rename a personal stencil tag by double-clicking it and entering a new name.
- Delete a personal stencil tag by selecting it and pressing the Delete key.
- Copy a stencil from another repository simply by drag-and-dropping it into your personal collection.
- Edit a personal stencil by right-clicking on the stencil and choosing Edit Stencil.
- When editing a personal stencil in its repository project you can drag it to that project’s Archive section to hide it away so it no longer appears in the gallery.
- Delete a personal stencil by selecting the template and pressing the Delete key.
- Share a personal stencil by right-clicking on the template and choosing Send to Friend or Send to Zengobi.
Using the Stencils Library Shelf
- The Stencils library shelf perfect for power users of stencils, where you can easily drag-and-drop stencils from the shelf to your idea space. Read more in the Stencil library section below.
Instant Document Templates
You can insert new documents of any type from within an idea space using document templates. This comes in handy when you want to quickly expand upon some ideas in a new TextEdit document or perform some advanced drawing in a new Photoshop document.
Create a New Instant Document in an Idea Space
- Choose the document you wish to create from the Insert > Instant Document submenu.
- A copy of the chosen template document is automatically embedded in your project and added to the current idea space. Simply double-click the document to launch it in its native application.
Add Custom Entries to the Instant Document Menu
- You first need to create a document that you wish to use as a template. Launch the appropriate application, such as Photoshop or Word, then create a new document and save it anywhere on your hard disk. The name of this file will be used as the template name later in step #3. Alternatively, if there’s an existing document you wish to use as a template then you can skip this step.
- Choose Insert > Instant Document > Add File as Instant Document from the main menu.
- In the Open dialog, locate and select the document you wish to add as a template and click the Add button.
- A copy of the document you selected is created in your Home directory’s
~/Library/Application Support/Curio/Version XX/Repository/External Document Templatesfolder. The document’s name is also added to the document templates submenu. - You can create multiple template documents of the same type, but make sure they have descriptive names so you can tell them apart in the document templates submenu.
Remove Custom Entries from the Instant Document Menu
- Choose Insert > Instant Document > Remove Instant Document from the main menu, and then choose the template to remove and click Remove.