Curio 11.0 Release Notes
Release Date
January 18, 2017
Requirements
Curio 11 runs on macOS Yosemite (10.10), El Capitan (10.11), or Sierra (10.12).
Feature Availability
Features only available in certain editions will be listed with colored tags like or .
Important Notice To Upgraders
- ⚠ Curio 11 has a brand new file format!
Once a project is converted to Curio 11 it cannot be opened with earlier Curio versions!
What's New?
Features
Curio Editions
- ⚠ Curio 11 has a brand new file format!
Once a project is converted to Curio 11 it cannot be opened with earlier Curio versions!
After a long hiatus, Curio editions are back so you can purchase based on the features you need:
- Curio's amazing freeform, place anything anywhere idea spaces
- Rich text figures with support for bundled and personal figure styles
- Embedded and aliased images, PDF's, files, multimedia, Mail messages, web links, and live WebViews
- Mind map, list, table, index card, album, pinboard, and stack collections
- Flowcharting shapes for idea graphs and diagrams, plus straight, curved, and orthogonal sticky lines
- Integrated audio and video recording, plus screen capture support
- Searchable meta: checkmarks, percent complete, start/due/duration & automatic date calculations, tags, priorities, ratings, resources, notes, actions
- Export as text, image, PDF, HTML, CSV, OPML, and numerous mind map formats
- Idea space templates, figure stencils, and the Stencils shelf
- Brushes and pens for freeform sketching with pressure-sensitive graphics tablet support
- Sync tasks to Calendar & Reminders, plus PDF mirror for a constantly updated export of your project
- Evernote integration so you can search for and drag in notes from within Curio
- Sleuth and the new Sleuth shelf, for one-click Internet research and inspiration
- Spread PDF, to instantly spread the pages of a PDF across multiple idea spaces
- Organizer sections, to help manage larger projects with independent divisions
- Master styles, stencils, and idea space templates, for dynamic updates throughout a project
- Status shelf, for easy cross-project task tracking at a glance
- Presentation mode with transitions, for quick sharing to a group
- Project password, automatic project backup, external project library
- External repository support, for sharing styles, stencils, and templates with colleagues
In these release notes, Features only available in certain editions will be listed with colored tags like or .
One App = Four Products
Technically there is only a single build of Curio.
On first launch it begins as a full-featured trial of Curio Professional — that is, all features and functionality are fully enabled.
Professional + Standard + Core
During the trial period, or even after the trial expires, you can purchase a Professional, Standard, or Core license key. After entering it into Curio's license dialog, the functionality within Curio's interface will change to reflect that edition's appropriate features.
So, for example, if you decide you only need Standard's functionality, then you can purchase a Standard license key and, once entered into the license dialog, the interface will refresh so Pro's extra features are removed.
You can always purchase a crossgrade license to upgrade your functionality, if you wish. Perhaps at a later time you decide you need Pro's features after all. Just purchase and enter a Standard-to-Pro crossgrade license and the interface will refresh to provide those additional features.
The best part is there's no need to download and install a different product or juggle different apps in your Applications folder. It's one app and you simply enable the features you need.
+ Reader, Too!
 As described below, once a trial expires, Curio will enter into a simplified Reader mode for read-only browsing, printing, presenting, and exporting of Curio project files and contents.
At any time you can still purchase and enter a Professional, Standard, or Core license key and the interface will refresh itself to enable the appropriate functionality.
Trial Improvements and Reader Mode
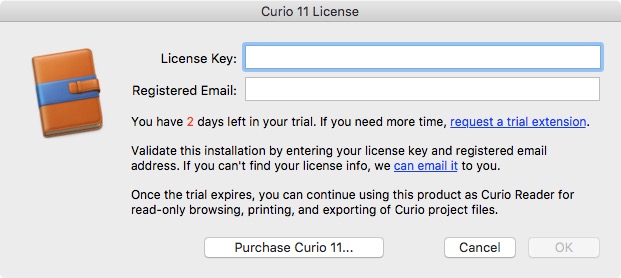 Curio's license dialog has been updated to reflect remaining days left if a trial is active.
The trialer is also now able to request a trial extension if they haven't already.
Curio's license dialog has been updated to reflect remaining days left if a trial is active.
The trialer is also now able to request a trial extension if they haven't already.
Reader Mode
Once a trial expires, Curio will enter into Reader mode, essentially turning into our old Curio Reader product.
In this mode the user can continue using the product for read-only browsing, printing, presenting, and exporting of Curio project files and contents. The toolbar and interface will change to reflect this simplified functionality. In fact, this integrated Reader functionality makes it easy to share projects with friends and colleagues.
At any time you can still purchase and enter a Professional, Standard, or Core license key and the interface will refresh itself to enable the appropriate functionality.
Full Alias Support
A key side benefit of this new Reader mode is related to the fact that the Curio app available from the Zengobi website is not sandboxed.
Previously, the sandboxing restrictions imposed on the old Curio Reader sold from the Mac App Store would not allow resolving aliases found within Curio projects since sandboxed apps can't resolve aliases created by different apps. This meant that, while Curio Reader handled embedded assets just fine, any aliased assets would appear broken.
Since the new Curio is not sandboxed, its Reader mode is able to fully support aliases.
Forced Reader Mode
If you rename the Curio application to "Curio Reader" then the following will happen:
- It will launch immediately into Reader mode.
- No indicators will appear in the top-right corner of the window.
- No trial mode will begin.
- No license dialog will be available.
Essentially it forces the product into a traditional Curio Reader app, without the ability to morph between different editions via license key.
New Welcome Project and Documentation
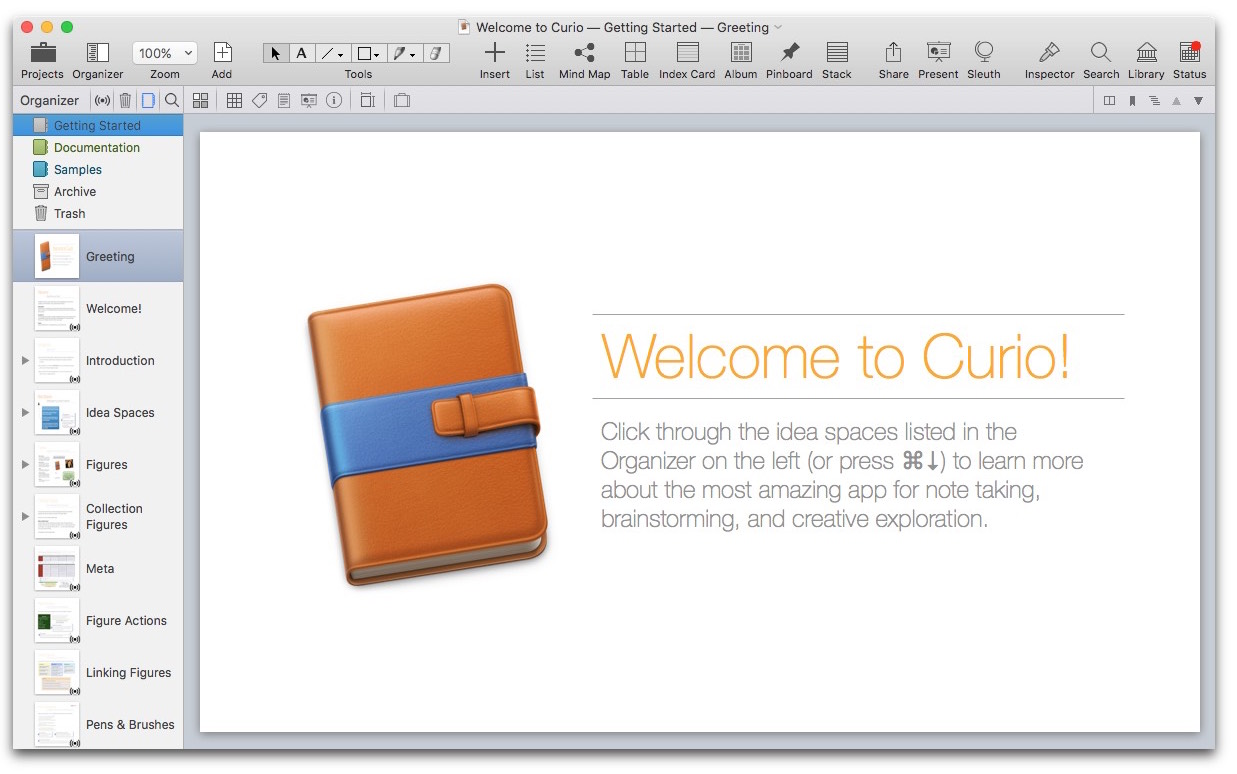
Instead of the old Getting Started project, Curio now includes a bundled Welcome to Curio project!
Here's what you'll find inside:
Getting Started
The first included section is titled Getting Started and serves as the new guided tour to Curio's major features. New styling and rewritten content make it much better intro than the old Getting Started project. Plus more interactivity so you can try described features right there within the idea space.
Documentation
The Curio documentation is now distributed not as a separate PDF file, but as a new Documentation section within the Welcome to Curio project.
This is fantastic for several reasons:
- No quickly-outdated screenshots as we can discuss features next to the feature itself within the UI.
- We can take advantage of Curio's integrated layout features.
- The Search shelf can be used to search the Documentation section only or the whole project if you'd like to find examples from the Getting Started section, as well.
- Eventually we can add some live WebView content that links to videos and other information on the Zengobi website.
- When discussing a feature with a customer we can email them curio:// links to specific areas of the documentation so they can zip right to an area for additional study.
For those that would prefer a PDF, you can always export the section as PDF to read it on your iPad or other device.
Samples
A new section titled Samples contains several idea spaces that demonstrate what can be created using Curio. This is in lieu of the old static screenshots we used to have on the website. Now you can actually work with the samples within Curio to see how they were created.
Master Styles
Background
Previously, in Curio, you've been able to create your own idea space and figure styles. After using the inspectors to customize the look of an idea space or figure, you simply right-click on the item and choose Save as Style.
These styles are saved to your personal repository on your hard disk. To apply one of these styles, you can right-click on an item and choose Apply Style or simply use the style shelf inspector and click on a style. In addition to personal styles you have access to bundled styles and, thanks to Curio's custom repository support, even other shared repositories set up by your company or school.
You can change the look of an item then re-save the style to your personal repository, even with the same name. However, while new items you create will have that new look, changing a personal style doesn't change the appearance of existing items, in this project or other projects, which adopted that style.
Master Styles
That changes with master styles.
A master style is one that is private to your project and, if the master style is updated, then those changes are immediately broadcast and applied to all idea spaces or figures that adopt that style. A master style can be created from scratch or from an existing style found in a personal, bundled, or external repository.
ℹ If you're familiar with Pages, Word, or even css then master styles are identical to the style support you see in those apps, where you can change a style, say for "Heading 1", and throughout your document all "Heading 1" text items are updated to reflect the new style.
 A sample workflow:
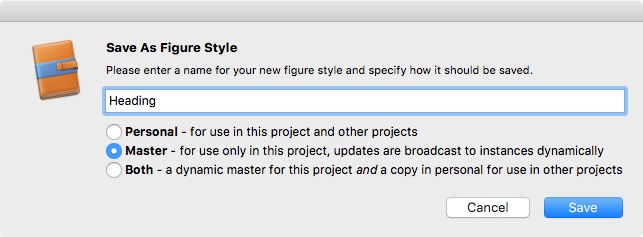
- Create a text figure that you'll use for a heading on an idea space and use the inspector to style it the way you wish with appropriate colorings, fonts, etc.
- Right-click on the figure and save the style as a master style named "Heading".
- Use the "Heading" style with other text figure instances scattered on idea spaces throughout your project.
- If you want to change its look, click on an instance, change any properties you wish using the inspector such as font size and text color, then click the Update button in the Styles inspector:

Or, if you wish, you can right-click on the instance and choose update style from its context menu: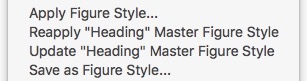
Notice in the right-click menu you can also choose to reapply the style if you didn't mean to change its look. - Instantly the style change is broadcast and applied to all figures that adopted that style.
Using the Inspector Shelf
The Style inspector now includes a Masters option in the repository popup so you can see the styles available in that pseudo-repository.
Read more about all the inspector shelf enhancements below.
Using the Galleries
Within the various idea space and figure galleries — via the Add or Insert button, of the Apply Style menu, or Style inspector bar button — you'll find a new Masters pseudo-repository there which contains all applicable master styles (and stencils/templates).
Read more about all the gallery enhancements below.
Master Stencils
Background
Similar to the history of styles described above, Curio has long supported figure stencils. A figure stencil is one or more figures that you'd like to use repeatedly within a project or in several projects. A stencil can be a simple stencil, containing just a single figure or collection figure, or a complex stencil which consists of multiple figures. Examples, include a complex stencil consisting of landscaping objects, like bushes, trees, and flowers, or a mind map stencil, with certain placeholder items representing a brainstorming workflow.
Stencils can be found in bundled or external repositories, but any that you create will be stored in your personal repository. However, while you can edit a personal stencil, changes aren't broadcast to instances of the stencil used in the current project or other projects which use that stencil.
Master Stencils
That changes with master stencils.
A master stencil is one that is private to your project and, if the master stencil is updated, then those changes are immediately broadcast and applied to instances of the stencil.
ℹ If you're familiar with the app Sketch then master stencils are similar to that app's symbol support, where you can change a symbol, say for an elaborate UI component, and throughout your document all instances of that component are updated to reflect the new changes.
 A sample workflow:
- Create a text figure that you'll use as a note figure with a special flag adornment, coloring, font, freeform size, and placeholder text.
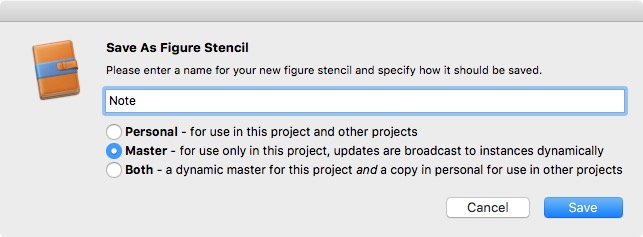
- Right-click on the figure and save the stencil as a master stencil named "Note".
- Using the Stencils shelf or the Insert > Styled Shape or Stencil gallery, insert that Note stencil onto idea spaces throughout your project.
- Edit the stencil either by right-clicking on an instance of the stencil on the idea space, or on the stencil itself in the Stencils shelf or insert gallery, or by finding the stencil in the new Masters Organizer, discussed below.
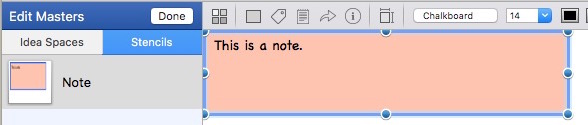 Change the look and contents of the stencil then click Done at the top of the Masters Organizer.
- Instantly the changes to the stencil are broadcast throughout the project to any instances.
Overrides
You can make some changes to your stencil instance and they won't be replaced when you change the master.
- Figure Position
Changes made to the positions of individual figures within a complex master stencil are not broadcast to instances. - Figure Size
Changes made to the size of a master stencil are broadcast and applied to instances, unless you manually change the size of an instance. This is handy if you need to change the size of an instance to accommodate more text, for example. - Figure Text
Changes made to the text contents of figures on the master stencil are broadcast to instances, unless you manually change the text of an instance. - Figure Style
Changes made to the style of figures on the master stencil are broadcast to instances, unless you manually change the style of an instance including font and font size.
Limitations
While figure stencils are quite powerful they do have some limitations:
- If you delete a figure from a complex master stencil then instances are removed elsewhere in the project. However, if top-level figures are added to the master then those new figures do not suddenly appear elsewhere in the project.
- Newly added or removed items found within collection figure stencils, such as nodes within a mind map, will not be broadcast to instances.
Editing a Master Stencil
Here are the ways to edit a master stencil:
- Right-click on an instance of the stencil on the idea space and choose Edit.
- Right-click on the master stencil itself in the Stencils shelf and choose Edit.
- Click the Masters button in the Organizer header to find and edit the stencil manually.
The Organizer will switch to the Masters Organizer and you will then edit your stencil within an idea space view. Once you are done, simply click the Done button in the Masters Organizer header to save and broadcast the changes throughout the project to any instances.
Using the Masters Organizer
 Click the new Masters button in the Organizer header to view the Masters Organizer.
The Masters button looks like a broadcast symbol
Click the new Masters button in the Organizer header to view the Masters Organizer.
The Masters button looks like a broadcast symbol  since changes to a master are broadcast throughout your project.
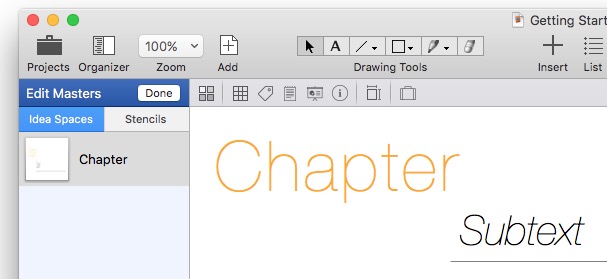
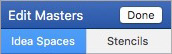
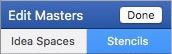 The header area will change so you see the blue masters header and Done button.
Underneath is pair of buttons you can use to switch between your master idea space templates and your master figure stencils.
The header area will change so you see the blue masters header and Done button.
Underneath is pair of buttons you can use to switch between your master idea space templates and your master figure stencils.
You can make changes to any of your stencils then click the Done button when you're ready to broadcast the changes throughout your project.
Additional Notes
In general working in the Masters Organizer is similar to the normal Organizer, but here are some notes:
- Master templates and stencils can be rearranged, renamed, and deleted, but they cannot be indented or color-coded.
- Right-click to copy, paste, duplicate, rename, or delete a selected item.
Using the Galleries
When you click the Insert toolbar button and go into the various figure galleries, you'll find a Masters pseudo-repository there which contains all master styles and stencils. Select a master stencil and click the Insert button to insert a new instance of that master into your idea space. If you later update the stencil then this instance will be updated as well.
Read more about all the gallery enhancements below.
Using the Stencils Shelf
The Masters option also appears in the Stencils shelf so you can see the stencils available in that pseudo-repository.
Read more about all the Stencils shelf enhancements below.
Master Idea Space Templates
This feature will change the way you work with Curio and will open it up to many other types of projects.
Background
Similar to the history of styles and stencils described above, Curio has long supported idea space templates. An idea space template is an idea space with a particular style and contained figures. Idea space templates can be found in bundled or external repositories, but any that you create will be stored in your personal repository.
You can create a new idea space based on a template, which essentially creates a static copy of the original. This means that changes made to the original template stored in your personal repository are not broadcast to instances of the template in the current project or other projects which use that template.
Master Idea Space Templates
That changes with master idea space templates.
A master idea space template is one that is private to your project and, if the master template is updated, then those changes are immediately broadcast and applied to instances of the template.
ℹ If you're familiar with Keynote or PowerPoint then master idea space templates are similar to the master slide feature in those apps, where you can change a particular master slide and throughout your presentation all slides based on that master are updated to reflect the new changes.
A sample workflow:
- Create an idea space with an appearance and containing the boilerplate figures you would like to use repeatedly throughout your project.
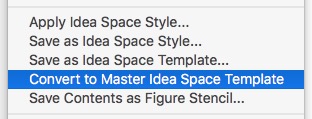 Right-click on the idea space in the Organizer and choose "convert to master" to instantly save the idea space as a master template and then automatically convert the selected idea space into an instance of that master. Alternatively you can do the same thing via the "save as template" option from the context menu to show the standard save template dialog.
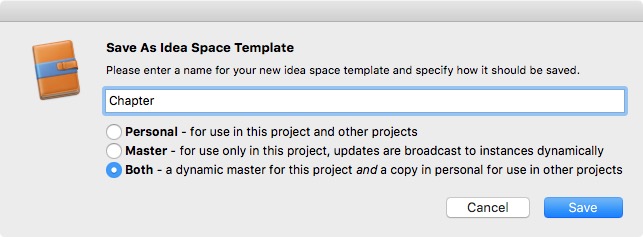
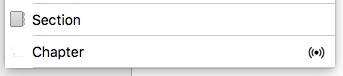
- Note that the icon for idea space instance now has a little master-broadcast icon so you know it inherits changes from a master template.

- Add new figures to this idea space instance, as you would work with a normal idea space.
- When you want to create another instance simply click the Add toolbar button and choose the master from the pick list where all masters are listed at the bottom with the little masters icon, or drill down in the idea space gallery and choose it from the masters repository.
- To edit an idea space's master template, you can (a) hold Option and double-click the idea space in the Organizer to zip right to it, or (b) right-click on the Organizer item and choose "edit master", or (c) click the Masters button on the Organizer header and find the master to edit it.
- Change the look and contents of the master idea space template then click Done at the top of the Masters Organizer.
- Instantly the changes to the template are broadcast throughout the project to any instances, which could include other master templates that are based on this master template.
Overrides
You can make some changes to your idea space instance and they won't be replaced when you change the master.
- Idea Space Dimensions
Changes made to the dimensions of a master idea space are broadcast and applied to instances, unless you manually change the dimensions of an instance. Note that width and height are tracked separately so you can grow the idea space instance vertically and still inherit the width from the master, for example. - Figure Position
Changes made to the positions of figures on the idea space master are broadcast and applied to instances, unless you manually change the size of an instance. This is handy if you need to change the size of an instance to accommodate more text, for example. - Figure Size
Changes made to the size of figures on the idea space master are broadcast and applied to instances, unless you manually change the size of an instance. This is handy if you need to change the size of an instance to accommodate more text, for example. - Figure Text
Changes made to the text contents of figures on the idea space master are broadcast to instances, unless you manually change the text of an instance. - Figure Style
Changes made to the style of figures on the idea space master are broadcast to instances, unless you manually change the style of an instance including font and font size.
Limitations
While master idea space templates are quite powerful they do have some limitations:
- Newly added or removed items found within collection figures, such as nodes within a mind map, will not be broadcast to instances.
Using the Add Button
Assuming you're viewing the normal Organizer, click the Add button you'll notice that any master template are listed at the very bottom of the popup. Choose one and a new idea space instance of that master template will be added to your project.
Editing a Master Idea Space Template
Here are the ways to edit a master idea space template:
- Hold Option and double-click the idea space instance in the Organizer.
- Right-click on the idea space instance in the Organizer and choose Edit.
- Click the Masters button in the Organizer header to find and edit the template manually.
The Organizer will switch to the Masters Organizer where you can edit your master idea space template. Once you are done, simply click the Done button in the Masters Organizer header to save and broadcast the changes throughout the project to any instances.
Using the Masters Organizer
Click the new Masters button in the Organizer header to view the Masters Organizer.
The Masters button looks like a broadcast symbol since changes to a master are broadcast throughout your project.
 The header area will change so you see the blue masters header and Done button.
Underneath is pair of buttons you can use to switch between your master idea space templates and your master figure stencils.
The header area will change so you see the blue masters header and Done button.
Underneath is pair of buttons you can use to switch between your master idea space templates and your master figure stencils.
You can make changes to any of your templates then click the Done button when you're ready to broadcast the changes throughout your project.
Using the Add Toolbar Button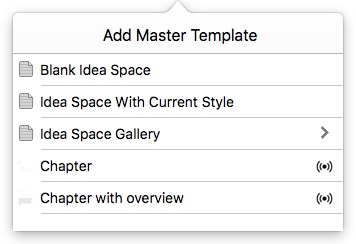
Click the Add toolbar button to add new master idea space templates.
Note that you add one of the following:
- A blank idea space.
- An idea space which uses the same style or template as the currently selected idea space.
- An idea space based on one chosen from the gallery. This could be either a personal, bundled, or external style or template or another master style or template which means this master will adopt any updates made to that master.
- An idea space based on an existing master idea space template (these are all listed with the little masters icon) which means changing that master template will automatically update this master template as well.
Additional Notes
In general working in the Masters Organizer is similar to the normal Organizer, but here are some notes:
- Master templates and stencils can be rearranged, renamed, and deleted, but they cannot be indented or color-coded
- Right-click to copy, paste, duplicate, rename, or delete a selected item.
Using the Gallery
When you click the Add toolbar button and go into the idea space gallery, you'll find a Masters pseudo-repository there which contains all master idea space styles and templates. Select a master template and click the Choose button to add a new instance of the master to your project. If you later update the master template then this instance will be updated as well.
Read more about all the gallery enhancements below.
Placeholder Figures and Changing Masters
Normally you can't apply an idea space template to an existing idea space, since Curio wouldn't know what to do with the existing figures. However, this is indeed possible with master templates and a new figure identifier property.
Recall that a master template defines the style of the idea space and contains boilerplate figures. In many instances you may want those boilerplate figures to be placeholders (perhaps with "lorem ipsum..." text) that you'll edit and fill in with real data in the instance of the template.
For instance, you may have master templates with "title" and "body" placeholder text figures but where the figures are positioned and styled very differently. Perhaps these templates also contain other figures unique to themselves in addition to those placeholder items. If you create an instance of one of these masters, edit and replace all the placeholders, then realize you wish you had used a different master, it would be nice if you can click to switch it to the stylings of the other, without having to recreate the whole thing from scratch.
Identifier
 Using the new figure Identifier field, accessible via the figure's Info inspector, this is now possible.
Curio has what it needs to map placeholders figures from one master to another.
Using the new figure Identifier field, accessible via the figure's Info inspector, this is now possible.
Curio has what it needs to map placeholders figures from one master to another.
Edit your master templates and give the figures that represent placeholder items appropriate identifier values, such as "title" and "body".
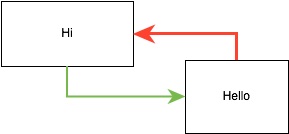
When you edit an idea space that has figures with locally defined identifiers (that is, not inherited from a master) then those figures will glow green instead of blue and their tooltips will show their identifiers. This is helpful when you want to quickly make sure appropriate figures have set identifiers.
Change Master

 Click Done to exist editing masters, then create a new instance of one of those masters.
Edit and change the placeholder text as necessary.
If you decide you want to change to the different master, notice that the normal styles area of the inspector shelf shows master templates for the idea space instead.
Just click on a different master in the inspector to instantly change to that master.
Click Done to exist editing masters, then create a new instance of one of those masters.
Edit and change the placeholder text as necessary.
If you decide you want to change to the different master, notice that the normal styles area of the inspector shelf shows master templates for the idea space instead.
Just click on a different master in the inspector to instantly change to that master.
Behind the scenes, Curio will style the idea space to match the new master's style, use the identifiers to map figures from the old master to the new master thus keeping their contents intact, remove any figures that were unique to the old master, add any figures that are a part of the new master, and leave any figures you added on your own to the instance in place, as is.
As a note, this list of master templates you can change to is filtered to only include other masters which support figures with identifiers that the user has changed in the current idea space. Therefore if, in your instance, you have changed the "title" figure then only other masters that contain a "title" figure will available. That way you can't switch to a master that wouldn't support your changed figure.
Nested Masters
As mentioned above, if you create a new master based on an existing master, via the Add toolbar button with the Masters Organizer is active, then that new master will inherit changes made to its "parent" master. You can continue this process so that changes to Master A go to Master B go to Master C go to...
This might be useful if you define a "Background" idea space master then create duplicates that define "Chapter" and "Slide" masters. Change the background of Background and instantly all masters change and thus all instances of all of those masters change.
To really make your head spin you could have a master figure style that you use on a master stencil that is in use on a master template which is used by other nested master templates, along with instances of those master templates plus other instances of that master stencil, etc. Change the style and the change is propagated through all the impacted items.
Tagged Sets of Master Idea Space Templates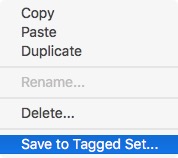
If you create a whole series of master idea spaces for a project and want to re-use them it's super easy!
Just select all the master idea spaces in the Masters Organizer, right-click and choose to save them to a named tagged set in your personal repository, such as "Portfolio". You can choose an existing tag or enter a new name.
Later when you want to use that set, simply choose File > New, select the name of your personal tag set, "Porfolio" in this case, and click the Use Tagged Set as Masters button. A new project will be created with all the idea spaces in that tagged set preloaded as master idea space templates.
Master Styles via Master Idea Space Templates
Say you define that "Heading" master figure style then you apply it to figures on several master idea space templates. Change the master style and then all master templates update and thus all instances of those master templates update.
Next, say you save your master idea space as a personal idea space template (or perhaps as a tagged set in your personal repository) then you use that template in another project. If that template becomes a master template then any master styles embedded within the template will be automatically recovered and available as master styles in the new project.
Note this only happens if the idea space template becomes a master again, simply inserting an instance of the personal template into your Organizer won't recover the master styles. You could do this via tagged sets, described above, or the convert to master idea space template right-click option in the Organizer.
Disconnecting
If you want to disconnect a master template instance from its master then right-click and choose Disconnect from Master. After confirmation, the idea space will be independent and no longer receive updates from its former master template.
Organizer Enhancements for Masters
The Organizer has been changed shelf has several changes for Masters support.
- Master Header Button — In the header you can click the Masters button to see the Master Idea Space Templates and Master Stencils. By default Curio will show master idea space templates but if you hit Option when clicking the Masters button the Curio will show stencils.
- Done Header Button — Click the Done button when you're done editing master templates and stencils to save the changes and broadcast the changes throughout the project to any that items that are instances of that template or stencil, and to return to the normal Organizer view.
- Master Instances Identification — Instances of a master template in the Organizer have (a) a little master broadcast icon in the bottom-right corner of their image, (b) a boldfaced title if Organizer Master Instances Bold Title advanced setting is enabled.
- Edit + Keyboard Shortcut — Right-click on a instance of a master template and choose Edit Master Idea Space Template or, as a shortcut, Option-Double-Click the icon to jump immediately to the master template for editing.
- Reapply Master — Right-click on a instance of a master template and choose Reapply Master to Idea Space to reapply the master template while still keeping any items you've added to the idea space intact.
Gallery Enhancements
A number of Curio galleries have been improved.
New Project Gallery (via File > New)
- Empty — Press the Option key and the Blank button, which creates a project with a single blank idea space, will change to an Empty button. Clicking Empty will create a new project with no idea space whatsoever.
Figure and Idea Space Galleries
- Keyboard Shortcuts — You can now use the up/down arrow keys in the Add and Insert popovers. Press Return or right-arrow to select an item. Once you go into a gallery you can press Command-LeftArrow to come back out.
- Snappier Performance — The Add and Insert popovers and galleries no longer use animations so everything's snappier.
- Larger Add Gallery — The Add idea space gallery is now larger.
- Taller Insert Selector — The Insert figure popup selector menu is now taller.
- Copy to Personal — Right-click on a template, figure stencil, or style that's not in the Personal repository and choose Copy to Personal.
- Delete — Right-click on a template, figure stencil, or style in Personal repository and choose Delete.
- Mail Selection of Templates — Right-click on a template Personal templates tag and choose Send All to Friend/Zengobi if you want to share a "theme" of idea space templates with others.
Updates for Masters
- Use Tagged Set as Masters — In the new project gallery you can select a template tag name and click the new Use Tagged Set as Masters button to create a project where all of the idea spaces in the tagged set will be added to the project as master idea space templates.
- Drag and Drop — Drag-and-drop an idea space template, figure stencil, or style from another repository into the Masters repository folder to make a copy. You can also drag from Masters to Personal if you wish.
- Copy to Masters — Right-click on an idea space template, figure stencil, or style that's not in the Masters repository and choose Copy to Masters.
- Delete — Right-click on an idea space template, figure stencil, or style in Masters repository and choose Delete. You may also simply press the Delete key. Existing instances of a template or stencil will remain as-is.
- Edit — Right-click on a master idea space template or stencil and choose Edit Template / Edit Stencil to switch the Organizer to masters, select the appropriate master item, and display the template or stencil in the main viewing area for editing. Click the Done button in the Organizer header area to end editing.
Stencils Shelf Enhancements
The Stencils shelf has been improved.
- Types Popup — Stencils shelf now has Types popup so you can see all stencils, all simple one-figure stencils, all complex multi-figure stencils, or all figures of just a specific type (figure vs list vs mind map vs …), all stencils.
- Copy to Personal — Right-click on a stencil that's not in the Personal repository and choose Copy to Personal Stencils.
- Edit Stencil — Right-click on a master or personal stencil in the shelf and choose Edit Stencil to edit the stencil.
Updates for Masters
- Master Stencils — You can now choose to view all Master Stencils via the Repository popup.
- Copy to Masters — Right-click on a stencil that's not in the Masters repository and choose Copy to Master Stencils.
Styles Inspector Shelf Enhancements
The Styles inspector shelf has been improved.
- Delete / Mail — Right-click on a personal style to delete it, or mail it to a friend or Zengobi.
- Copy to Personal — Right-click on a style that isn't a personal style and choose to Copy to Personal to copy the style into your personal style repository. If the current style isn't a master then the selected idea space or figure is associated with that new style.
- Update — A new Update button allows you to instantly update a changed a master or even a personal style with changes. Note that this performs the same action as right-clicking on the figure or idea space background and choosing Update Style.
Updates for Masters
- Copy to Masters — Right-click on a style that isn't a master style and choose to Copy to Master to copy the style into a master style and then associate the selected idea space or figure with that new style.
Auto Layout and Guidelines
You ever place a figure on an idea space, say as a header or footer, and wish that it would move and resize with the idea space as the idea space changed sizes?
Now you can.
Springs and Struts
 Here is the new layout control found in the figure Geometry inspector.
Similar to Xcode's sizing control, if you're familiar with that environment, it visualizes the "springs and struts" method for laying out items.
The smaller, inner box represents a figure, which is contained in a larger box which represents the idea space itself.
The red and green lines determine whether its position or size is fixed (a strut, represented by a red line) or flexible (a spring, represented by a green arrow).
Here is the new layout control found in the figure Geometry inspector.
Similar to Xcode's sizing control, if you're familiar with that environment, it visualizes the "springs and struts" method for laying out items.
The smaller, inner box represents a figure, which is contained in a larger box which represents the idea space itself.
The red and green lines determine whether its position or size is fixed (a strut, represented by a red line) or flexible (a spring, represented by a green arrow).
The default layout for a figure shown here indicates that as the idea space is resized, the figure's width and height will remain fixed and its left and top distances from the idea space edge will remain fixed, but the right and bottom distances are flexible.
That is, the figure doesn't follow or move with the right and bottom edge of the idea space, it stays stuck in that location where you placed it regardless of the idea space size.
 In contrast, this layout indicates that the figure is fixed on the left, bottom, and right side — that is, those values will remain constant as the idea space size changes — and its top is flexible.
Note that its width is also flexible but its height is fixed.
What could this figure be?
It's a footer for the idea space!
It's stuck to the bottom of the idea space it will stay stuck there as the idea space grows in height and width.
In contrast, this layout indicates that the figure is fixed on the left, bottom, and right side — that is, those values will remain constant as the idea space size changes — and its top is flexible.
Note that its width is also flexible but its height is fixed.
What could this figure be?
It's a footer for the idea space!
It's stuck to the bottom of the idea space it will stay stuck there as the idea space grows in height and width.
Using the layout control is easy. Simply click on a red strut or green arrow to toggle that element to its opposite.
Note that group and collection figures will show disabled width and height widgets within the layout control because those are automatically determined by the container itself and can't be overridden.
Automatic Layouts via Idea Space Guidelines
While you can use the Geometry inspector to manually specify the layout rules for a specific figure, we wanted to have a more automatic method for defining these rules.
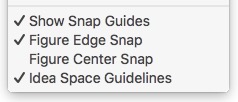 To solve that we're going to piggyback on another feature we're introducing in Curio 11 which is idea space guidelines.
These guidelines provide a helpful margin around an idea space you you can drag and resize items so they snap against the margin or even against the edge of the idea space itself.
To solve that we're going to piggyback on another feature we're introducing in Curio 11 which is idea space guidelines.
These guidelines provide a helpful margin around an idea space you you can drag and resize items so they snap against the margin or even against the edge of the idea space itself.
We'll use these idea space guidelines to help determine an automatic layout setting!
Start moving or resizing a single figure then hold down the Control key. You'll notice, as you bump against a guideline, the guideline is drawn with red! This indicates that you have set a new strut as a layout constraint and, indeed, if you watch the Geometry inspector as you do this you'll notice springs and struts appearing automatically.
 For example, while dragging a figure to the bottom right region of the idea space you press and hold the Control key.
You will notice it was snap a few pixels away from that corner and the layout settings will change to indicate it will now be pinned to that location, with a right and bottom strut.
When the idea space resizes that figure will stick to that location!
For example, while dragging a figure to the bottom right region of the idea space you press and hold the Control key.
You will notice it was snap a few pixels away from that corner and the layout settings will change to indicate it will now be pinned to that location, with a right and bottom strut.
When the idea space resizes that figure will stick to that location!
Now resize that figure, and while resizing hold the Control key, so its left edge snaps to the left margin of the idea space.
Curio will automatically assume you want a left strut and a spring for the width.
So now when the idea space resizes the figure will stay in place and resize with the idea space itself.
Basically you've defined a footer simply by dragging and resizing!
All of this can be done without touching the layout control in the Geometry inspector. However, if you want to override the rules then click within the layout control to toggle the struts and springs and the automatic feature will be disabled. Click the Reset button next to the layout control if you want Curio to use the defaults for the figure.
Master Idea Space Templates

 This feature is even cooler if you have Curio Pro since you can create master idea space templates that define headers, footers, and other smart, autolayout figures.
Combine this will Curio's variables functionality (see Insert > Variable) you can easily create a styled header figure along the time of every idea space, with its name dynamically filled in, along with the date it was created.
This feature is even cooler if you have Curio Pro since you can create master idea space templates that define headers, footers, and other smart, autolayout figures.
Combine this will Curio's variables functionality (see Insert > Variable) you can easily create a styled header figure along the time of every idea space, with its name dynamically filled in, along with the date it was created.
Related Enhancements
- Text Figures With Variables
When a text figure containing a variable is set to its natural size then it will correctly resize itself if the variable is dynamically updated with longer or shorter text.
Sleuth Shelf
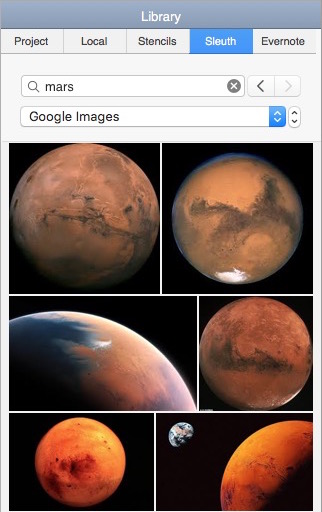 The Sleuth shelf is a new, more accessible method for quickly conducting research while working on your Curio project.
The Sleuth shelf provides a subset of the sites the primary Sleuth window supports, that work well within the more compact width of the shelf.
The Sleuth shelf is a new, more accessible method for quickly conducting research while working on your Curio project.
The Sleuth shelf provides a subset of the sites the primary Sleuth window supports, that work well within the more compact width of the shelf.
Type in a search term and quickly find images, definitions, synonyms, videos, and much more.
Drag-and-drop results from the Sleuth shelf directly to your idea space.
Instant Search in Sleuth Shelf
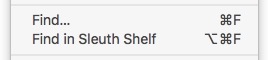 Select a figure that contains some text or select some specific text within a text figure then press ⌥⌘F (or Edit > Search in Sleuth Shelf) and the Sleuth Shelf will immediately appear with the selected text filled in as the search term and the last-used Sleuth site queries for the results.
You can also do the same thing by Shift-clicking the Sleuth toolbar button! Instead of the Sleuth window, Curio will show the Sleuth shelf with any selected text pre-filled in.
This is a super-fast way of finding definitions, images, or anything else you might need.
Organizer Trash
Now when you select and delete any item from the Organizer — including sections, idea spaces, Organizer documents, and folders — they will be moved to a new session Trash. Items in the Trash will be automatically discarded when the project is closed.
⚠ Important: The Trash will automatically empty when you close your project. It is only a temporary Trash for the current editing session.
The purpose of this temporary, session Trash is for quick recovery of idea spaces or sections that you may have inadvertently deleted.
Why not Undo?
When you delete an item from the Organizer, Curio asks you to confirm the deletion, then deletes the item.
This is not an undoable action because Curio's undo systems are independently managed by each idea space. That way you can undo actions performed in one idea space without undoing actions made in another. There is no "global" undo manager. (This is identical to the way Xcode operates, for those familiar with that app.)
Apple's Keynote app, on the other hand, offers a single, global undo stack. This means undoing will step you back in time changing items in the current slide, other slides, plus slide creations, rearrangements, and deletions. It's all one big undo stack so you can't undo only the slide arrangement changes, or only changes to a specific slide, without undoing unrelated actions.
Our Solution
The session Trash is Curio's solution to this issue. It offers the flexibility of giving the user a way to "undo" a mistaken deletion while still maintaining independent undo stacks for each idea space.
It is important to note this isn't an ever-growing Trash, like the Finder's, that would quickly bloat your project requiring you to periodically remember to empty it. Nor is it one that automatically deletes items that are more than x days old, as that adds a number of complexities. For that you might want to learn more about the new Archive section discussed below.
Its purpose is simply for the recovery of Organizer items inadvertently deleted during this session.
Using the Trash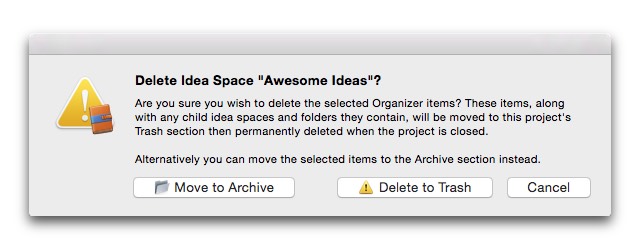
To delete items from the Organizer, first select the items you wish to delete then press the Delete key.
A confirmation alert will appear so you can confirm the deletion, noting that the selected items and any any child items will be moved to the Trash then permanently deleted when you close the project. In this alert you can choose to move items to the Archive section instead, which is discussed below.
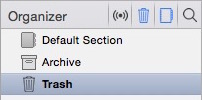
If you confirm the deletion then the items are moved to the Trash and both the Trash icon in the Organizer header area and the Trash section icon will become tinted red to indicate that the Trash now contains items.

Click the Trash icon in the Organizer header to open the sections display and automatically select the Trash section.
To recover items, simply drag items out of the Trash and into any section of your project. While dragging you can hover over a section to jump into the section for more precise placement within that section's contents.
In addition to using the Delete key to send items to the Trash, you can also drag items directly to the Trash section.
Characteristics of Items in the Trash
The Trash may look like a normal section but it is handled quite differently:
- The Search shelf will ignore items in the Trash unless you specifically choose the Trash via the Search shelf's scope popup.
- The Project Library shelf will ignore items in the Trash unless you specifically choose the Trash via the Library shelf's scope popup.
- Trashed items are not listed in the Navigator bar's popup list of project idea spaces.
- Trashed items are not exported or synced along with other project items.
- Trashed items cannot be rearranged, renamed, assigned a color label, or deleted within the section or Organizer areas.
- New Organizer items cannot be created in the Trash.
What Happens to Items in the Trash?
When you close the project, the project Trash is automatically emptied and everything is sent to the Finder Trash.
Emergency Recovery
In emergency situations where you've deleted idea spaces, confirmed the deletion, and closed the project so the project Trash is emptied, you can now drag an idea space .curioAsset file from the Finder Trash into the Organizer and Curio will be able to restore the idea space and any text figures.
However, any other asset figures that existed on the idea space, such as files or images, cannot be restored, as they are not a part of that single .curioAsset file (unless they still exist in the project if another existing idea space references them), but you can drag them out of the Finder Trash as well if you wish.
Organizer Archive
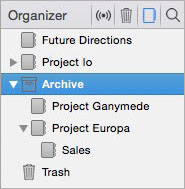
As mentioned above, Curio now includes a special Archive section which can be used for long term storage of items that you may have been tempted to delete but want to hold onto just in case.
Using the Archive
There are several ways to add Organizer items to the Archive.
- Right-click on selected Organizer items and choose Move to Archive.
- Drag one or more Organizer items directly to the Archive section.
- Press the Delete key then click the Move to Archive button in the confirmation dialog that appears.
Characteristics of Items in the Archive
The reasons below explain why you may want to place items into the Archive:
- Archive items are not loaded into memory on project load but only as needed.
- The Search shelf will ignore items in the Archive unless you specifically choose the Archive via the Search shelf's scope popup.
- The Project Library shelf will ignore items in the Archive unless you specifically choose the Archive via the Library shelf's scope popup.
- Archived items are not listed in the Navigator bar's popup list of project idea spaces.
- Archive items are not exported or synced along with other project items.
So the Archive is a perfect long term storage place for items you want to keep around, just in case you need to reference them, but they aren't active components of your project and therefore don't need to turn up in searches, exports, etc.
Search Scope
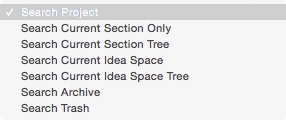
Normally the Search shelf doesn't display items in the Archive or Trash, however, the Search shelf now includes a scope popup so you can search those two special pseudo-sections.
In addition, Curio now allows you to search only within the current section, section tree, idea space, or idea space tree.
Library Scope
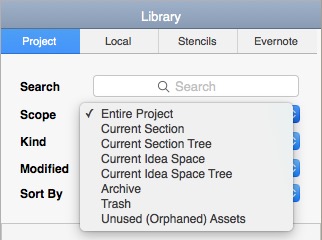
Like the Search shelf, the Project Library shelf doesn't normally display items in the Archive or Trash. However, you can now choose both of those special pseudo-sections in the updated Scope popup in that shelf.
In addition, you can now choose to display library results only within the current section, section tree, idea space, or idea space tree.
The results are not refreshed automatically if you change to a different selected section or idea space, so you can easily drag an asset from the resulting assets into a different area of your project. You can force a refresh by clicking the new refresh button on the shelf, or you can use the Section Selects Autorefresh Library and Organizer Selects Autorefresh Library advanced settings to permit autorefreshes if you wish.
Print Enhancements
The print dialog has been improved with some useful enhancements.
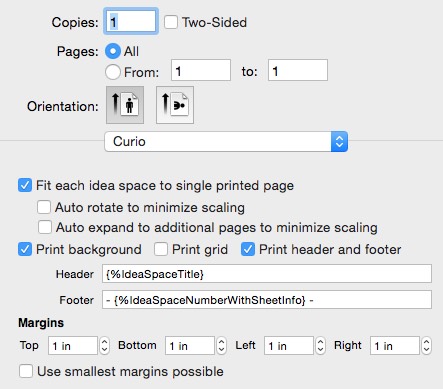
Orientation
You can now change the default portrait vs. landscape orientation here in the print dialog and see the preview update immediately. You can still change the default orientation in the Page Setup dialog, as well.
Fit with Auto Expand
You've always been enable to tell Curio to fit each idea space so it fits on a single printed page. And, you could even tell Curio to rotate the page between landscape and portrait as necessary to minimize the amount of scaling that occurs.
However, sometimes you have a really big idea space and when fitting it to a single printed page, even with rotation, the results are simply too tiny.
Now you can tell Curio to automatically expand to additional pages, only as necessary, to minimize the amount of scaling that occurs. By default this means that if the resulting scaling would be less than 50% then Curio will add pages until it passes that threshold. This scaling threshold can be adjusted via the Ideaspace Print Auto Expand Threshold advanced setting.
Margins
The margin settings have been moved here from the project inspector, as that makes more sense. You can now change your margins and see the preview update live before printing. The margins are also saved as your default for the project.
Work Schedule Enhancements
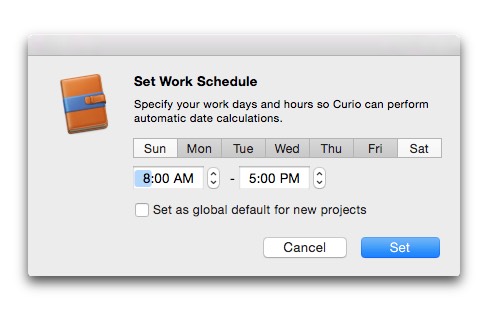
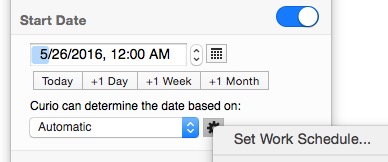 The project work schedule settings have been moved from the project inspector to its own dialog accessible via the Start and Due date actions buttons.
This way it more convenient to scheduling task dates.
The project work schedule settings have been moved from the project inspector to its own dialog accessible via the Start and Due date actions buttons.
This way it more convenient to scheduling task dates.
Additional Improvements
There are a number of additional improvements as well:
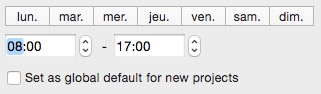 Internationalization Support — The listed work days are now internationalized and localized meaning that, for example, in France they will start on lundi and end on dimanche.
- Global Setting — You can now specify that the schedule is the new global default instead of repeatedly setting the schedule for each new project.
Project Milestone Enhancements
For several years you've been able to mark certain project milestones within Curio so you can easily search for figures modified since those dates in the Search shelf.
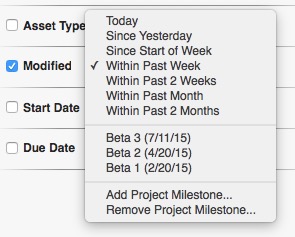
Previously we called these "project timestamps" and you set them in the project inspector. We're now calling them "project milestones" and making it so you can manage them directly from the Modified date popup in the Search shelf so they are much more accessible and useful.
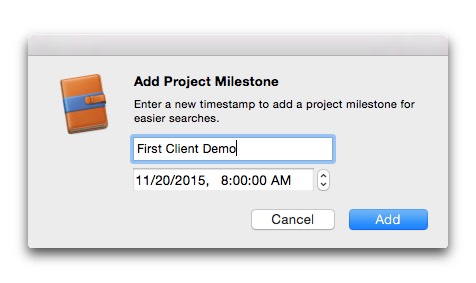
For instance, as shown below, you can create a milestone for the first time you demonstrated your product during a client visit:
Then you can use the Search shelf to easily find all figures modified since that visit:

External Project Asset Library
You can now tell Curio to store a project's assets in an external folder which sits alongside the project file. Why? For Spotlight.
Package Files
When you create a Curio project, say "Pepsi Campaign" the resulting project file is called Pepsi Campaign.curio on your disk.
While it looks like an ordinary file, it's actually a package file: essentially a special directory hierarchy that appears as a normal file.
You can peer within the package file by right-clicking on the file in the Finder and choosing Show Package Contents.
When you drag documents into Curio, we store those documents inside the package file so everything is in a nice, self-contained bundle which is easy to move, copy, and archive.
Package Files and Spotlight
The Mac Spotlight feature is amazing in that it can index all the files on your disk so you can easily find documents containing search terms. However, it has a pesky limitation: it can't search within package files.
This means Spotlight won't be able to find any documents you have embedded into your Curio projects since they are hidden within the Curio project package file.
Our Solution
Fortunately, we have a solution: support for external project asset libraries.
This feature allows the asset library for the project to sit alongside the Curio project file, like this:
 Pepsi Campaign.curio
 Pepsi Campaign.curioLibrary
With this new external folder, Spotlight can find and index the documents stored within.
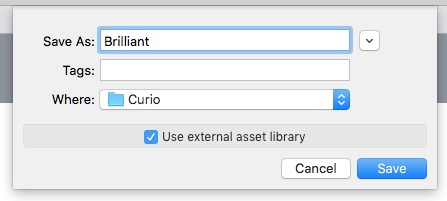
New Projects
If you create a new project, you can tell Curio to use an external asset library when you first save your project via the Save dialog:
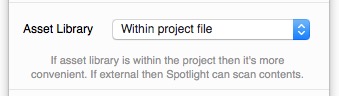
Existing Projects
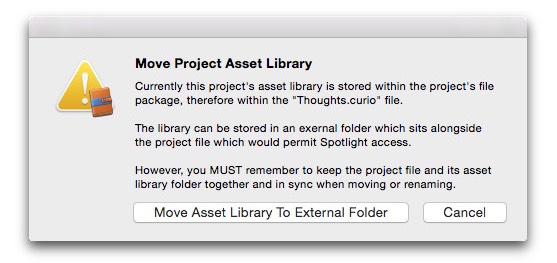
For existing projects, use the project inspector to do this:
Which will present the following alert:
Working with an External Asset Library
For the most part, the internal or external location of the project's asset library is inconsequential when using Curio.
However, there is an important thing to remember:
⚠ Important: You must make sure both the curio and curioLibrary files have the same file name and are kept together.
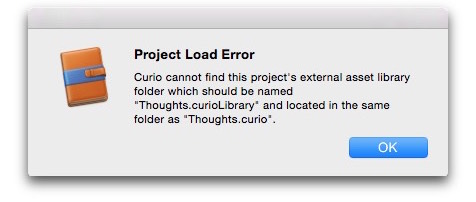
If within the Finder you rename the project then make sure to rename the curioLibrary folder as well, and you must make sure to move both files if you want to move the project to a different location.
Otherwise Curio won't be able to load the project.
Fortunately, operations within Curio automatically support external library folders:
- File > Save As, Save To, Duplicate, and Rename
Curio will make sure the external library folder is moved or renamed. - File > Create Archive
For the resulting archive Curio will embed the asset library folder back into the project package file. - Quick Look
The Curio Quick Look plugin has been updated to support external library folders when you preview the.curioproject file. - Automatic Project Backups
The new project backup feature will make sure the external library folder is backed up as well.
Reverting Back to an Internal Asset Library
If you want to revert back to using a normal internal asset library use the project inspector to toggle the setting.

Technical Note
Programmatically Curio is simply moving the Library subfolder from within the package file and to a location alongside the project file with a curioLibrary extension.
But there are a ton of tweaks in the code to support this relocated library folder so don't simply move the internal folder manually.
Automatic Backups
Curio can now make automatic backups of your Curio projects and Curio application support data.
Project Backups
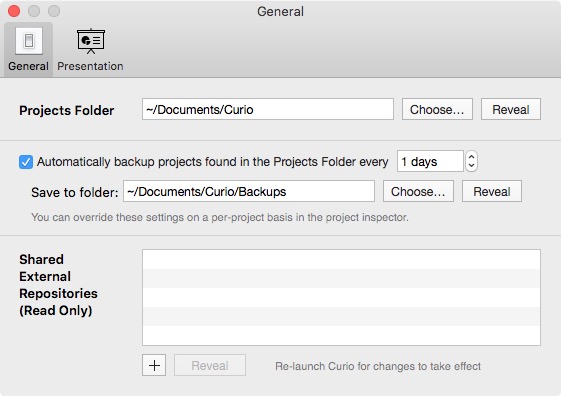
The automatic backup of Curio projects stored in the specified Projects Folder can be enabled in the Preferences window, where you can also specify the frequency of the backups and the location where the backups are placed.
During project load Curio will see if the backup needs to be refreshed and, if so, copy the current project to the backup folder.
Location of the Backups
By default the backups are stored within a Backups subfolder created under the Curio projects folder.
The default Curio projects folder is ~/Documents/Curio therefore the resulting default folder for backups is ~/Documents/Curio/Backups.
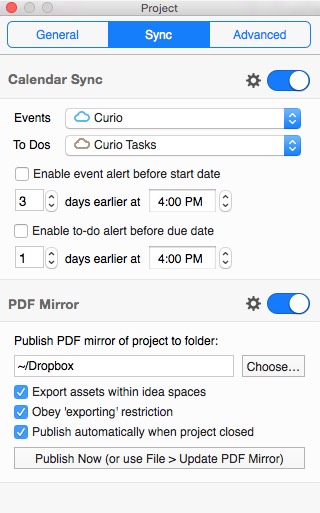
However, you can tell Curio to use a specific backup folder if you wish. This may be handy if you wish to create backups in a very different location, like a Dropbox folder, for instance.
Per Project Override
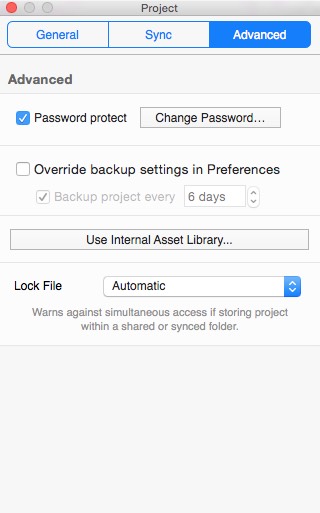
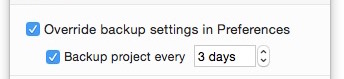 If you wish you can override the backup settings for a particular project via its project inspector.
For instance, you might have a particularly large project that only needs a backup every 7 days.
Or perhaps you have automatic backups disabled and instead you enable it only for specific projects.
If you wish you can override the backup settings for a particular project via its project inspector.
For instance, you might have a particularly large project that only needs a backup every 7 days.
Or perhaps you have automatic backups disabled and instead you enable it only for specific projects.
Backup of Application Support and Personal Repository Folders
Curio will now automatically make periodic backups of its application support and personal repository folders, to ensure the safety of your styles, stencils, templates, project lists, custom Sleuth sites, saved searches, and much more.
By default this will occur every 5 days although you can change this frequency via the Backup App Support Frequency advanced setting. If set to 0 then no backups will occur.
Assuming you're using the default ~/Library/Application Support/Curio/Version 11 location then the backup will be named ~/Library/Application Support/Curio/Version 11 Backup.
If you have overridden the application support folder location and/or personal repository folder, using their respective advanced settings, then Curio will still make sure those folders are backed up, as well.
Technical Note
For those running macOS Sierra and Apple's fancy new file system (APFS), the backups should be instantaneous, according to the docs, thanks to APFS's native cloning support and Curio's use of the standard copyItemAtURL:toURL:error: and copyItemAtPath:toPath:error: methods.
Project Inspector Enhancements
Due to the print, work schedule, milestone, and backup changes described above Curio's project inspector now has a new, cleaner layout:
Project Image Improvements
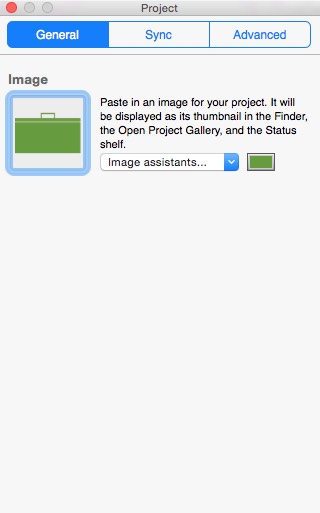
Tintable Template Images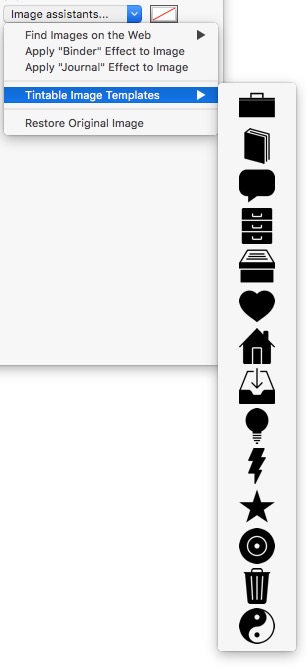
The project image inspector has been updated so you can choose one of several template images (via the "Image assistants" popup) and apply a color tint to it. Any set project image is displayed as the project's thumbnail in Curio's project gallery and Status shelf, and in the Finder. This is a quick way to associate your projects with color-coded icons.
Better Finder Icons
Another change is that Curio is forcing the image thumbnail override such that the Finder won't impose the set image on top of the generic blank document with curled edge icon, thus the result is much nicer and exactly what you specified for the project's file icon.
Note that OS X seems to cache thumbnails rather aggressively so you might not see an icon change in the Project Gallery or window title bar until you relaunch Curio.
Advanced Tab
Note that the functionality found in the Advanced tab only appears for Curio Professional users.
Finder Tags for Project Categories
Curio's Project Gallery and Status shelf support customizable categories that you can associate with your projects. For instance, you may use the Active category for the projects you are actively working on, the School category for projects involved with your school, and a Personal category for your personal projects. Note that a project can be associated with more than one category.
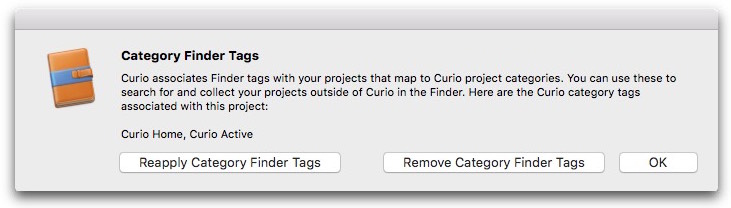
Curio will now automatically map these assigned categories to Finder tags so your projects will have associated Finder tags as well. This will occur retroactively for any existing projects you have categorized and for any new projects you create.
This mapping is pretty straightforward, as we simply prefix Curio to the category title. For instance, the Personal category maps to the Curio Personal Finder tag.
Note this won't interfere with any existing Finder tags you associate with a project via the Save dialog or the Finder's Get Info panel. You can associated any number of additional tags outside of Curio to your projects if you wish and Curio will leave them as-is.
As you add, remove, or rename categories associated with a project Curio will immediately update the project's appropriate Finder tags.
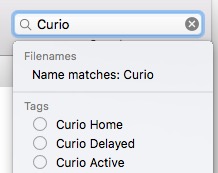 With category Finder tags, you can now search for categories of projects in the Finder, outside of Curio.
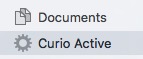
Just enter the search tag, such as Curio Active in a Finder window search field and you'll find all projects associated with that category. Click the Save button in the Finder window to save the search and even add it to your sidebar for one-click access to those projects.
See the "Finding Tagged Files" section on Apple's site for more information on using Finder tags.
You'll even be able to search for your tagged files using Siri in macOS Sierra!
Working with Category Finder Tags
Curio's Project Gallery — accessible via the File > Open From Gallery menu item or by Option-clicking the Projects toolbar button — has some new features related to category Finder tags.
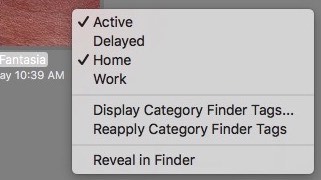
Display, Remove, or Reapply Category Tags
Right-click on a project on the right side of the gallery and you can display its associated category Finder tags. You can also remove all category tags currently associated with the project, or reapply the category tags (removing all current category tags and then adding only those appropriate for the project).
Removing or reapplying category tags will not touch any other tags that you associated directly with the project using the Finder's Get Info panel. That's why we prefix our special tags with "Curio ".
Repairing Missing Categories
 Right-click in the categories area on the left side of gallery and you can ask Curio to use Spotlight to find all Curio projects, checking each for any associated category Finder tags, and then re-add any missing categories and re-associate the projects associated with each category.
This is useful if you installed Curio on a brand new machine and didn't bring the Application Support folder from your old machine, or if the Projects.plist file within the support directory was missing or corrupted.
With just one click all of your project categories and project associations are instantly restored.
Sandboxing
Note that the ability to repopulate the projects within the categories only works for non-sandboxed Curio products sold from our website.
For security reasons, a sandboxed Curio app can only gain access to projects opened by the user via the Open dialog or by drag-and-drop from the Finder.
So a sandboxed workaround is to perform a Finder search for the category tag (e.g. Curio Active) and then drag-and-drop the resulting files into the Project Gallery when it's displaying that same category (e.g. Active).
Technical Note
You might wonder why we don't ditch categories and just move everything to Finder tags.
Curio tracks all the projects that you collect and organize into categories with security-scoped bookmarks (SSB). This means that even a sandboxed version of Curio can support opening those projects via our gallery or Status shelf.
If we rewrote the gallery and Status to use Finder tags and Spotlight's API then that wouldn't give us an SSB to the project so a sandboxed Curio wouldn't be able to support opening the project or peering into it to get its status information, which would make the gallery and Status shelf pretty useless. 😉
So, in Curio 11 we're essentially supporting both: categories plus SSB's for our amazing gallery and Status shelf and Finder tags for searching outside of Curio.
Text Enhancements
The text inspector now includes several enhancements.
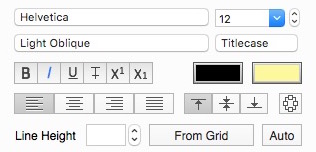
- Typeface
There's a new typeface popup, so you can choose a specific typeface among those supported by the selected font family. For instance, Helvetica Neue supports these typefaces: Regular, Medium, Light, Thin, UltraLight, Italic, Medium Italic, Light Italic, UltraLight Italic, Bold, Bold Italic, Condensed Bold, and Condensed Black. - Size Stepper
There's a new stepper control to quickly go through font sizes. - Capitalization
There's a new capitalization popup so any specified text or variable text will be transformed right before display. Note the stored text itself is not capitalized, it is only rendered as capitalized. Here are the options and an example of how a sample text figure would be rendered:- None — rendered as entered: "the new macos sierra for iMAC and MACBOOK Pro integrates with IOS devices."
- Uppercase — uppercase all letters: "THE NEW MACOS SIERRA FOR IMAC AND MACBOOK PRO INTEGRATES WITH IOS DEVICES."
- Lowercase — lowercase all letters:"the new macos sierra for imac and macbook pro integrates with ios devices."
- Sentence — lowercase all except first word and products: "The new macOS Sierra for iMac and MacBook Pro integrates with iOS devices."
- Capitalize — capitalize each word except products: "The New macOS Sierra For iMac And MacBook Pro Integrates With iOS Devices."
- Titlecase — capitalize but lowercase certain words: "The New macOS Sierra for iMac and MacBook Pro Integrates with iOS Devices."
List Enhancements
- List Line Spacing
The list line spacing can now be used to set per-level line spacing. If the list figure itself is selected then all line spacings are changed. If a selected item within the list is selected then the line spacing is changed just for that hierarchical level. - New List Prefix Style
Curio now supports an additional prefix style for lists. First level gets no prefix, next level get a bullet if just one item else numbered, next level gets little abc, next gets little roman numerals.
I needed this for the Welcome project's new Documentation as shown here. This is a single list collection figure but the first parent has a bulleted child since there's just one child, while the second parent has multiple children so they are numbered. Note this is also using the variable line spacing where level 1 has a 20 pixel spacing while the rest of the list has a normal 5 pixel spacing.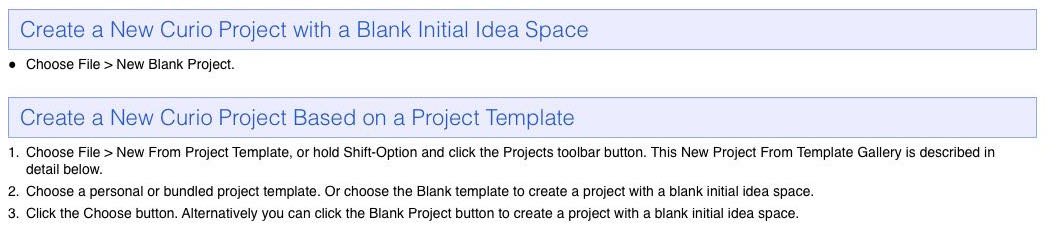
- Paste As List
Paste As > List is now smarter about skipping numbering/bullet prefixes if they are of the form [prefix][tab][content].
Mind Map Enhancements
- iThoughts v4 File Format
Curio now supports the new version 4 file format introduced in the latest iThoughts release. - MindNode Zip File Format
Now supporting exporting mind maps as MindNode's renamed zip file format since that's their new default instead of package files.
Organizer Enhancements
- Organizer Preview Sizes
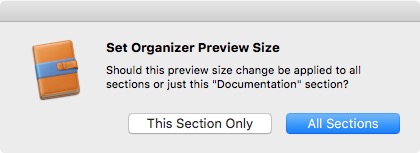
You can now set Organizer preview sizes for a specific section. - Organizer Font
The default font in the Organizer is now 12 point instead of 11 point.
Shape Enhancements
- Orthogonal Lines
The algorithm for drawing orthogonal lines has been greatly improved. - Left and Right Arrow Shapes
The content area for contained text within those shapes now adjusts its boundaries so it doesn't overlap with the arrowhead area.
Additional UI Enhancements
- Idea Space Dimensions

Setting idea space dimensions now happens as soon as you change a width or height value — clicking a Set button is no longer required. When showing points, hold Option and click the steppers for 10 point increments, hold Option-Shift for 100 point increments. - File > Share
New File > Share submenu which is filled dynamically with the same options as the Share toolbar button. This replaces the old File > Mail As and File > Export As which weren't nearly as flexible. - Toolbar
The default toolbar now includes more buttons showcasing the most popular functionality. You can still customize the toolbar items, of course. - Backtick
Brought back the ` (backtick) shortcut which will toggle the display of both the Shelf and Organizer with one tap.
Hyperlink Enhancements
- Relative Hyperlinks
Curio now supports relative curio:// hyperlinks. When you Copy As > Hyperlink and you use the Format > Text > Link to set it for selected text then, behind the scenes, Curio will notice the hyperlink is for the current project and automatically remove the project path at the beginning of the hyperlink to make it totally path independent. For example, curio://?ideaspace=AA3D1A0B-CD59-4289-9278-0A408CDC084E - Welcome Hyperlinks
Curio now supports a special curio:///welcome/... hyperlink that will load the customer's Welcome to Curio project and jump to the specified idea space or figure. This will be useful when handling Support issues so we can point customers to a specific area in the documentation. - Defaults Setting Hyperlinks
Curio now supports a special curio:///defaults-write/... hyperlink that can make changes to the customer's Curio advanced defaults settings, like those listed at Curio 11 Advanced Settings. You will be asked in Curio to confirm or even change the value before the value is set. For instance, clicking this curio://defaults-write?Priority%20Urgent=Hurry! instead of typing this in Terminal:defaults write com.zengobi.curio "Priority Urgent" -string "Hurry!"
Miscellaneous Tweaks
- Autowrap
Fixed the text figure layout code so large text doesn't inadvertently impose autowrap when it shouldn't. - Splitter
Curio now has a workaround for a OS X El Capitan (10.11) bug where double-clicking the splitter doesn't collapse the split. In addition, the splitter "gutter" coloring now blends in with the rest of the interface.
Technical Improvements
Single Build
As mentioned above, the Curio application can turn into 4 different products — Curio Professional, Curio Standard, Curio Core, and Curio Reader — based on trial state or license key. However, there is only a single build of the application itself.
A single build means that there is only one app that is compiled, tested, updated, managed, posted, etc. This greatly simplifies past experiences where juggling a number of builds became increasingly burdensome for both developer and customer alike.
New Project File Format
With Curio 11 we're introducing a new project file format with a number of significant improvements.
Curio 11's new project file format is more compact, more efficient, more robust, and more compatible with sync services such as Dropbox.
⚠ Your Projects Will Be Upgraded! ⚠
All existing projects will be converted to the new Curio 11 file format as they are opened, however you will be asked to confirm the upgrade of each project before this occurs.
Once they have been converted they cannot be opened with earlier versions of Curio.
A zipped version of the original project is placed into the Trash before the conversion begins.
History
In the beginning, Curio's project file package kept almost everything in a single, monolithic data file along with an associated asset folder hierarchy for any file assets dragged into the project. This was quite efficient but the single, monolithic data file became a liability as any issue with corruption, code error, or sync problem could potentially break the entire project rendering it unopenable.
We resolved this with an improved file format introduced in Curio 8 where all asset objects were written to disk as individual files and dynamically scanned and loaded on project open. The resulting file package hierarchy was much more robust as there was no longer a single point of failure. Everything was dynamically reconstructed on project load.
However, some new problems came up with this approach:
- We went a bit overboard as even individual text figures, which are treated as assets internally, were stored as individual asset data files on disk.
This could lead to hundreds or even thousands of data files, especially with larger projects:
 0a5cda11-0fdc-4ae2-8819-5fd0ef87ced2.data
- 3ceac0f2-ae06-49a9-b39e-00f9fa56f8f7.data
- ...
- Large projects with hundreds or even thousands of individual data files take longer to load.
- Even supposedly tiny asset files were taking up more disk space than necessary, thanks to OS X's 4K block size, so projects ballooned in size.
- With more files it made it even more important for all those internal files to be in sync if using a service such as Dropbox. An incomplete sync could occur if the entire file package wasn't completely uploaded to the cloud before disconnecting from the Internet, or the entire file package wasn't completely downloaded before opening the project on another Mac. The result was some of the data files were synced but some were not. In the worse case, a customer could end up with a broken idea space containing no content due to an out-of-sync idea space data file.
- We treated idea space data files as normal files to be tracked by the internal asset library. Thus its document information, like its figure layout, background color, etc., was stored in a
.curioIdeaSpacedocument file, and like all file assets, it had an associated asset.datafile sitting alongside. Since we were writing both files we could certainly optimize this further.- 98297b43-5eff-4c0c-8b27-13f304b6b356.data
- My IdeaSpace.curioIdeaSpace
The New Format
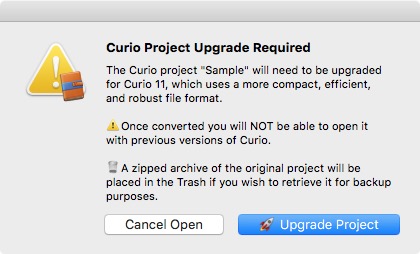 So we made some major improvements:
- Packed Assets
Curio now supports packed assets. Any non-sharable, non-file-based assets — like text assets! — can be packed into a parent asset's data file. For idea spaces with hundreds of text figures this is a huge optimization as now only a single file is needed. - Asset Content Data
To optimize even further, Curio assets can now embed and store content data. So instead of storing idea space data within a separate.curioIdeaSpacefile, the data can go directly within the asset data file. - Asset Data File Names
Previously asset data files were named using a unique identifier and a.datafile extension. However, we wanted idea space assets to have nicer, more identifiable names so Curio now supports a.curioAssetextension, likeGreat Ideas.curioAsset.
The Results
As expected the gains were substantial and impressive.
The new file format means the content of a Curio idea space is now represented by a single internal file, containing all layout data, the asset data, and any packable child asset data such as text. Instead of potentially hundreds of files that need to be in sync, you only need a single file.
(Of course, images, Word documents, Photoshop files, and other files dragged into Curio are still stored as separate asset files within the project package. As before, they are located dynamically when the project is first opened, and are loaded into memory only as needed for display in the idea space.)
Test File: "Getting Started"
Curio 10's Getting Started contains roughly 70 idea spaces, 700 text figures, and 120 images:
| Open Curio 10's Getting Started With... | Number of Internal Files within Project Package | Project File Size on Disk | Project Load Time |
|---|---|---|---|
| Curio 10 | 1,217 | 22.2 MB | 0.31 seconds |
| Curio 11 | 414 (66% fewer) | 19.7 MB (11% smaller) | 0.19 seconds (39% faster) |
Test File: "Big Text"
A Big Text test project is an extreme example as it contains just 2 idea spaces but 10,000 text figures but the results are remarkable:
| Open Big Text With... | Number of Internal Files within Project Package | Project File Size on Disk | Project Load Time |
|---|---|---|---|
| Curio 10 | 10,013 | 48.8 MB | 7.72 seconds |
| Curio 11 | 13 (99% fewer) | 12.1 MB (75% smaller) | 5.98 seconds (23% faster) |
• Use Terminal's find "Getting Started.curio" -type f | wc -l to get a count of files contained within the project file package.
• Use the Finder's Get Info inspector to see how much room the project takes up on disk (not just file size but amount taken up on disk).
• Use Curio's File > Mail As > Project Statistics to find out the number of idea spaces, figures, etc, and the project load time.
Additional Changes
While we were updating the file format we took advantage of this opportunity to make some additional internal changes:
- Found a few spots where we were recording colors as archived NSColors. Those are now stored as cross-platform color strings instead.
- While complex text figure strings — like those with embedded images, text lists, or text tables — have been stored as encoded RTF/RTFD data blocks for years, we were still storing simple text figure strings directly as NSAttributedStrings (via NSCoding), which aren't cross-platform. Those are now stored as RTF/RTFD data blocks, as well.
- Removed some deprecated stored properties that were only in there for older releases of Curio.
Emergency Recovery
Another advantage of this new file format is it allows the emergency recovery of discarded idea spaces since you can now drag an idea space .curioAsset file from the Finder Trash into the Organizer and Curio will be able to restore the idea space and any text figures.
Versioned Support Folders
Curio 11's new versioned application support and personal repository folders will ensure that file format changes do not impact earlier or later major releases of Curio therefore establishing a more robust and protected structure.
Curio has a number of supplemental files that it stores within the user's ~/Library/Application Support/Curio folder hierarchy.
These files include things like styles, templates, project lists, custom Sleuth sites, and saved searches.
Periodically, during certain major releases, Curio adds refinements and enhancements to those files which might necessitate new file formats, file structures, or other significant changes.
However, minimizing the impact of those upgrades is always tricky if the user has older versions of Curio that they are still using. Specifically, if an existing customer wants to simply begin a trial of a newer release of Curio, then they don't want any changes made to those supplemental files that could break their current Curio installation.
To make this more straightforward and much more robust, Curio now stores all supplemental within version subfolders.
Version 11 Subfolder
All of Curio 11's support files are now located within a Version 11 subfolder within the application support hierarchy, like this:
~/Library/Application Support/Curio/
	Version 11/
		Repository/
			Libraries/
				IdeaSpaceTemplates.curio
				Stencils.curio
			External Document Templates/
			HTML Export Templates/
			Project Templates/
			Color Swatches.plist
			Styles.plist
			Tags.plist
		Saved Searches/
		Scripts/
		Sleuth/
		Transitions/
		Untitled/
		Keyboard Shortcuts.plist
		Repositories.plist
		Stencil Usage.plist
		ProjectMapping.plist
		Projects.plist
		Getting Started.curio
Migration
When migrating from older versions of Curio, Curio 11 will create the new hierarchy and copy existing support files from the older Curio.
When the migration is complete, Curio 11 will leave those original files as-is. It will not remove or archive them, so your previous Curio installation will continue working normally.
Curio 11 will only reference and modify files in its Version 11 folder hierarchy.
Overridden Application Support Folder
There is an Application Support Folder advanced setting that many of you use to override the default location of these support files.
For example, you might move the folder to a synced Dropbox folder such as ~/Dropbox/Application Support/Curio so you can share all your support files between your home and work Macs.
That way all of your machines have access to the same Curio support data like custom Sleuth sites, keyboard shortcuts, templates, styles, etc.
defaults write com.zengobi.curio "Application Support Folder" -string "~/Dropbox/Application Support/Curio"
The Curio 11 migration code handles this setting and will create the Version 11 folder hierarchy in that overridden location.
For example migrating everything to ~/Dropbox/Application Support/Curio/Version 11.
Two Exceptions
There are two files where Curio 11 will ignore the override and always store them in ~/Library/Application Support/Curio/Version 11:
- ProjectMapping.plist
- Projects.plist
Why? Because those two files contain project aliases that are specific to a specific user account on a machine.
ProjectMapping.plist is used when you click on a jump target that references an external project that has been moved.
When you find the new location for the project, Curio keeps track of the old path to new path mapping using a file alias so it won't have to ask you again.
Projects.plist is used in the Project Gallery and Status shelf to manage custom project categories, such as Work and Home which contain file aliases to projects located on your hard disk.
Those aliases can't be shared as the paths encoded (as security scoped bookmarks) are specific to a user's local machine so, to prevent corruption and data loss, Curio 11 will make sure those are only stored within the actual support folder, not the overridden folder.
(As a note, when loading those two files, Curio 11 will first look in the actual support folder then will check the override to see if they exist over there. This is handy if you just relocated your support folder to Dropbox thus those two files no longer exist in the actual support folder. However, when saving Curio will always make sure to save the files in the actual support folder, not the override.)
Overridden Personal Repository Folder
There is also a Personal Repository Folder advanced setting introduced back in Curio 10 that some of you might be using to override the default location of the Repository folder.
defaults write com.zengobi.curio "Personal Repository Folder" -string "~/Dropbox/Curio/Repository"
So you aren't overriding the entire Curio application support folder, as described earlier, just the personal repository subfolder which is normally in that application support folder hiearchy.
You might be doing this for two reasons:
- Sharing with Others via the Internet — You might share your personal repository with others by placing it in public Dropbox folder. They can then add that folder to their list of accessible repositories via Curio's Preferences, giving them read-only access to your stencils and styles, for example.
- Sharing with Others on the same Computer — You might share your personal repository with other people that use this same computer by storing it in your computer's
/Users/Sharedfolder.
The Curio 11 migration handles this personal repository override setting in a rather clever way.
You'll recall that normally the repository would be located within the new versioned application support structure, like so:
~/Library/Application Support/Curio/Version 11/Repository/
If you override the personal repository we still want to track separate versions so we don't step on earlier or later Curio releases, so Curio creates a version folder within the overridden repository location, like this:
~/Dropbox/Curio/Repository/Version 11/
And Curio will then load your personal repository from that location.
Later Migration
Say you weren't overriding when you installed Curio 11 but, later, you wanted to.
Simply drag your ~/Library/Application Support/Curio/Version 11/Repository folder to ~/Dropbox/Curio/Repository and set up the advanced preference as described above.
When you launch Curio 11 it will notice that the Version 11 subfolder doesn't exist and will migrate the files in ~/Dropbox/Curio/Repository to ~/Dropbox/Curio/Repository/Version 11 automatically.
Versioned External Repository Support
You should note that Curio 11 now only supports versioned subfolder for external repositories.
So, if in Curio's Preferences you specified a folder location for an external repository then Curio will now look within that folder for a "Version 11" subfolder and then load up its contents.
Let's give an example...
Your friend Cooper wants to share a live link to his repository folder...
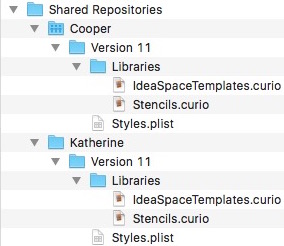
- Cooper moved his
~/Library/Application Support/Curio/Version 11/Repositoryfolder to~/Dropbox/Curio/Repositoryand used the Personal Repository Folder technique described above so his Curio will use that folder:
defaults write com.zengobi.curio "Personal Repository Folder" -string "~/Dropbox/Curio/Repository" - When Cooper launches Curio it will noticed the new personal repository folder and move it into a versioned subfolder
~/Dropbox/Curio/Repository/Version 11automatically. - Cooper will then right-click on his
~/Dropbox/Curio/Repositoryfolder and choose Share to share a link to the folder with you via Dropbox. - You accept the share invitation and your Dropbox creates a folder called
~/Dropbox/Repositorywithin your Dropbox. ThatRepositoryfolder is actually Cooper's shared folder. - Fortunately you can move and rename this folder and it will still keep the share, so you rename it "Cooper" and move it into our own
~/Dropbox/Shared Repositoriesfolder so now you have~/Dropbox/Shared Repositories/Cooper. - What's nifty about this approach is when Cooper adds new styles and stencils they will immediately sync to his Dropbox, so he can access them on all of his Macs, plus you can access them via the shared folder linkage.
Your friend Katherine wants to share a static, snapshop of her repository folder...
- Katerhine shares her repository folder by emailing you a zipped snapshot of her
~/Library/Application Support/Curio/Version 11folder (using the Finder's Compress feature). - You unzip the file, creating
Version 11which you then drag into a~/Dropbox/Shared Repositories/Katherinefolder that you create it sits alongs theCooperfolder. - Note that the
Katherinefolder will also have aVersion 11subfolder since it came from her normal application support hierarchy, which is already versioned.
Next set it up in your Preferences
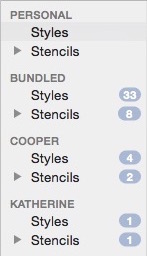
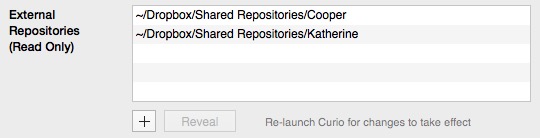
Use Curio's Preferences window to add both Cooper and Katherine folders as external repositories.
Then relaunch Curio so it can connect to those sources.
When you click the Insert toolbar button, then choose Styled Shape or Stencil, you will see all of these repositories correctly listed even though one has a Version 11 subfolder and the other doesn't.
Upgrading older external repositories
Note that Curio 11 will only open repositories in a Version 11 subfolder, likewise a future Curio 12 will only open from a Version 12 subfolder.
In Cooper's case, when he launches Curio 12 it will automatically create and upgrade his old Version 11 repository subfolder to a Version 12 subfolder and you will instantly be able to access it since you have a dynamic link to his Repository folder.
In Katherine's case, she'll need to launch Curio 12 hereself, have Curio 12 upgrade her repository, then re-zip and share the file with you and you'll need to unzip it as a Version 12 folder.
Updated 3rd Party Frameworks
Curio 11 includes the latest releases of several embedded 3rd party frameworks.
- Now using PXSourceList 2.0.7, which manages the Organizer's outline view, up from the old 2.0.5 version we had been using.
- Now using Sparkle 1.15.1, which manages Curio's ability to check for and safely and securely install application updates. There are tons of fixes and improvements since the old 1.12 version we had been using.
Code Updates


The Curio codebase has been updated to work with macOS Sierra (10.12) while still providing compatibility with OS X El Capitan (10.11) and Yosemite (10.10). All Xcode projects have newly updated project settings, the subsequent flood of nitpicky warnings were squelched so we're even more robust.
Updated Spotlight and Quick Look Plugins
Curio's internal QuickLook and Spotlight plugins now use the Curio.app's frameworks instead of their own code modules for more robust operations and compatibility with the new project format options.
Bug Fixes
Dozens of bugs, annoyances, and graphical issues have been fixed, as well. 😇